There has been so much going on. Right before I moved to school, everything was chaotic and now I finally feel settled in here at the CIA. So, here I am to tell you, mostly like what you think I might, the CIA is amazing.
I feel so utterly fortunate to be able to pursue my baking and pastry dreams here at the CIA. Right now - I'm rounding out the last few days of Hearth Breads and Rolls class. My chef for this class has really pushed me and although frustrated and tired at times, I wouldn't have it any other way. In the beginning baguette shaping was such a task; My only thought was will I ever get the feel for this? Now as I'm slightly saddened moving onto the next class, Baguette shaping and all the other class tasks have become natural motions and a delight to work on everyday. The shaping of our baguettes, batards, and strands of various multi-piece challah has transcended to something more than what it seems. All over the CIA, weather they know it or not, students and patrons are savoring our breads, more beautiful by the day, and that is something to be proud of.
I really hope to return to this blog someday soon - I really enjoy writing it and being able to share this love with few who may read from time to time. Hopefully I'll get some pictures of our breads before it's too late.
5.22.2007


1.21.2007
If you give a mouse a pizza, she's going to want a cannoli...
There hasn't been much going on on the culinary front in the past week or so. We are getting ready for a big move out of a house that we've lived in for 10 years; despite finding a plethora of exciting recipes and new, unused cookbooks sitting on the shelf, the drive to bake is temporary stunted. Moving is stressful as most know and more so in special situations as such; My parents were recently divorced (recent as in this past Wednesday) and we are moving out of our beautiful home and relocating to a new house February 6th. This is only 6 days before I will make another epic move to the Culinary Institute of America. The excitement and sadness is confusing; at times I'm giddy with thoughts of baking away in the kitchens of the CIA for 6 hours a day and others I am trying to process how to deal with leaving behind our home nestled in the quiet, two acre forest in the heart of upper-middle class suburbia. Quite picturesque, eh?
Although there may not be much heating up in my kitchen; I have been eating. In the midst of happiness and sadness, we eat and we eat good. I live in Fairfield County, the suburbs of Connecticut, about a 40 minutes from New Haven and 60 minutes from my former residence, New York City. And in the words of Alton Brown, these cities offer up some seriously "good eats". I claim to be no gourmet but rather a serious gourmand. I love food; good seriously tasty, flavorful food. I do not discriminate; the big guys from the humble little guys, say Thomas Keller's esteemed Bouchon, from your aromatic neighborhood bakery. While my palate may not have the sophistication of some; I care deeply of the quality of food that enters my mouth and consequently, inches to my hips. This serious relationship branches out to many cuisines, particular foods or ingredients; one of which being pizza. Living in New York, I considered the best of my experiences with pizza to stretch as far as a subway ride to Brooklyn or down on my corner at Arturo's. Shame on me for not exploring the greater lengths of great pizza; I suppose I'll be easy on myself for not knowing better but I was falling short before the wonder that is New Haven pizza.
If you are unaware of New Haven pizza, as I was, tread carefully upon these next words- they'll be hard to stomach and may prompt a food excursion. The famed Sally's Apizza and Frank Pepe's from New Haven are by far the best pizza I've ever had in my life; I can't eat at a local pizzeria to satisfy the craving for pizza. My taste buds have been forever spoiled; It's the way pizza was meant to be. Every flavor and texture of your average pizzeria just incomparable, from the crisp, sturdy coal burned crust from the oven's of Sally's to the tangy tomato sauce that is perfectly sweet and salty.
The duo of Frank Pepe's pizza and Sally's has been a dual for best of the best of New Haven pizza. Both are delicious; however, Sally's has won my heart with their consistent, bursting with flavor goodness that in my opinion has a an edge on Pepe's. Some may argue there is a trio in this battle including Modern Apizza but I'm here to set the record straight. The only thing their "M" logo stands for at Modern pizza is messy and mediocre at best. When I plan to expend my calories indulgently, I expect to walk away smiling and satisfied, high from settled anticipation and full bellied delight. That night at Modern Apizza on State Street in New Haven, I pouted over each fallacy as they exponentially unfolded. The first sign of doubt came as the menus were tossed down on the table in front of us; the menus included something other than pizza. I say this because at Sally's and Pepe's there is one thing on the menu; the perfection that is their pizza and they don't practice the trickery of filling up on sides notes of garlic bread or salad because you've only come for one reason, the pizza! The second sign was that of the garlic bread that arrived at the table that appeared to just be grocery store quality french bread piled with a heaping glob of greasy mozzarella. I squirmed but remained poised; I mean the pizza had to be good with all of the "talk" prior to this visit. The first pizza arrived and so did my third qualm; the pizza looked ordinary. My disappointment set, the pizza looked fine like an average pizzeria cheese pie, but fine is not why I come to New Haven, not what I waited all week to devour. Then our pie arrived, a medium cheese (you must ask for cheese in New Haven) with half broccoli and half sausage; this was among the variety of pie's we've had at Sally's and Pepe's. The pie descended on the table, slicked with a thick sheen of water/oil/who knows on top. I wondered if there was some sort of mistake, maybe we should call back the waitress but as the pies continued to arrive each was a mirror image of the former. I reached to lift up the first piece; the cheese and sausage slide like an avalanche onto the saturated paper of the pan. I was left with a wet noodle like dough supposed to be a pizza crust. Now I was miffed, how did they think they could serve a pie like that? I ate in hungry disgust as I picked off the sausage chunks and tears of outer crusts which were really the only edible portions. The way this meal was redeemed was to heading to our favorite Italian Bakery on Wooster Street (neighbor of Pepe's), Libby's, to buy cannolis to revive our spirits in good food. Okay, and there were some cookies involved in this revival, about a half pounds worth. After that disaster, it was bound to take a lot of "nourishment" from creamy ricotta and feathery butter balls to feed my disheartened food soul.
"Modern" had to be given the chance, as given to each establishment before it in the tri-state area concerning pizza so far. At least now, I could return to my true lover with even more devotion, Sally. I'll never return to Modern Apizza; even if it happened to be an "off" night for this pizzeria, I don't see how they could produce a good pie after having my first and last pizza there. If you serve something of such poor caliber as our sloppy, wet pie you don't deserve another chance on the mere fact of quality control and pride. As a baker, even as an amateur, I take pride in knowing I produce baked good of quality in my kitchen. Anything I bake (or cook) that comes out of my kitchen shaped with my hands, I believe I created to my best ability to provide a flavor and joy to others (and myself). So with any establishment, in this case Modern Apizza, I find distaste in serving something of poor quality. The only thing I can do now is carry on knowing that I've tasted what's out there and get to the gym to prepare for my next date with Sally.
Although there may not be much heating up in my kitchen; I have been eating. In the midst of happiness and sadness, we eat and we eat good. I live in Fairfield County, the suburbs of Connecticut, about a 40 minutes from New Haven and 60 minutes from my former residence, New York City. And in the words of Alton Brown, these cities offer up some seriously "good eats". I claim to be no gourmet but rather a serious gourmand. I love food; good seriously tasty, flavorful food. I do not discriminate; the big guys from the humble little guys, say Thomas Keller's esteemed Bouchon, from your aromatic neighborhood bakery. While my palate may not have the sophistication of some; I care deeply of the quality of food that enters my mouth and consequently, inches to my hips. This serious relationship branches out to many cuisines, particular foods or ingredients; one of which being pizza. Living in New York, I considered the best of my experiences with pizza to stretch as far as a subway ride to Brooklyn or down on my corner at Arturo's. Shame on me for not exploring the greater lengths of great pizza; I suppose I'll be easy on myself for not knowing better but I was falling short before the wonder that is New Haven pizza.
If you are unaware of New Haven pizza, as I was, tread carefully upon these next words- they'll be hard to stomach and may prompt a food excursion. The famed Sally's Apizza and Frank Pepe's from New Haven are by far the best pizza I've ever had in my life; I can't eat at a local pizzeria to satisfy the craving for pizza. My taste buds have been forever spoiled; It's the way pizza was meant to be. Every flavor and texture of your average pizzeria just incomparable, from the crisp, sturdy coal burned crust from the oven's of Sally's to the tangy tomato sauce that is perfectly sweet and salty.
The duo of Frank Pepe's pizza and Sally's has been a dual for best of the best of New Haven pizza. Both are delicious; however, Sally's has won my heart with their consistent, bursting with flavor goodness that in my opinion has a an edge on Pepe's. Some may argue there is a trio in this battle including Modern Apizza but I'm here to set the record straight.
 The only thing their "M" logo stands for at Modern pizza is messy and mediocre at best. When I plan to expend my calories indulgently, I expect to walk away smiling and satisfied, high from settled anticipation and full bellied delight. That night at Modern Apizza on State Street in New Haven, I pouted over each fallacy as they exponentially unfolded. The first sign of doubt came as the menus were tossed down on the table in front of us; the menus included something other than pizza. I say this because at Sally's and Pepe's there is one thing on the menu; the perfection that is their pizza and they don't practice the trickery of filling up on sides notes of garlic bread or salad because you've only come for one reason, the pizza! The second sign was that of the garlic bread that arrived at the table that appeared to just be grocery store quality french bread piled with a heaping glob of greasy mozzarella. I squirmed but remained poised; I mean the pizza had to be good with all of the "talk" prior to this visit. The first pizza arrived and so did my third qualm; the pizza looked ordinary. My disappointment set, the pizza looked fine like an average pizzeria cheese pie, but fine is not why I come to New Haven, not what I waited all week to devour. Then our pie arrived, a medium cheese (you must ask for cheese in New Haven) with half broccoli and half sausage; this was among the variety of pie's we've had at Sally's and Pepe's. The pie descended on the table, slicked with a thick sheen of water/oil/who knows on top. I wondered if there was some sort of mistake, maybe we should call back the waitress but as the pies continued to arrive each was a mirror image of the former. I reached to lift up the first piece; the cheese and sausage slide like an avalanche onto the saturated paper of the pan. I was left with a wet noodle like dough supposed to be a pizza crust. Now I was miffed, how did they think they could serve a pie like that? I ate in hungry disgust as I picked off the sausage chunks and tears of outer crusts which were really the only edible portions. The way this meal was redeemed was to heading to our favorite Italian Bakery on Wooster Street (neighbor of Pepe's), Libby's, to buy cannolis to revive our spirits in good food. Okay, and there were some cookies involved in this revival, about a half pounds worth. After that disaster, it was bound to take a lot of "nourishment" from creamy ricotta and feathery butter balls to feed my disheartened food soul.
"Modern" had to be given the chance, as given to each establishment before it in the tri-state area concerning pizza so far. At least now, I could return to my true lover with even more devotion, Sally. I'll never return to Modern Apizza; even if it happened to be an "off" night for this pizzeria, I don't see how they could produce a good pie after having my first and last pizza there. If you serve something of such poor caliber as our sloppy, wet pie you don't deserve another chance on the mere fact of quality control and pride. As a baker, even as an amateur, I take pride in knowing I produce baked good of quality in my kitchen. Anything I bake (or cook) that comes out of my kitchen shaped with my hands, I believe I created to my best ability to provide a flavor and joy to others (and myself). So with any establishment, in this case Modern Apizza, I find distaste in serving something of poor quality. The only thing I can do now is carry on knowing that I've tasted what's out there and get to the gym to prepare for my next date with Sally.
1.11.2007
House Warming Banana Muffins
The plague of rotten bananas. Everyone party in our house currently buys their own groceries; hence, we usually end up with surplus bananas which is good for the baker in the house and usually for everyone else.

However, these bananas would were meant to reside in a different house- my oldest and dearest friend's new apartment. I know that if were moving (and I will be soon), I'd need some homey baked goods to relieve the stress and lighten the overwhelming load of move-in chaos. When I walked into to her new, large apartment still in shambles from move-in day, I knew the muffins would definitely provide relief, even if just for those few minutes while savoring one of these golden,moist muffins.
Exhausted, I made a trip to her late Tuesday to deliver the muffins; this was after waking up at 2:45am to work at the Bakery; did I mention I'm working for free?
The muffins were nice; very moist, golden and chock full of banana however I realized afterwards there were no added spices to these banana muffins which I do prefer but a lot of banana muffin recipes do not have any. So, I'll leave that up to your discretion. The walnuts are also a great addition; I did half with and half without - I like to try to accomodate everyone's tastes. These muffins are incredibly moist; I could imagine a nice pinch of nutmeg to skyrocket there delicious factor then it would be the ideal banana muffin, in my humble opinion.

Banana Nut Muffins
Yield - 12 regular muffins
adapted from Simply Recipes
3 ripe bananas
1/3 cup melted butter
3/4 cup sugar
1 egg, beaten
1 tsp vanilla
1 tsp baking soda
Pinch of salt
1 1/2 cups flour
1/2 - 1 cup chopped walnuts
Pre-heat oven 350 degrees. In a large bowl mash bananas and add melted better and mix well.
Mix in sugar, eggs, and vanilla. Add baking soda and salt and mix in.
Add flour and mix until just incorporated. Fold in walnuts if desired.
Pour mixture in to prepared muffin tin. Bake 25-30 minutes. When toothpick inserted in muffin center comes out clean, muffins are done! Cool on wire rack.
I also forgot to mention that these muffins are so easy to prepare. In a pinch for a gift or you simply want fresh banana muffins in the morning, these muffins would be a great go-to for impromptu events calling for muffins.

However, these bananas would were meant to reside in a different house- my oldest and dearest friend's new apartment. I know that if were moving (and I will be soon), I'd need some homey baked goods to relieve the stress and lighten the overwhelming load of move-in chaos. When I walked into to her new, large apartment still in shambles from move-in day, I knew the muffins would definitely provide relief, even if just for those few minutes while savoring one of these golden,moist muffins.
Exhausted, I made a trip to her late Tuesday to deliver the muffins; this was after waking up at 2:45am to work at the Bakery; did I mention I'm working for free?
The muffins were nice; very moist, golden and chock full of banana however I realized afterwards there were no added spices to these banana muffins which I do prefer but a lot of banana muffin recipes do not have any. So, I'll leave that up to your discretion. The walnuts are also a great addition; I did half with and half without - I like to try to accomodate everyone's tastes. These muffins are incredibly moist; I could imagine a nice pinch of nutmeg to skyrocket there delicious factor then it would be the ideal banana muffin, in my humble opinion.

Banana Nut Muffins
Yield - 12 regular muffins
adapted from Simply Recipes
3 ripe bananas
1/3 cup melted butter
3/4 cup sugar
1 egg, beaten
1 tsp vanilla
1 tsp baking soda
Pinch of salt
1 1/2 cups flour
1/2 - 1 cup chopped walnuts
Pre-heat oven 350 degrees. In a large bowl mash bananas and add melted better and mix well.
Mix in sugar, eggs, and vanilla. Add baking soda and salt and mix in.
Add flour and mix until just incorporated. Fold in walnuts if desired.
Pour mixture in to prepared muffin tin. Bake 25-30 minutes. When toothpick inserted in muffin center comes out clean, muffins are done! Cool on wire rack.
I also forgot to mention that these muffins are so easy to prepare. In a pinch for a gift or you simply want fresh banana muffins in the morning, these muffins would be a great go-to for impromptu events calling for muffins.
1.05.2007
No-Knead Bread Completion & 2007
 I'm sorry but I have writers diarrhea lately; although, it's not unwelcome (but I'll include some photos this time). Everything around me is inspiring me to write, create, and just be. A good feeling for the start of 2007. I started 2006 in shambles; feeling like I missed the transition into the New Year not being on firm ground at the stroke of midnight (literally and figuratively). 2007 feels like home, like, I've finally returned into myself after a year of treading rough streets and lonely alleys. These moments were not vein.
Notes to Myself for 2007:

- Bake more bread
- Be the best culinary student; engage in my environment at school and it use it to it's full advantage (I hope mom sees this one).
- Smile because nothing is that bad.
- Write often; just for yourself or for anything or any reason.
- Visit ethnic bakeries (and tons of bakeries in general)
- Learn a lot more about Indian food and India's culture.
- Try to embrace my soon-to-be less spacious, less technological, less marble counter top kitchen in our new house (more on that another time; ode to kitchen post to follow some time soon).
And that's that... Onward with the food!
 R.I.P Glorious No-Knead Bread
At proximately 2:03 pm, eastern standard time, Lauren's first loaf of Jim Lahey's No-Knead bread was laid to rest by Lauren herself as she tore the last humble wedge in two and munched. Loaf had a short but fulfilling life, giving joy and full bellies to many, living up to every expectation (except maybe a short a few teaspoons of salt).
The ease of preparation in the this bread has been boasted all of the internet and now I can attest to this statements veracity. Some notes about my preparation are that I left the bread for approximately 18 hours for the first rise and used wheat bran as my non-stick agent and slipmat underneath instead of a towel. I used 1 1/2 cups water, as instructed in the video and not as listed in err as 1 5/8 cups in the text recipe as posted. I also do not own a dutch oven but I do have ownership of a few of my great grandmother's cast iron pans which worked beautifully. I used the smaller one to hold the bread and the larger to cover it for the first 30 minutes. I'm writing these notes with the assumption that you know about this bread or have tried it yourself but if not please check out the article on the New York Times website.
I'm obviously dreaming up variations for the next loaves. I have a large bunch of fresh rosemary leftover from the accompanying soup for dinner last night, Chickpea-Tomato Soup with Fresh Rosemary from Orangette's recipe archive. This fresh rosemary may just find it's way into a loaf of bread this coming week. As for the soup, smooth, simple and full of flavor; the fresh rosemary does not overwhelm any of the other ingredients, just compliments (for those iffy about rosemary, as my mother is). The only thing I changed in the recipe was reducing the total amount of olive oil from 3 tbsp to 1.5 tbsp which is used to sautee the garlic and rosemary; I wouldn't use more than the 1.5 tablespoons, anymore would be too oily, in my humble opinion.
Hopefully this year will continue as the preparation and eating of this No-Knead Bread did, with ease and delight.
Ice Cream Maker, No-Knead Bread, & Abandoned Cranberries
Is this thing on?
Well, I write because I love it so if anyone else is reading today; I hope you find what I have to say semi-entertaining or interesting. Maybe everyone is on an after-holiday lull.
Yesterday at William Sonoma, partially with a Christmas giftcard, I purchased the Kitchenaid Ice Cream Maker Attachment for the stand mixer. I had my eye on this even before I owned the mixer itself; I knew this would have to be in my kitchen. The mystery and wonder of creating such delicious delectables in my own kitchen still tickles me every time I bake and I wanted to take that with new heights with ice cream. I want this mixer to get its deserved place as a pillar in the kitchen and use it in as many ways possible. The bowl is in the freezer putting in it's 15 hours before usage as instructed my the manual. I put in around 8pm last night, I believe, so it's been 15 hours and I haven't even picked out a recipe yet. Suggestion and recipes welcomed!
I'm also in the market for great recipes with the use of fresh cranberries. I bought these with the intention of making a cranberry upside cake but it hasn't happened yet.
Last but not least - I'm taking up the rear on the No-Knead Bread recipe. Last night around ten o'clock, I was web surfing and came across a NYT article and it struck me that I had not ever tried Jim Lahey's, from the Sullivan Street Bakery, No-Knead Bread. How did I forget for so long?? When I lived in the city, the Sullivan Street Bakery, was about 2 blocks from my apartment. I would often sit in the tiny space and devour slices of pizza pomadoro and slices with just dots of plum tomatoes with little splashes of extra virgin olive oil (I don't recall the name of this one however). I often visited at off hours in the afternoon, so I'd get the sit in peace and enjoy ever little bit until it was time to walk home. Oh.. how I miss that.
Anyway, that was a nice memory, I'm on hour 14 of my no-knead bread; I figured I'll keep it going until after I come back from the gym edging on the longer rest times. The bread will be piping hot out of the oven just in time for dinner. I haven't even thought of a dish to accompany my bread; the bread is always the star, however.
Pictures to follow sometime later, enjoy your Friday.
Well, I write because I love it so if anyone else is reading today; I hope you find what I have to say semi-entertaining or interesting. Maybe everyone is on an after-holiday lull.
Yesterday at William Sonoma, partially with a Christmas giftcard, I purchased the Kitchenaid Ice Cream Maker Attachment for the stand mixer. I had my eye on this even before I owned the mixer itself; I knew this would have to be in my kitchen. The mystery and wonder of creating such delicious delectables in my own kitchen still tickles me every time I bake and I wanted to take that with new heights with ice cream. I want this mixer to get its deserved place as a pillar in the kitchen and use it in as many ways possible. The bowl is in the freezer putting in it's 15 hours before usage as instructed my the manual. I put in around 8pm last night, I believe, so it's been 15 hours and I haven't even picked out a recipe yet. Suggestion and recipes welcomed!
I'm also in the market for great recipes with the use of fresh cranberries. I bought these with the intention of making a cranberry upside cake but it hasn't happened yet.
Last but not least - I'm taking up the rear on the No-Knead Bread recipe. Last night around ten o'clock, I was web surfing and came across a NYT article and it struck me that I had not ever tried Jim Lahey's, from the Sullivan Street Bakery, No-Knead Bread. How did I forget for so long?? When I lived in the city, the Sullivan Street Bakery, was about 2 blocks from my apartment. I would often sit in the tiny space and devour slices of pizza pomadoro and slices with just dots of plum tomatoes with little splashes of extra virgin olive oil (I don't recall the name of this one however). I often visited at off hours in the afternoon, so I'd get the sit in peace and enjoy ever little bit until it was time to walk home. Oh.. how I miss that.
Anyway, that was a nice memory, I'm on hour 14 of my no-knead bread; I figured I'll keep it going until after I come back from the gym edging on the longer rest times. The bread will be piping hot out of the oven just in time for dinner. I haven't even thought of a dish to accompany my bread; the bread is always the star, however.
Pictures to follow sometime later, enjoy your Friday.
1.03.2007
Apple Crumb Pie Tartlettes
 New Years has lost it's debauchery factor as I continue to grow up. New Years was the night to see and be seen and, of course, the night not remember the next day. Waking up at three o'clock in the afternoon still groggy and parched to boot was not the way to start the New Year. These libations were left the others and I rang in the New Year in an nontraditional, certainly cozy way.
My boyfriend and I, once he arrived home from work, cozied up in our bumming gear. We ate, drank (in a mild manner), and were merry in bed all night and watched the SVU marathon and tuned in with the rest of America five minutes to midnight to watch the ball drop.
Food, as with any holiday or any excuse, is a large portion (no pun intended) of any festivity and New Years Eve would be no different. After all, this was the last "hurrah" before we resumed back to strict healthy eating. Cavatelli with Broccoli was the main meal for myself that evening, as the boyfriend was still hard at work; This pasta and I go way back, very fond memories. Cavatelli and broccoli was a quick evening meal my mother made growing up and it always a favorite. Chewy ricotta caves dabbled with garlic, parmesan and olive oil with large sprinkles of my favorite vegetable, broccoli; a wonderful childhood comfort of Italian American cooking.

I suppose I should get the dessert portion of this post. As I've blogged about previously, the apple crumb pie made my mother since I can remember is without a doubt my favorite dessert. I dream about this pie, literally. I couldn't think of a better candidate to ring in the New Year than a variation on my families traditional apple crumb pie with Apple Crumb Pie Tartlettes. I made them into little tartlettes because I received tartlette pans for Christmas and was eager to try them out. Also, these tartlettes allowed for no fighting over crumbs or large slices since you had an individual pie all to yourself to pine over and indulge as slow or as fast as you pleased. A perfect way to start the New Year, hope you all had a great one!
12.30.2006
Walnut Cupcakes with Brown Sugar Buttercream

The first creation from my new mixer! As fatigued and unpleasant as I felt on Friday night, cupcakes prevailed. Hungry folks needed these (although they didn't know they did) and I knew baking would help raise my mood as well.
Cupcakes stuck in my mind to share as the first baking creation from my new Kitchen Aid mixer. Cupcakes just shout "celebration!" and this mixer is worth the celebration.
Not only did I want the first mixer creation to be a cupcake, I wanted it to be special, or perhaps - different, in some way. Everyone has seen vanilla and chocolate; not to down play these flavors, of course... they are wonderful in there own ways. Just not what I wanted.
Martha came through with this wonderful recipe as she did during my cookie baking this Holiday. However, throughout holiday baking I did come across some problems with her; but, I'll save that for another post.
This Walnut Cupcake is fun yet sophisticated but most of all absolutely, down-right delicious. I decided to accompany this cupcake would be Brown Sugar Buttercream, also from Martha. The buttercream is an Italian-meringue style with the sugar and egg-whites being heated together before whipping. The buttercream was very temperamental and I didn't know what to expect but even after I thought I ruined it by over beating; I was able to bring it back (thank god!).
The cupcake was moist, nutty and sweet which was a perfect compliment to the pure buttercream frosting. Neither were overwhelmed by the other or overwhelming in flavor or sweetness. Overall - great experience with my mixer, the cupcakes and just plain ol' baking joy.
 Note to self (and any others looking for advice on this recipe): I baked 9 regular cupcakes and 4 mini cupcakes. I halved the recipe and used 2 eggs. Mini-cupcakes took about 7 minutes; regular about 25.
12.27.2006
Christmas Cookies & A Wonderful Gift.. (A bit late, I know)

Hope everyones Holiday's have been filled with wonderful feelings and food. I know mine has; the cookies don't seem to ever disappear.
The picture above and aside is my beloved new Kitchen Aid Professional 600 mixer that
 my father so surprisingly bought me for Christmas. I wasn't ever expecting to get this although I had pined over it at William Sonoma and internet websites many nights... This gift accompanies many other wonderful baking supplies from other family members and my boyfriend including cake decorating stand, cake stand, mini tart pans, biscuit cutter set, a slip-pat mat and many others. I was definitely spoiled this Christmas. They'll receive wonderful goodies in return in addition to there Christmas cookie bags.
Holiday baking this year was like no other so far. I baked off my own set of holiday delectables for gift giving in addition to mother's traditional Christmas cookies. I wanted a diverse and colorful plate and I think I ended up with just that. I also learned a lot in the process. I love the trials and tribulations of new baking adventures. I feel much more seasoned as a baker after this experience. I learned do not heat your jam for your rugelach too much or else the dough will melt to your work surface (yet still bake up into a yummy little mess of goo), I learned making caramel requires attention and will set your burners a flame if it escapes from your pot, and last but not least: baking alone to your favorite music is more soothing and fun than a warm bath with candles.

Here is the complete set. Starting with the dark chocolatey ones from the left, we have Double Chocolate Brownie Cookies with M&M's adapted from Martha, Caramel Nut Bars from Martha with three types of nuts: Salted Peanuts, Cashews, and Pecans, Trail Mix Cookies adapted from the Gourmet Cookbook - hearty oatmeal cookies chock full of salted peanuts, raisins and chocolate chips, Holiday Butter Spritz from Cooks Illustrated - dipped in semisweet chocolate and white chocolate adorned with holidays sprinkles, pistachios, and almonds. Next is Rugelach from Martha with 5 different fillings: apricot, walnut and brown sugar, spiced apple + brown sugar, spiced apple + brown sugar w/ walnuts, chocolate chip and pistachio and honey almond and last but not least Cranberry Pistachio Biscotti from Martha as well.
Whew. Well I'm going to scour my new cookbooks for a cupcake recipe to christen my new mixer with. One last photo... these rugelach are too good.

12.20.2006
Apricot Almond Danish Braid

This pastry creation from Baking With Julia was so enjoyable to create. Each part of this wonderful danish from the dough to the filling are made with scratch and so much (on the risk of being corny) love. Each fold and roll of the danish dough was so suspenseful, in a nervous, giddy delight; I pondered hopefully for flaky layers but somehow I knew it would not fail. After all the cookbooks and magazines I've read on pastry I felt I knew the dough even before attempting it.
This was the dough the day before the bake-off which was refrigerated till the next morning before it baked off and brought to my younger cousin's Birthday Brunch.

A blurry, close up. My eyes were deceiving me that day.

I can't even express how perfect and delicious it was. The danish's pastry was flaky, buttery, and light and the encased apricot and almond fillings melded harmoniously between the danish crosses. I plan on doing this again if the occasion calls (or not!); the possibilities for filling are endless. A great experience.
I know this entry lacks creativity but this weeks holiday baking has been quite exhausting. I didn't take any pictures yet but the repertoire includes Rugelach (with a variety of fillings), Caramel Nut Bars, Double Chocolate Fudge Cookies w/ M&M's, Butter Spritz Cookies (dipped in white and semi-chocolates and sprinkled with various nuts, sprinkles), Cranberry Pistachio Biscotti, and Oatmeal-Trail Mix Cookies. Blogging will follow eventually once I catch up on my beauty sleep. Happy Holidays to all!
12.13.2006
Chocolate Angel Food Cake
I know I've been a bad blogger; I do apologize for those who might actually enjoy reading of my kitchen adventures. The holidays are stressing me out and I haven't even starting baking! Spending so much money on ingredients for loving home-baked gifts is wonderful but it's dwindling my small budget. Well, enough complaining, In attempts to enjoy dessert every night, I sought to create a longtime light favorite. 
When I first starting a life-long (most of the time) healthy eating, active lifestyle, I enjoyed this cake for one of my birthdays layered with cocoa laced fat free cool whip (quite the culinary sin... I know) and topped with fresh fruit. With the addition of my fat free coolwhip, this dessert might be looked down upon; however, it is truly delicious, light, satisfying, guilt free dessert. Sense my guilt?
This wonderful dessert is angel food cake! Before I became slightly baking savvy, we cooked our angel food in a regular cake pan (yikes!). Everyone in the know knows the cake needs the tube pan so it may ever so angelically crawl up the sides to create its wonderful volume.
I decided to chose a simple recipe from Recipezaar after searching since it required minimal ingredients.
I really did follow the recipe exactly, as I usually do the first time around. I figured most of the "playing" with the recipe would be given to the infinite options for fillings, glazes, and frosting. I highly recommend this recipe - it is incredibly moist although the light brown color doesn't scream "chocolate!", is has a prominent chocolate flavor which doesn't overwhelm the cakes lightness.
Calling all faithful dieters (or at least trying)! this recipe might save you.
Chocolate Angel Food Cake
adapted from Recipezaar
2/3 cup sifted cake flour
1/3 cup unsweetened cocoa powder
1 1/2 cup granulated sugar, divided
12 large egg whites, at room temp.
1 1/2 tsp. vanilla
1 1/2 tsp. cream of tartar
1/2 tsp. salt
Pre-heat oven to 375 degrees.
In a large bowl, sift flour, cocoa, sugar together 3 times and set aside.
In a separate large bowl, beat the egg whites at low speed until foamy, about 5 minutes. Add vanilla, cream of tartar, and salt. Gradually increase speed to medium while beating in remaining 3/4 cup of sugar - 1 tbsp at a time for 5 minutes. When sugar is incorporated continue to beat until stiff peaks form about 2 minutes.
Sift 1/3 of dry ingredients over egg whites; gently fold in with rubber spatula. Repeat this process 2 more times until all dry ingredients are incorporated.
Pour batter into ungreased 10 inch tube pan. Cut through batter to remove air pockets. Bake 40-45 minutes, until top springs back when lightly pressed.
Invert and hang pan on neck of object to cool. To unmold run knife around edge of pan; invert pan. Turn cake upright and serve how you please!
The basic nutritionals are as follows for 12 servings - 150 calories, 0.5g fat, 0.9g fiber, 25.3g sugar, 4.7g protein.
I promise I have been reading everyones blogs faithfully but haven't had the time to comment. There is some good stuff going on in the kitchen. I have to start baking my holiday cookies today; let the games begin!
Here is a preview of what I'll be blogging about on my next entry - this was obviously pre-bake . I promise I'll be sooner than later. Happy Baking!

When I first starting a life-long (most of the time) healthy eating, active lifestyle, I enjoyed this cake for one of my birthdays layered with cocoa laced fat free cool whip (quite the culinary sin... I know) and topped with fresh fruit. With the addition of my fat free coolwhip, this dessert might be looked down upon; however, it is truly delicious, light, satisfying, guilt free dessert. Sense my guilt?
This wonderful dessert is angel food cake! Before I became slightly baking savvy, we cooked our angel food in a regular cake pan (yikes!). Everyone in the know knows the cake needs the tube pan so it may ever so angelically crawl up the sides to create its wonderful volume.
I decided to chose a simple recipe from Recipezaar after searching since it required minimal ingredients.
I really did follow the recipe exactly, as I usually do the first time around. I figured most of the "playing" with the recipe would be given to the infinite options for fillings, glazes, and frosting. I highly recommend this recipe - it is incredibly moist although the light brown color doesn't scream "chocolate!", is has a prominent chocolate flavor which doesn't overwhelm the cakes lightness.
Calling all faithful dieters (or at least trying)! this recipe might save you.
Chocolate Angel Food Cake
adapted from Recipezaar
2/3 cup sifted cake flour
1/3 cup unsweetened cocoa powder
1 1/2 cup granulated sugar, divided
12 large egg whites, at room temp.
1 1/2 tsp. vanilla
1 1/2 tsp. cream of tartar
1/2 tsp. salt
Pre-heat oven to 375 degrees.
In a large bowl, sift flour, cocoa, sugar together 3 times and set aside.
In a separate large bowl, beat the egg whites at low speed until foamy, about 5 minutes. Add vanilla, cream of tartar, and salt. Gradually increase speed to medium while beating in remaining 3/4 cup of sugar - 1 tbsp at a time for 5 minutes. When sugar is incorporated continue to beat until stiff peaks form about 2 minutes.
Sift 1/3 of dry ingredients over egg whites; gently fold in with rubber spatula. Repeat this process 2 more times until all dry ingredients are incorporated.
Pour batter into ungreased 10 inch tube pan. Cut through batter to remove air pockets. Bake 40-45 minutes, until top springs back when lightly pressed.
Invert and hang pan on neck of object to cool. To unmold run knife around edge of pan; invert pan. Turn cake upright and serve how you please!
The basic nutritionals are as follows for 12 servings - 150 calories, 0.5g fat, 0.9g fiber, 25.3g sugar, 4.7g protein.
I promise I have been reading everyones blogs faithfully but haven't had the time to comment. There is some good stuff going on in the kitchen. I have to start baking my holiday cookies today; let the games begin!
Here is a preview of what I'll be blogging about on my next entry - this was obviously pre-bake . I promise I'll be sooner than later. Happy Baking!

12.01.2006
Thanksgivings Ruminations: Mile High Biscuits and Mom's Apple Crumb Pie
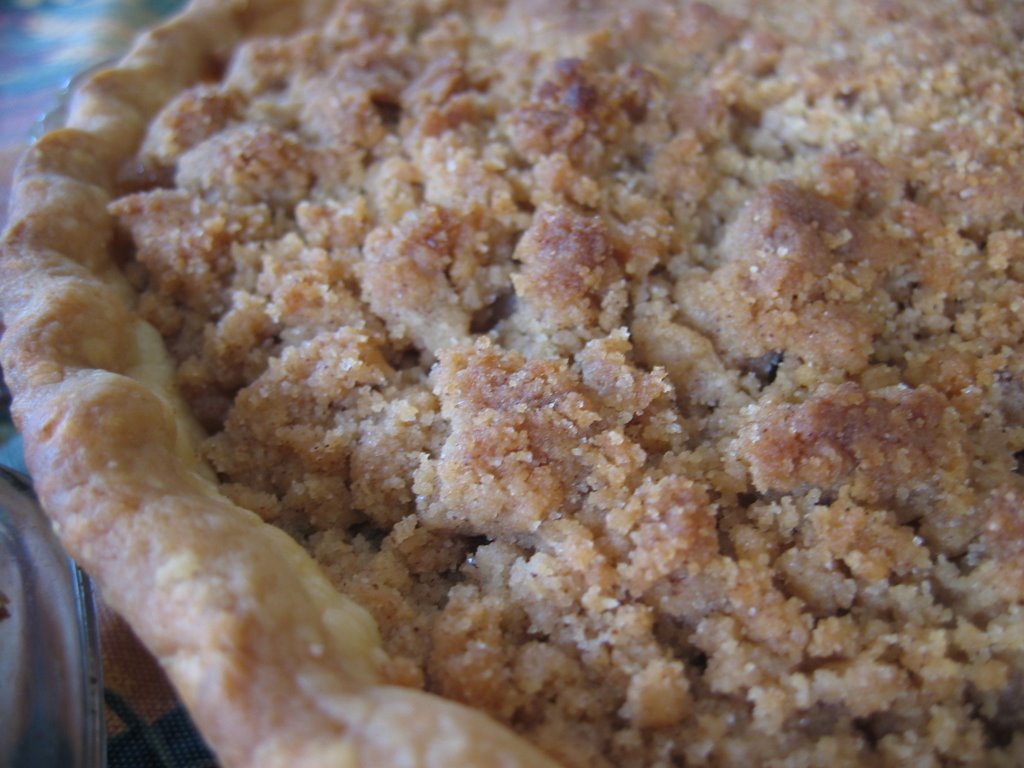 Better late than never as we creep into the morning of the 1st of December. I still haven't a gift for anyone or finalized what I'd like to bake for the approaching holiday festivities but regardless, I'll give the gift of blog this morning!
Thanksgiving was wonderful, full of food and family. I was happy that my mom decide
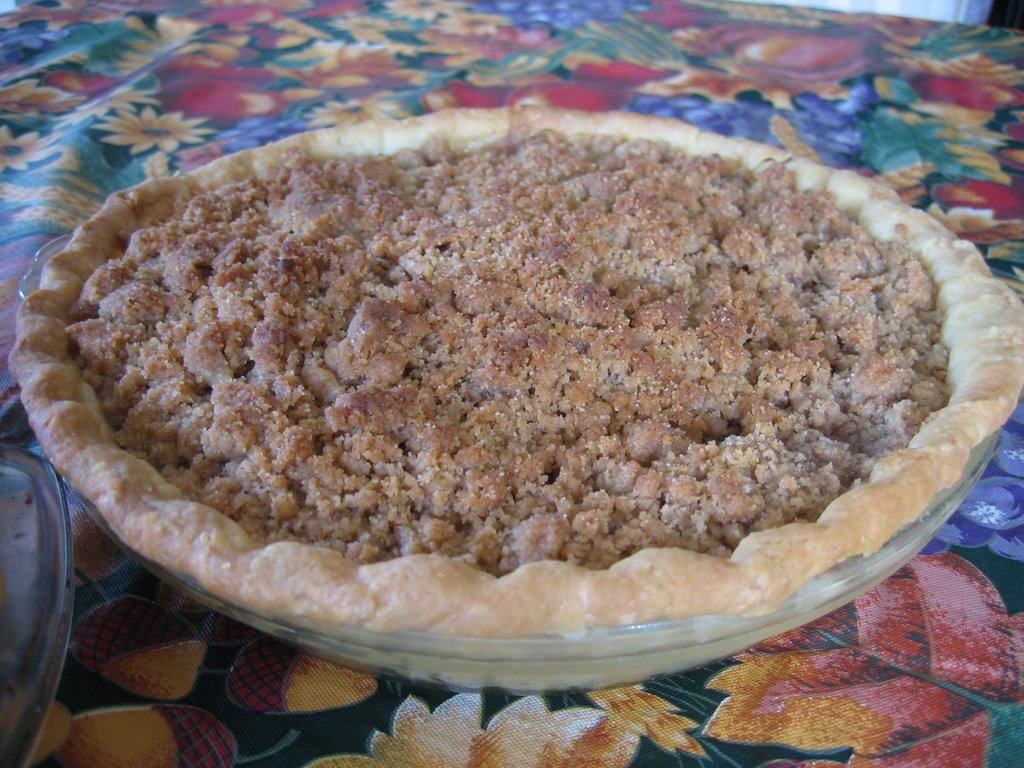
 d to join us down in South Carolina even though we are returning to CT this weekend (yikes). And what comes with Mom is my favorite dessert. Yes, I am bold enough to say that this dessert is my absolute favorite. I have no mercy when it's comes to mile high crumbs over crisp flavorful orchid apples and perfectly flaky crust. I had it for breakfast for 2 mornings after Thanksgiving (another, yikes); I can't forsake the pie if it's there. The apple crumb pie brought to you by my mother and now myself is a compilation of different recipes from my family. The pie portion comes from the Betty Crocker Cookbook, the crumbs are a recipe from my great grandmother's coffee cake recipe, and the crusts have changed a few times but for this pie I rolled out a wonderful crust from Baking With Julia.
This second attempt at pie crust with Baking With Julia was perfect. Since my Pate Brisee flop, I had read up a great portion on pie crust and was ready to tackle again head on. I decided for the time being to use a recipe that contained butter and shortening. I never grew up with shortening in my house and this was a very scary, foreign object that always perplexed me. For baking sake, I used shortening for the first time. What we had in the house (my boyfriends mother's stash) was Crisco shortening in the iconic blue tub. I would definitely not use regular Crisco shortening in the future given the existing trans-fat in the product but I know there are alternatives. Anyway - Julia's recipe was the perfect blend of butter and shortening to create a flavorful and flaky crust. I detest all shortening crusts; They just taste like air. However, I do love all butter crusts but I do have to better my technique with them.
 My next Thanksgiving baking adventure was biscuits. I've been yearning to make delicious buttermilk biscuits from scratch since I moved down to the south. I had my fare share since I've come down here but homemade in your own kitchen is always superior. I had planned to make buttermilk rolls but the timing would have been too tricky. It was the perfect opportunity to make biscuits for the bread quota of the Thanksgiving table. Making them was fun and suspenseful, to see if they were everything they were cracked up to be. I used the recipe from a little cookbook I picked up in the Charleston from The Hominy Grill entitled Mile High Biscuits. I don't feel I should post the recipe from there but it included all of your basic biscuit ingredients: soft wheat flour, salt, baking powder, buttermilk, butter, shortening and lard. Instead of soft wheat flour, I used AP because I had it on hand and is perfectly acceptable and no lard because I never have that on hand but I would interesting in trying it in the biscuits. Lard repulses and intrigues me at the same time.
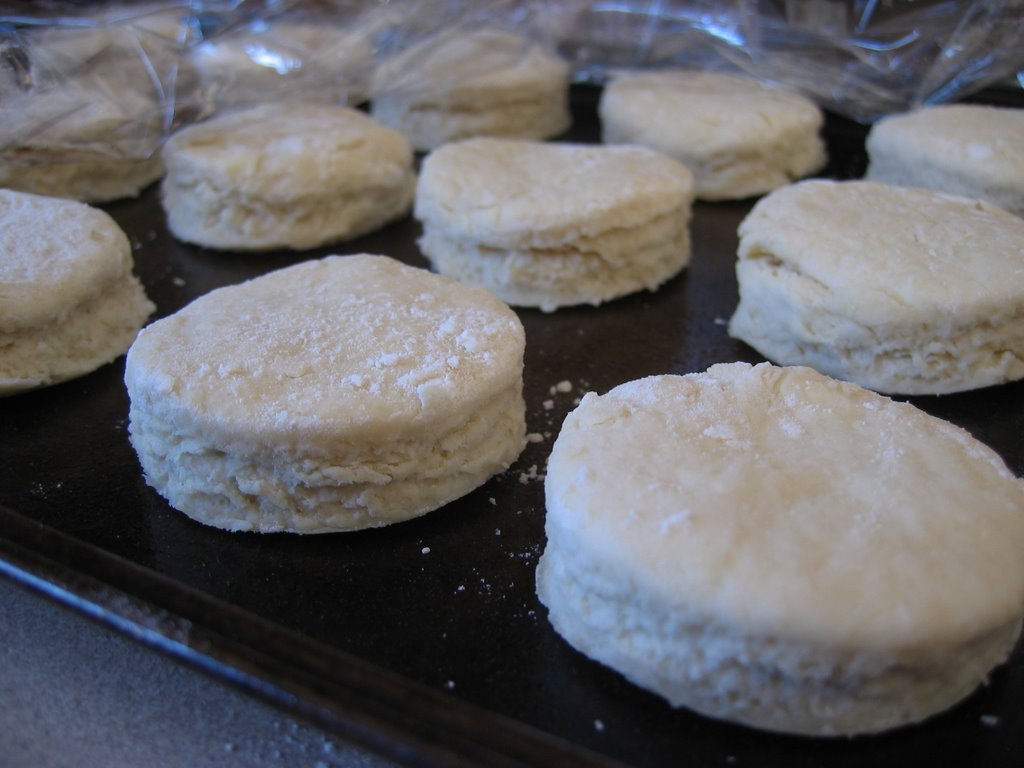 These were the biscuits prior to baking. I stored them in the fridge until we were just about ready to eat; they only needed 10-12 minutes in the oven. I've said it before but these really were everything I hoped they would be. Warm, buttery and flaky, the layers just peeled away and melted in your mouth; I would know, I ate about 5 of the 15.
Well, glad I finally got this written; Can't wait to do it again next year.
11.25.2006
Sicilian Cassata Cake
 The cannoli. One of the many pastry concoctions my family holds near and dear to their Italian hearts. Since I was born, Cannoli's would appear on our dessert table from esteemed New York City Italian pastry shops to be quickly devoured by each member except myself. Anything that was not chocolate did not pass these lips for a very long time - too long, but I think I've redeemed myself. Each aspect of a cannoli is perfection in it's own right, beginning with the shell. A cylindrical, fried to perfection, crisp and sturdy bassinet to cradle the delicately dense ricotta cream filling. The ricotta cream is perfectly blended with sugar to create a subtle sweetness to it's rich flavor and texture and a hint of cinnamon to complete the delight.
It's only fitting that the Cassata Cake was a starring guest, although infrequently, at our birthday tables. My mother would be the only one to tackle this complicated cake besides an Italian bakery. She made it for my Grandpa on his birthday and now I would make it for her on her birthday.
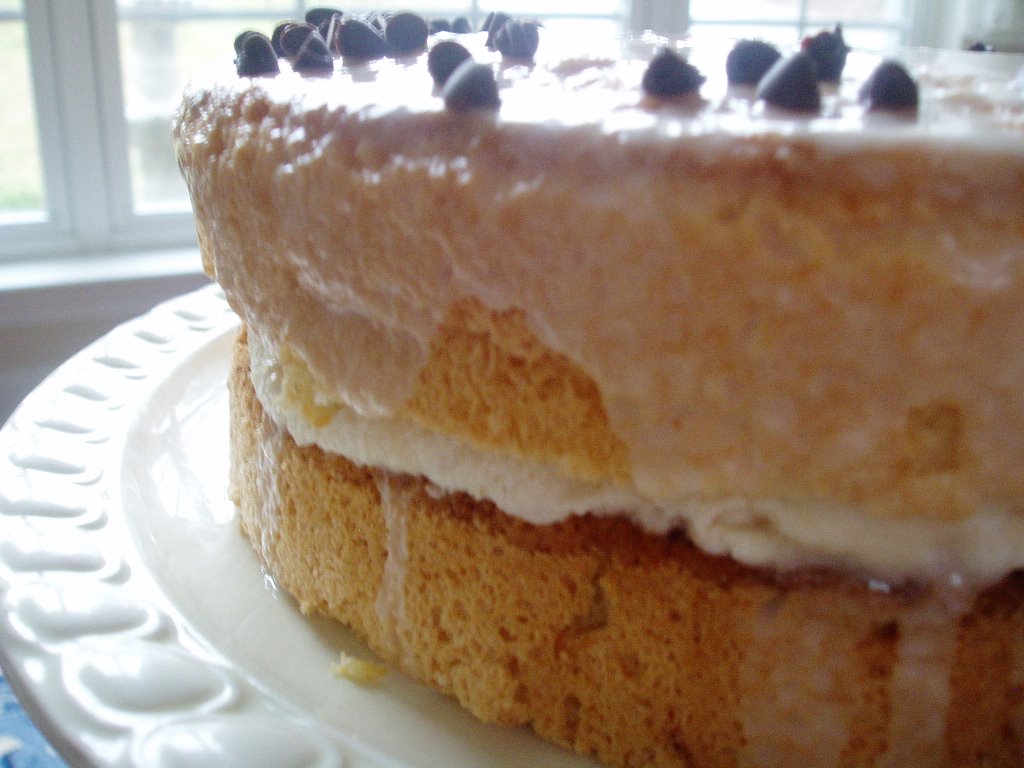
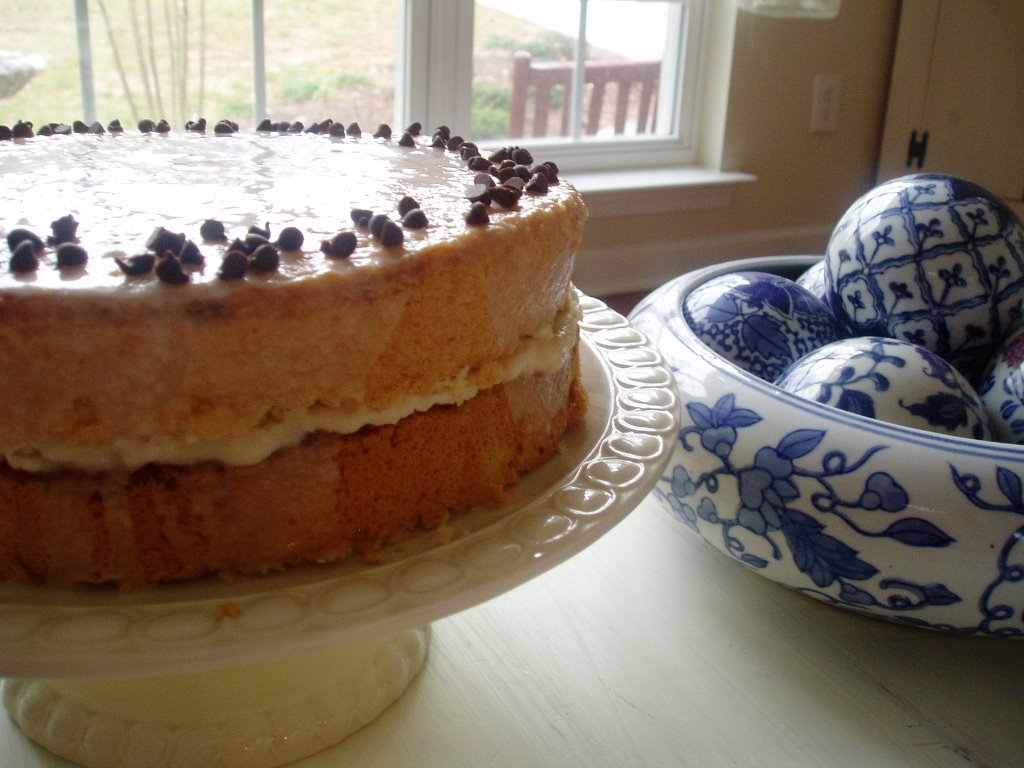
I really wanted to make this perfect so I sought out to find exactly what the components of a Cassata Cake were and go from there. The cake layers were Italian sponge cake which is purely leavened from all the eggs in the recipe and filled with cannoli cream although they added other things to cream that I didn't usually find in standard cannoli cream. Their were different ways for topping the cake such as chocolate glaze but my mother is a vanilla-o-holic, so vanilla glaze won.
I chose a recipe from Nick Malgieri for Pan Di Spanga cake layers and my cannoli cream recipe from epicurious.com to compile my Cassata Cake.
Pan Di Spanga
adapted slightly, curteousy of dianasdesserts.com
2/3 cup all purpose flour
1/3 cup cornstarch
5 large eggs, separated
1 cup sugar, divided
2 tsp. vanilla extract
Pinch of salt
Preheat oven to 350 degrees. Butter a 9 or 10 inch spring form pan (the original suggested lining with buttered parchment but I did not have any).
In a small bowl stir together flour and cornstarch.
In bowl with an electric mixer with the whisk attachment, whip egg yolks and half the sugar and the vanilla on medium speed for 2 minutes, until they are light and fluffy.
In another bowl, with whisk attachment for electric mixer, whip the egg whites and salt on medium speed until white and opaque. Add remaining sugar 1 tbsp. at a time, and continue whipping until whites hold firm peak when whisk is lifted.
Using a large rubber spatula, fold yolk mixture into whites. Sift 1/3 of flour mixture over eggs and fold in; repeat 2-3 times until all the flour has been incorporated. Scrape batter into prepared pan and smooth the top. Bake until well risen and well colored. About 30-40 minutes (30 was too little for me and when I took it out and thought it was done the top-middle portion was too wet; I'd give it closer to 40).
Remove cake from oven and run knife around edges to loosen; remove sides. Slide cake onto wire racks to cool. Cool completely before slicing to be used for other cakes; Refrigerate or freeze for 1 day for more even cut layers. It can be refrigerated for several days before use.
Cannoli Filling
adapted from Epicurious.com - Silician Cannoli Recipe
1 lb ricotta (2 cups) + 2 oz
1/2 cup confectioners sugar, scant
1/4 tsp. cinnamon
1/4 cup mini semi-sweet chocolate chips
Beat together ricotta, confectioners sugar, and cinnamon with an electric mixer on medium speed until smooth. Fold in chocolate and chill.
From this experience, I would highly suggest making this 1 or 2 days ahead so as the filling sits you can drain the water a few times during the day for a denser, less wet filling. Or I suppose you could strain the ricotta prior to mixing.
Assemblage was cutting the cake into two layers and spreading the cannoli filling between the layers and pouring a vanilla glaze over the cake and decorating with more mini chocolate chips.
For the record, the cake was outstanding; there was a tiny piece left which was devoured quickly the next night for dessert. I really enjoyed making this cake especially for such a special birthday for a truly special person- my mom.
The sponge cake was light and sweet and perfectly complimented the mild ricotta filling; the vanilla glaze gave a super sweet contrasting bite which was very enjoyable. I would definitely make this cake again, perhaps experimenting with some different toppings/glazes.
11.21.2006
Oreo Cheesecake & Strawberry Oatmeal Jam Bars... and CIA!
I can't save this news for last; I got accepted to the Culinary Institute of America for Winter 2007 in the AOS program for Baking and Pastry! The woman called me yesterday on the phone to congratulate me; My dream come true is really happening.
Anyway, let me report on some backed up culinary adventures since there are gonna be another good handful with the upcoming days including my mother's birthday which is today. I am in the process of making a slightly altered version of an authentic Silician Cassata Cake or Cannoli Cake. Everyone is greatly anticipating this tonight for dessert... as am I.
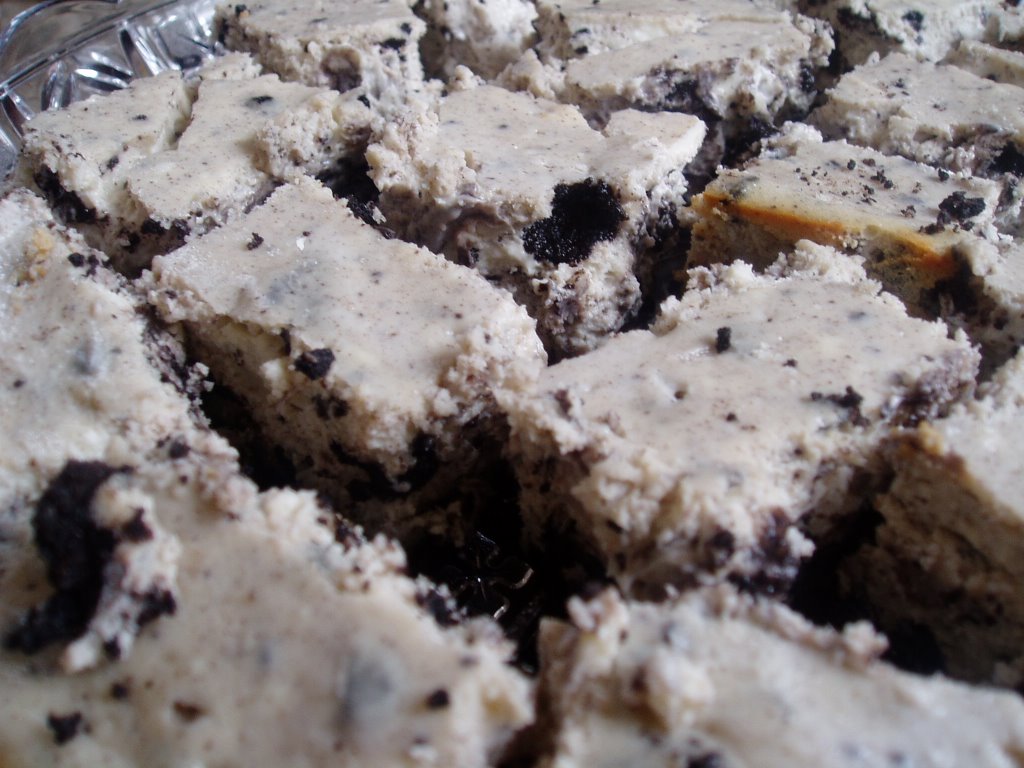
Last weekend during my families time of mourning we all gathered everyday for about 4 days and what would any family event be without an over abundence of food. I wanted to keep morale up and tried to do so one of the best ways I know how - providing delicious comforting desserts. I received an interesting magazine from a co-worked who knew my love for baking and desserts after showing up at work with goodies to share; It was a Kraft Food and Family magazine she received in the mail. I browsed through and everything was mostly easy and quick recipes for food and desserts. Like, use these Kraft's products here, use this brownie mix for these... kinda thing; You get the picture. On the back cover however was a very inticing picture for Oreo Cheesecake Bars; Oreo's being a Kraft division product of course. The recipe is prepared with ease and minimal ingredients and looked so delicious; who doesn't love Oreos? This was my first venture in cheesecake and putting together the ingredients was simple however judging bake time and cutting these bars were not.
Oreo Cheesecake Bars
adapted from Kraft Food & Family Magazine (Backcover)
1 pkg. Oreo cookies, divided
1/4 cup butter, melted
4 pkg. (8 oz each) Cream Cheese, softened
1 cup sugar
1 tsp. vanilla
1 cup sour cream
4 eggs
Preheat oven to 325 degrees and prepare a greased 13X9 baking dish (the original called for foil but I've never used that method).
Place 30 of the cookies into a food processor and process until finely ground. Add butter and mix well. Press firmly to bottom of prepared pan.
Beat cream cheese, sugar and vanilla in large bowl with electric mixer on medium speed until well blended. Add sour cream; mix well. Add eggs, one at a time, beating just until blended after each addition. Chop the remaining cookies and fold into cheesecake mixture (You can reserve some to sprinkle on top but I forgot).
Bake 45 minutes or until center is set. Cool and refrigerate for at least 4 hours or overnight. Cut into bars and serve! I cut mine much more bite size than the original serving suggestion of 16; these are dense and filling.

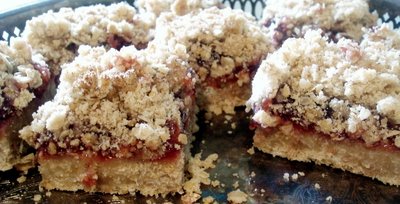
I also made my favorite loved Oatmeal Jam Bars which I filled with Strawberry Preserves. I first blogged about them - here where you'll find the recipe as well. This time I actually had enough ingredients so I could double the crust and still put a generous amount of crumbles on top. Delicious as usual... I think raspberry preserves are still my favorite for these. These bars always get raved about and they are so adaptable to different fillings; Next time I would really like to tried a spiced pear butter. They work better in my opinion with a mild sweetness to the filling as opposed to very sweet.
I'm off to continue birthday baking and blog reading for the morning.
Anyway, let me report on some backed up culinary adventures since there are gonna be another good handful with the upcoming days including my mother's birthday which is today. I am in the process of making a slightly altered version of an authentic Silician Cassata Cake or Cannoli Cake. Everyone is greatly anticipating this tonight for dessert... as am I.
Last weekend during my families time of mourning we all gathered everyday for about 4 days and what would any family event be without an over abundence of food. I wanted to keep morale up and tried to do so one of the best ways I know how - providing delicious comforting desserts. I received an interesting magazine from a co-worked who knew my love for baking and desserts after showing up at work with goodies to share; It was a Kraft Food and Family magazine she received in the mail. I browsed through and everything was mostly easy and quick recipes for food and desserts. Like, use these Kraft's products here, use this brownie mix for these... kinda thing; You get the picture. On the back cover however was a very inticing picture for Oreo Cheesecake Bars; Oreo's being a Kraft division product of course. The recipe is prepared with ease and minimal ingredients and looked so delicious; who doesn't love Oreos? This was my first venture in cheesecake and putting together the ingredients was simple however judging bake time and cutting these bars were not.
Oreo Cheesecake Bars
adapted from Kraft Food & Family Magazine (Backcover)
1 pkg. Oreo cookies, divided
1/4 cup butter, melted
4 pkg. (8 oz each) Cream Cheese, softened
1 cup sugar
1 tsp. vanilla
1 cup sour cream
4 eggs
Preheat oven to 325 degrees and prepare a greased 13X9 baking dish (the original called for foil but I've never used that method).
Place 30 of the cookies into a food processor and process until finely ground. Add butter and mix well. Press firmly to bottom of prepared pan.
Beat cream cheese, sugar and vanilla in large bowl with electric mixer on medium speed until well blended. Add sour cream; mix well. Add eggs, one at a time, beating just until blended after each addition. Chop the remaining cookies and fold into cheesecake mixture (You can reserve some to sprinkle on top but I forgot).
Bake 45 minutes or until center is set. Cool and refrigerate for at least 4 hours or overnight. Cut into bars and serve! I cut mine much more bite size than the original serving suggestion of 16; these are dense and filling.
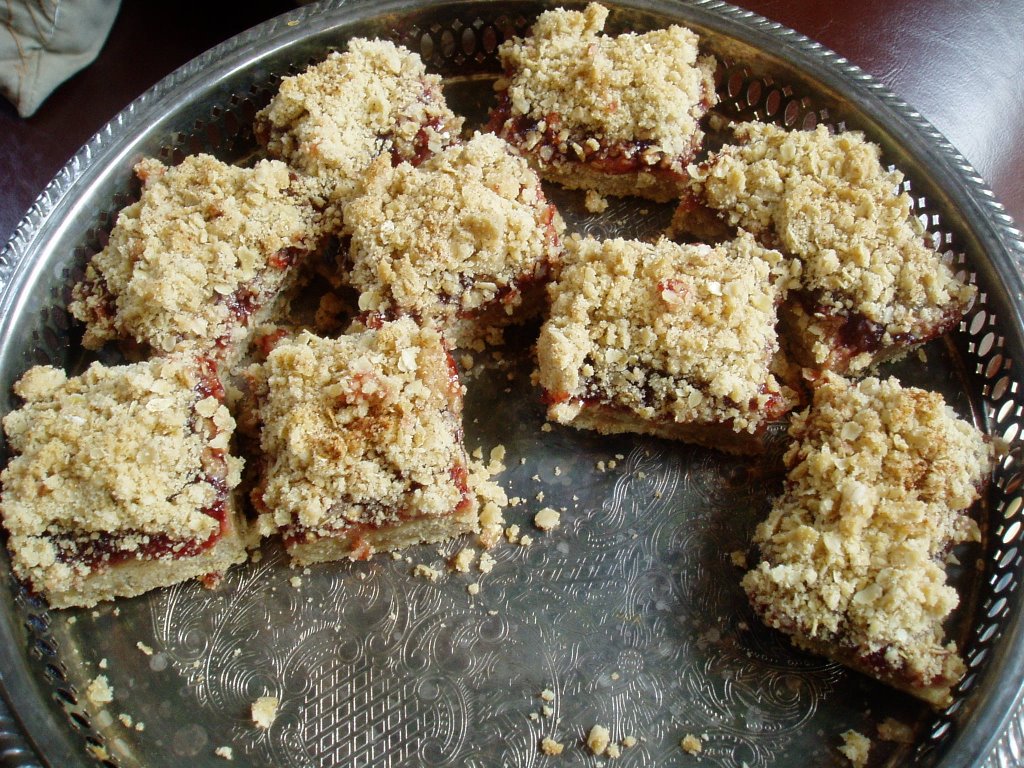
I also made my favorite loved Oatmeal Jam Bars which I filled with Strawberry Preserves. I first blogged about them - here where you'll find the recipe as well. This time I actually had enough ingredients so I could double the crust and still put a generous amount of crumbles on top. Delicious as usual... I think raspberry preserves are still my favorite for these. These bars always get raved about and they are so adaptable to different fillings; Next time I would really like to tried a spiced pear butter. They work better in my opinion with a mild sweetness to the filling as opposed to very sweet.
I'm off to continue birthday baking and blog reading for the morning.

11.17.2006
Back with Hearty Whole Wheat Banana Muffins
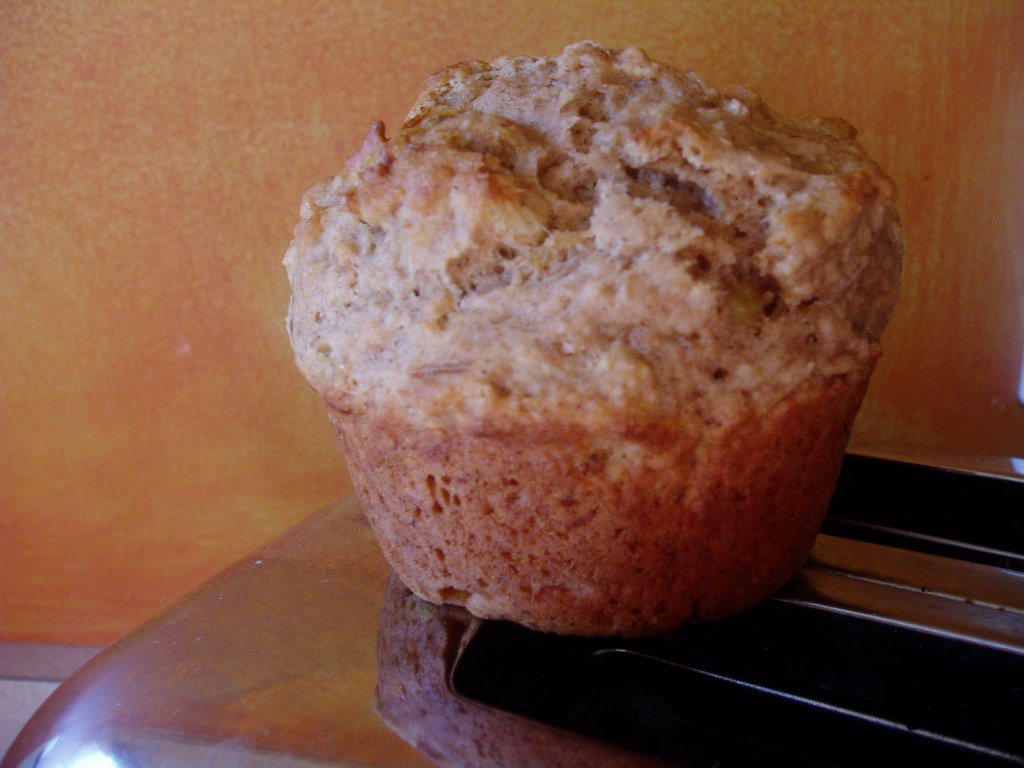
Thanks so much for the kind words - I really appreciate it. I've missed blogging and baking but I got to do a bit over the past week that I haven't shared yet.
Last Thursday - I actually had made these Banana Muffins in the morning but that's when all the madness began. At work the previous night they were going to throw away some barely browned banana's and I volunteered to take them instead of wasting them. Muffins seemed like the best option for something healthy for the morning; unless it's a special day, my morning meal is a usually a combination of fruit and whole grain.
I adapted this recipe out of my Better Homes and Gardens New Cookbook binder from the Oat Bran Muffin recipe.
Hearty Whole Wheat Banana Muffins
1 1/4 cups organic whole wheat flour
1 cup unbleached all-purpose flour
1/4 cup brown sugar
2 tsp. baking powder
1/4 tsp. baking soda
1/4 tsp. salt
1 beaten egg
3/4 cup mashed banana, heaping
3/4 cup fat-free buttermilk
1 tbsp. unsalted butter, melted
1/4 cup chopped walnuts
Lightly coat 12 - 2 1/2" muffins cups and set aside. Pre-heat oven to 400 degrees.
In a medium bowl combine ww flour, AP flour, baking powder, brown sugar, baking soda and salt. Make a well in center of flour mixture and set aside. Mix in walnuts.
In a small bowl combine egg, banana, buttermilk, and butter. Add all at once to flour mixture. Stir just until moistened (batter should be lumpy).
Divide batter evenly among muffins cups. Bake in 400 degree oven for 16 to 18 minutes or until golden and object inserted in center comes out clean. Cool in muffin cups on a wire rack for 5 minutes. Remove from cups; serve warm.
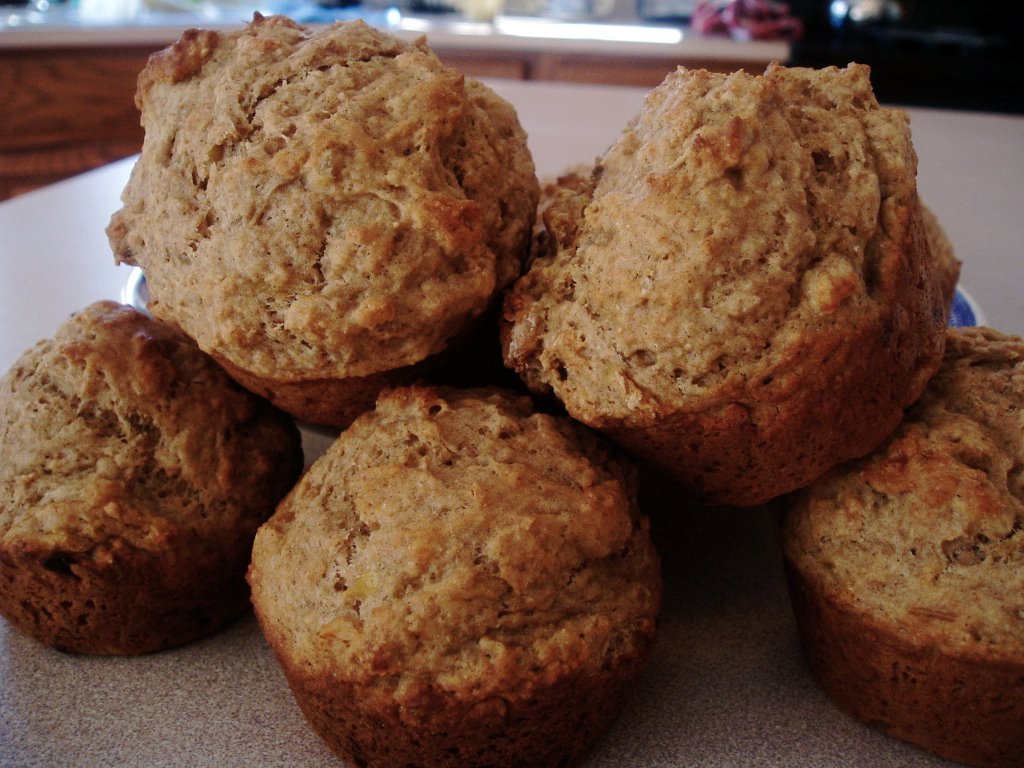
My boyfriend and I ate the muffins warm from the oven and they were tasty but could have used a bit more moisture. I would try a full cup of buttermilk next time since the original ingredients calls for 1/4 cup of honey contributing to the moist ingredients which I subbed from brown sugar. I could tell the batter was a bit thick but didn't want to risk drier muffins by more stirring. I will definitely make these again with a few tweaks. I only filled 10 out of the 12 muffins cups and I liked the size they came out; they rose nice and big.
 I probably won't be able to blog about the Oreo Cheesecake or Strawberry Oatmeal Jam Bars until I get a replacement computer charger ... Long story.
I'll get that worked out today somehow but in good news, my application for the Culinary Institute of America is complete and in for review. I should find out in about a week about acceptance and dates and such. I'm off to go read all your blogs until my computer runs out of batteries!
11.10.2006
A Moment of Silence
My grandmother passed away yesterday morning to much despair of my family. May she rest in peace with my grandfather.
She used to make me salami sandwiches on toasted italian bread when she watched us after school. That unique combination never fails to remind me of her.
I'll be back in a few day with lots to share.
She used to make me salami sandwiches on toasted italian bread when she watched us after school. That unique combination never fails to remind me of her.
I'll be back in a few day with lots to share.
11.06.2006
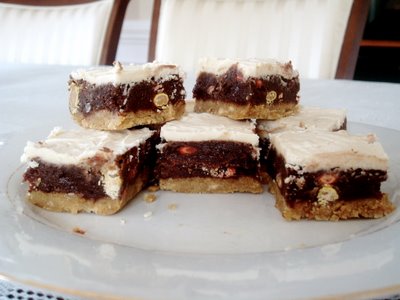
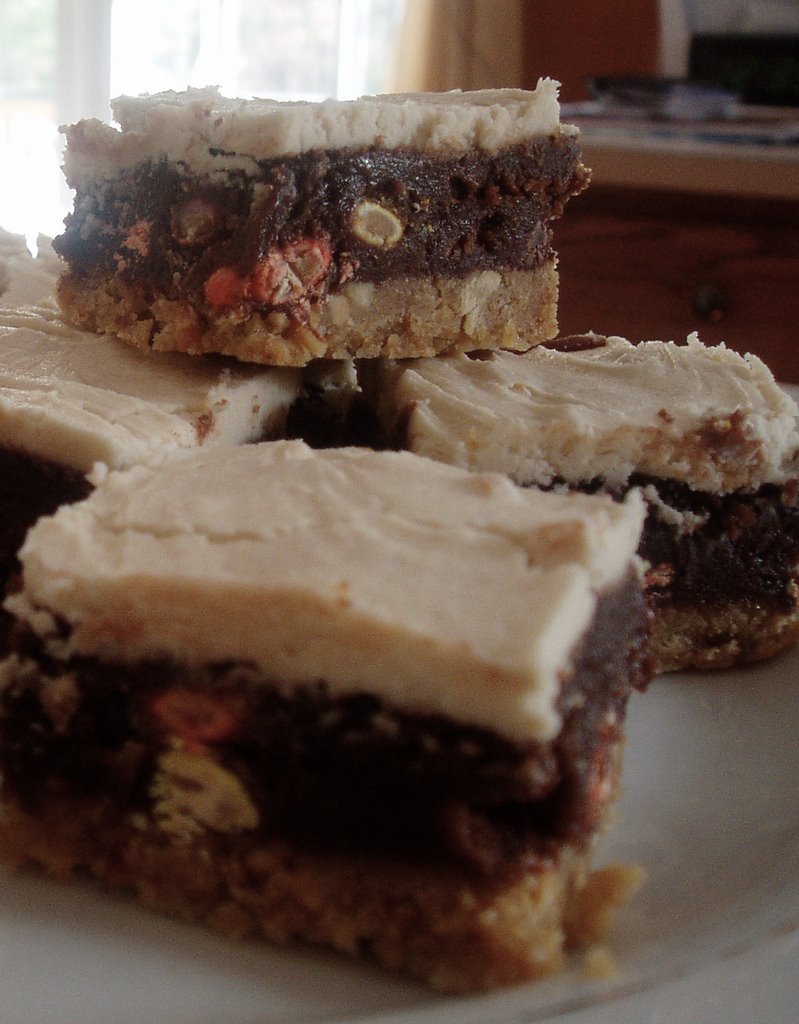
Reeses Pieces Brownies with Peanut Butter Frosting
These brownies were last nights project. I had leftover Reeses Pieces from a movie that were just begging to be apart of a baking creation. I hope this information doesn't offend b ut I've never been a huge fan of peanut butter; being that I never ate it when I was growing up, not even the coveted kid sandwich, PB & J. As I get older, my palette is becoming more and more diverse; The more I try, the more I like! I think my like for nut butters began when I was vegan and I used to go to my favorite natural food store, Lifethyme, complete with an amazing vegan bakery. They had the dreamiest cakes, combinations I would have never thought of; my favorite was the blueberry lemon cake with the creamiest, not too sweet, cashew butter frosting. Those cakes are still some of the best I've ever had, vegan or not.
Back to the brownies. I was originally going to go for an uninspired butter cookie mixed with the Reese Pieces but my boyfriend expressed interest in the combination chocolate and peanut butter. I was re-browsing my holiday baking magazines and found a brownie article in Better Homes and Gardens: Holiday Baking featuring different brownie combinations. This one called for just plain PB chips in the brownie batter portion so I substituted my Reeses pieces.
The reviews concluded that they were overall too sweet for my household members taste; I have to agree. The brownie portion was like fudge and peanut butter frosting did them in. I liked them but I definitely agree there could have been a better balance. I'm not sure how others would feel about them; I probably won't make them again but it was an easy recipe to prepare and came out very nice.
Reese Pieces Brownies with Peanut Butter Frosting
adapted from Better Homes and Gardens: Holiday Baking Magazine
1 1/4 cups crushed graham crackers (approx. 8 full cracker sheets)
1 1/4 cups sugar
1/4 cup finely chopped lightly salted peanuts
1/2 cup butter, melted
1/2 cup butter
2 ounces unsweetened chocolate, cut up
2 eggs
1 tsp. vanilla
2/3 cup all-purpose flour
1/2 cup Reeses' Pieces
Peanut Butter Frosting
1/4 cup butter
2 tbsp peanut butter (smooth or crunchy)
1 cup powdered sugar
1 tbsp. milk
1/2 tsp. vanilla
Preheat oven to 350. For crust: combine graham crackers, 1/4 cup of the sugar and chopped peanuts. Stir in half cup melted butter. Press mixture evenly into an ungreased 9X6X 1 1/4- inch pan (I had to buy a weird sized foil pan because I didn't have the specified 11X7X1 1/2-inch pan so something around these measurements would be fine). Bake for 5 minutes; cool.
For filling: In heavy saucepan, combine the 1/2 cup butter and the chocolate; heat and stir over low heat until melted. Remove from heat. Add the remaining 1 cup sugar, eggs, and vanilla; stir just until combined. Stir in flour and Reeses' Pieces. Spread evenly over crust. Bake for 20 minutes.
Cool in pan on a wire rack - do not cut brownies will they are warm, moisture will escape as steam and they may be dry when cooled. Spread with PB Frosting. Cut into bars - Makes 20 brownies.
For frosting: In bowl combine butter and peanut butter and beat with an electric mixer on low speed for 30 seconds. Gradually add the powdered sugar, beating well. Beat in milk and the vanilla. As you beat in the powdered sugar if it's too thick add enough milk to make a frosting that spreads easily.
You can cover and chill these for up to two days. They cut more evenly after being chilled. If your preparing ahead do not cut the bars until serving.
I ordered 2 new cookbooks from amazon that are on the way: The Bread Bakers Apprentice and Macrina Bakery Cookbook... they shipped today, yay! I am hopefully going to make some soup today and bread to follow. We'll see how the day goes.
 ut I've never been a huge fan of peanut butter; being that I never ate it when I was growing up, not even the coveted kid sandwich, PB & J. As I get older, my palette is becoming more and more diverse; The more I try, the more I like! I think my like for nut butters began when I was vegan and I used to go to my favorite natural food store, Lifethyme, complete with an amazing vegan bakery. They had the dreamiest cakes, combinations I would have never thought of; my favorite was the blueberry lemon cake with the creamiest, not too sweet, cashew butter frosting. Those cakes are still some of the best I've ever had, vegan or not.
Back to the brownies. I was originally going to go for an uninspired butter cookie mixed with the Reese Pieces but my boyfriend expressed interest in the combination chocolate and peanut butter. I was re-browsing my holiday baking magazines and found a brownie article in Better Homes and Gardens: Holiday Baking featuring different brownie combinations. This one called for just plain PB chips in the brownie batter portion so I substituted my Reeses pieces.
The reviews concluded that they were overall too sweet for my household members taste; I have to agree. The brownie portion was like fudge and peanut butter frosting did them in. I liked them but I definitely agree there could have been a better balance. I'm not sure how others would feel about them; I probably won't make them again but it was an easy recipe to prepare and came out very nice.

Reese Pieces Brownies with Peanut Butter Frosting
adapted from Better Homes and Gardens: Holiday Baking Magazine
1 1/4 cups crushed graham crackers (approx. 8 full cracker sheets)
1 1/4 cups sugar
1/4 cup finely chopped lightly salted peanuts
1/2 cup butter, melted
1/2 cup butter
2 ounces unsweetened chocolate, cut up
2 eggs
1 tsp. vanilla
2/3 cup all-purpose flour
1/2 cup Reeses' Pieces
Peanut Butter Frosting
1/4 cup butter
2 tbsp peanut butter (smooth or crunchy)
1 cup powdered sugar
1 tbsp. milk
1/2 tsp. vanilla
Preheat oven to 350. For crust: combine graham crackers, 1/4 cup of the sugar and chopped peanuts. Stir in half cup melted butter. Press mixture evenly into an ungreased 9X6X 1 1/4- inch pan (I had to buy a weird sized foil pan because I didn't have the specified 11X7X1 1/2-inch pan so something around these measurements would be fine). Bake for 5 minutes; cool.
For filling: In heavy saucepan, combine the 1/2 cup butter and the chocolate; heat and stir over low heat until melted. Remove from heat. Add the remaining 1 cup sugar, eggs, and vanilla; stir just until combined. Stir in flour and Reeses' Pieces. Spread evenly over crust. Bake for 20 minutes.
Cool in pan on a wire rack - do not cut brownies will they are warm, moisture will escape as steam and they may be dry when cooled. Spread with PB Frosting. Cut into bars - Makes 20 brownies.
For frosting: In bowl combine butter and peanut butter and beat with an electric mixer on low speed for 30 seconds. Gradually add the powdered sugar, beating well. Beat in milk and the vanilla. As you beat in the powdered sugar if it's too thick add enough milk to make a frosting that spreads easily.
You can cover and chill these for up to two days. They cut more evenly after being chilled. If your preparing ahead do not cut the bars until serving.
I ordered 2 new cookbooks from amazon that are on the way: The Bread Bakers Apprentice and Macrina Bakery Cookbook... they shipped today, yay! I am hopefully going to make some soup today and bread to follow. We'll see how the day goes.
11.04.2006
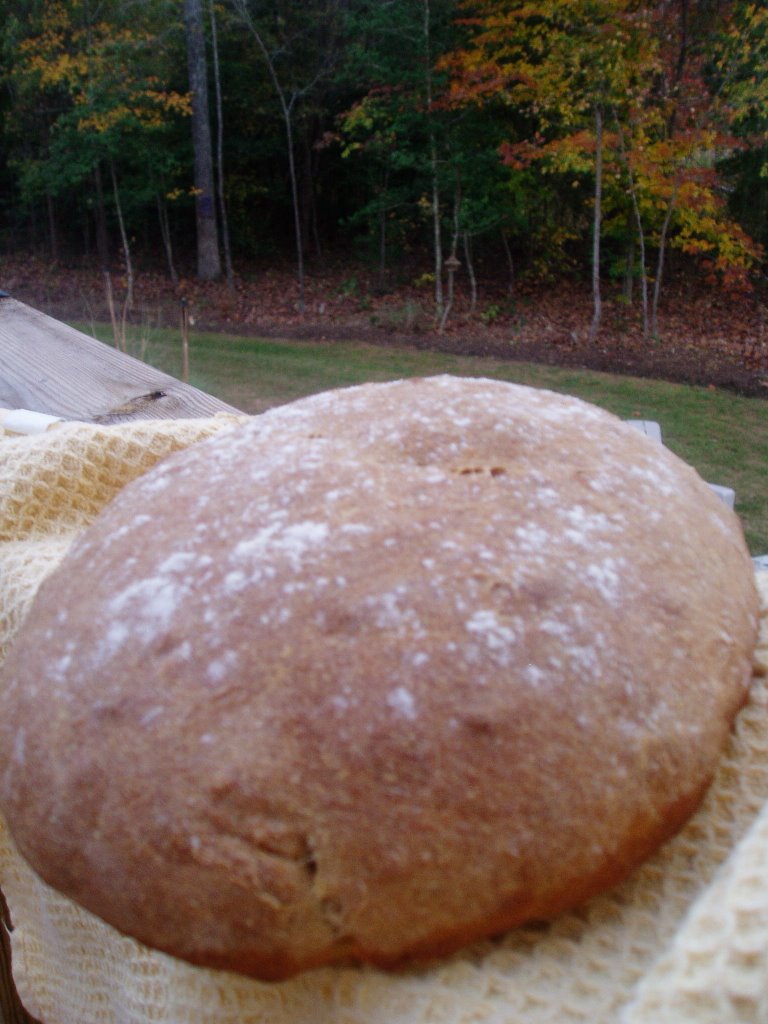
Baked Sweet Potato Bread
I feel poorly for the lack of dessert/baked goods in my blog. I have to admit there is a problem with my obsession with pastry and sugary treats, well, a few problems. One of them is the sheer health of it all; although I do believe in "healthy" indulgences, having baked goods around the time is not conducive to my healthy lifestyle because believe me, if there are cakes, tarts, pies, and cookies around me; they will be eaten. Moderation is not my strong suit especially when it comes to dessert. Another reason is budget; which is very humble lately. I'd love to run out and buy each ingredient at the store for baking just to have on hand when inspiration sparks but I have to spend fairly frugally as of now. Third, I have no one to eat my baked goods, which makes me utterly sad. My boyfriends mother is allergic to nuts (among 100's of other things) and is fairly picky; so, she's out. My boyfriend's father is away 3 weeks out of each month for business, not at all picky and loves to eat but is not around. His sister, currently, is on a low-fat diet; enough said. As his sister, my boyfriend is routinely on a rigid "diet" as a part of his regular healthy lifestyle and will only eat my baked goods on Mondays (a.k.a "cheat day", to those in the know in the diet world). And then there was one, me, what's a girl to do?
With that said, I've been baking more bread; It is equally near and dear to my heart when it comes to baking. There are countless reasons of my love for bread that have evolved from the simple enjoyment of eating it to baking it. I could keep going on this subject but I'll save that for another time. I've always been known as the bread girl in my family and nothing has changed. Today's bread baking venture was an all day affair. I was looking forward to baking some breads with slow rises because slow rises are supposed to improve the taste and texture the bread. Being that it was a slightly chilly 30 degrees this morning - it was the perfect day. I also wanted something a bit unique but easy to work with as I ease my way back into baking.
The Baked Potato Bread, from the Fresh Loaf, looked enticing but there were no baked potatoes to be found but there were sweet potatoes. An idea was born. I loved the idea of being able to use sweet potatoes as a unique ingredient in my bread that I hadn't previously thought of as a possibility. I adapted the recipe as I desired, hoping for the best. I wanted it to be healthy, unique, but overall, just delicious.
and it was.
Baked Sweet Potato Bread
adapted from Potato Rosemary Bread from The Fresh Loaf
1 packet active dry yeast
1 cup water
1 cup mashed sweet potato, heaping (could be boiled or baked)
2 1/4 cups bread flour
1 1/4 cups whole wheat flour
2 tsp. salt
1 tsp. pepper
1 tsp. sage
Mix packet of yeast with 1/4 cup of warm water (110-115 degrees); let sit for 5 minutes.
In a large bowl mix the whole wheat flour, 2 cups of the bread flour, water, yeast mixtures, salt, pepper and sage; reserve 1/4 cup of flour. Mix until dough begins to form turn out dough on floured work surface and knead for 6-9 minutes, incorporating the remaining 1/4 cup of flour. Once dough feels "ready", place the dough in a greased bowl and cover the bowl with a moist towel until double in size, about 1 - 2 1/2 hrs (depending on temperature environment where bowl is).
Remove dough from the bowl; de-gas it and shape it. You may make a large loaf, 2 small loaves, 12 large rolls... whatever you like! Placed them on a greased baking sheet and set aside to rise again until doubled (about 1 - 1 1/2 hrs).
When ready, pre-heat oven to 500 degrees (this will give a good last rise to the bread from the heat) and put dough in oven. Bake at 500 for 5-8 minutes then drop temperature down to 375 for 15-22 minutes depending on loaf size (rolls will take less time). When rolls are done they look brown/dark brown and sound hollow when tapped. Remove rolls and allow to cool before serving (as usual, I did sample out of the oven and I would definitely recommend letting them cool before eating/serving). They keep well at room temperature for 1-2 days without any deterioration in in flavor or texture.

I created one small loaf and 5 medium sized rolls for the household. Although, the sweetness of the sweet potato did not stand out in the bread; I think it definitely enhanced the overall flavor of bread compared to a normal baked potato. The loaf had a slight peppery bite which was pleasing to all the family members, who really liked the bread. It had a wonderful dense but soft, chewy crumb. My boyfriend and I made little sandwiches with roasted chicken breast shreds and BBQ sauce... definitely perfect for sandwiches. I have to go get prepared for this evenings baking adventure!
11.02.2006
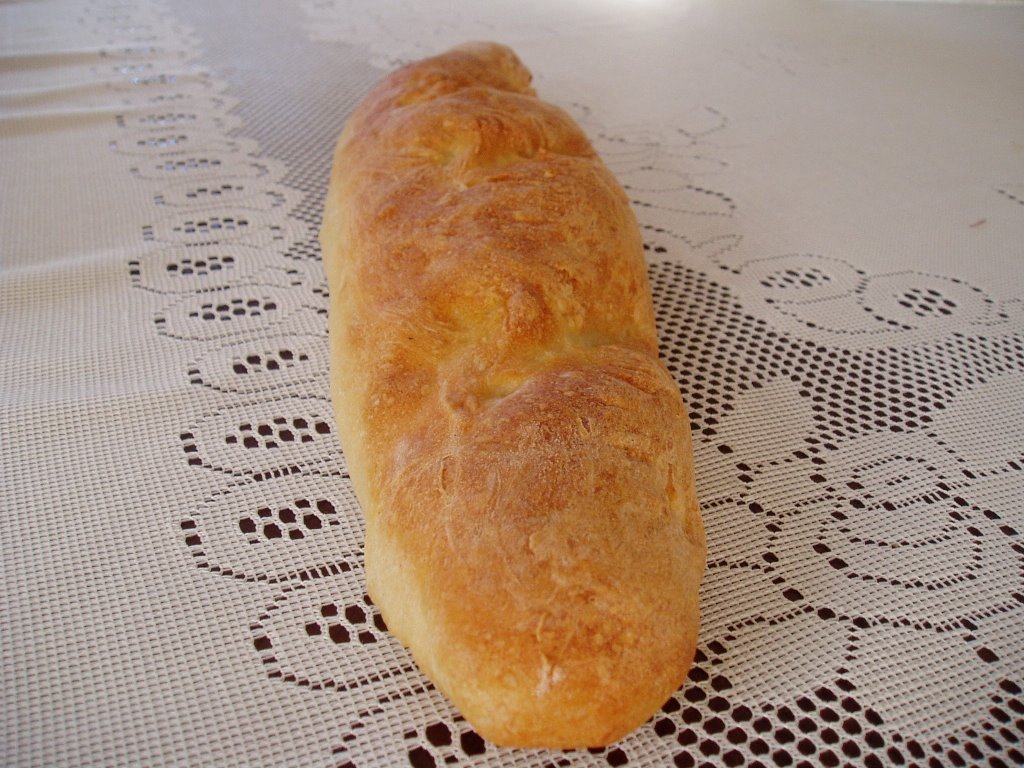
Baguettes
I have been thinking about starting my bread baking full time again. I'm tired of store bought loaves; The closest thing I've come to good bread is from the little La Brea Bakery kiosk in my local supermarket where they bake 2/3's baked loaves in a little convection oven to get them to you hot.
It baffles me to see 2-3 weeks old loaves of store bought bread sitting the bread pantry that look as they were just baked yesterday; what are they putting in these things?! In this turmoil, I headed to the closest health food supermarket to seek out an organic, no perservative loaf in case of emergencies. I found an oraganic millet and flax loaf that happens to be gluten free as well which was nice, made a nice breakfast toast. I used to regularly buy Ezekiel's Seasame Loaf but my boyfriend's mom is deathly allergic to seasame seeds - so that was a no go.
Getting back to me bread baking, my "skills", which were mediocre for a home baker, have slightly dwindled. I don't remember the process as well as I did. So, I started simple a recipe from Cooking Light for Baguettes. I know, probably not the best place for a baguette recipe but what I was looking for was simplicity, a small list of ingredients, not much prep, and hot bread before work.
Little did I know how many problems I would run into, including, shattering a glass baking dish in the oven. Good job. I won't go into detail about anything else.
In the end, the loaf was ready right as I was walking out the door. I sliced off a steaming end of my "baguette" and bit into bread bliss. It actually had a good flavor and crust was nice, crunchy and brown but the bottom was a bit under done on the bigger of the two. I would recommend this recipe for anyone wanting some fresh bread with menial effort and large margin for error. *I'll post the recipe later on today.
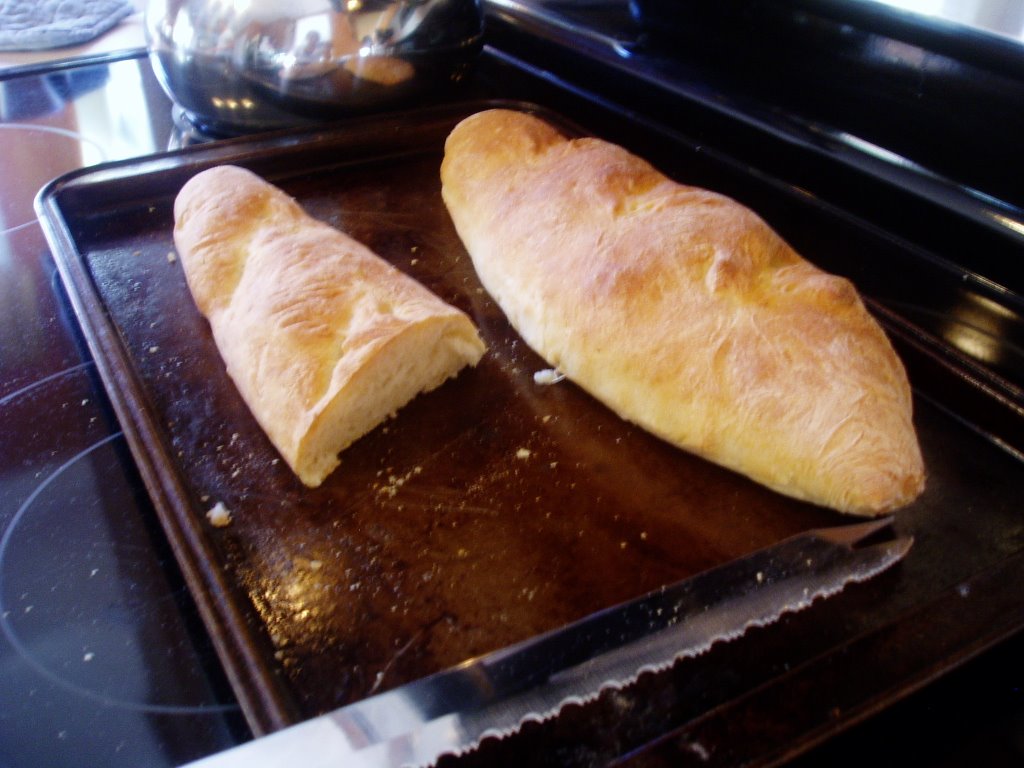 Today, I'm gonna search for a bread recipe to prepare for tomorrow so I can start a poolish this afternoon. Let the bread baking begin!
10.31.2006
Pizza Dough and Fresh Tomato Sauce

Last night, I cooked up a wonderful dinner courtesy of a new cookbook I purchased for $15 dollars at Borders a few weeks ago, The Gourmet Cookbook. I have no idea why it was on sale for so little, but this book is huge and full of unique, vamped up stand-by and satisfying recipes.
The recipe is like any pizza dough recipe but they provide tips for shaping and detailed instruction for execution. I followed their method and came out with a wonderful pizza dough. The whole process was so enjoyable as I always find working with dough. I just wish that I had a pizza stone to cook it on then it would have been perfection. I had also planned to go along with our fresh pizza dough, the accompaning recipe found a few pages beyond: Fresh Tomato Sauce.
Growing up, I never knew the exsistence of a jarred tomato sauce. Every Sunday morning before church, my mom would begin preparing her sauce for our pasta, which we had every Sunday as far back as I can remember. The sauce would sit on the stove simmering for hours until around early evening when the pasta would get boiling, the ricotta would be dished, black and green olives placed, and the occasional thick rounds of soppresta sliced. As a young adult, I still cannot fathom the use of a jarred sauce; sorry Mr. Newman... I appreciate it and all but there's nothing like homemade. The unlaborious, gratifying task of making tomato sauce is worthy of the 15 minutes preparation for Sunday evening pasta and the following dishes it will adorn over the week. The flavor and love behind it are too special to pass off to a store shelf.
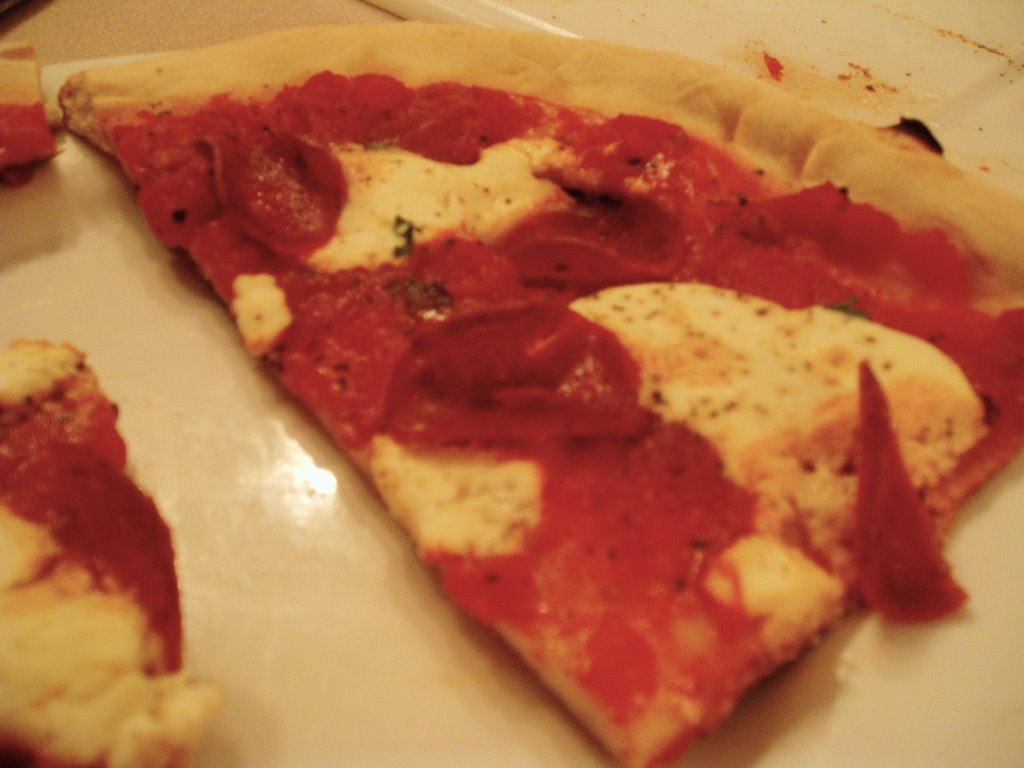
Since we are usually fairly healthy, although more slippage has occured lately, I topped the pizza with large dollops fat free ricotta, turkey pepperoni and a sprinkle of dried basil and pepper. The crust came out very nice, no runny topping falling off the pizza, however, I think I should cook it a tad less next time because although good and crunchy; I prefer my crust a little softer to the bite. The tomato sauce was truely perfection. I definitely found my go-to recipe for tomato sauce. Even though I halved the recipe, I've already used it to make other dishes this week that were equally as tasty.
The pizza dough recipe is a bit long to type out; the book itself is a good resource - I would recommend it highly. Here the recipe adapted slightly for the sauce; I subbed whole no-salt added tomato just because they were cheaper, hence, a smaller dent in my already small budget.
Fresh Tomato Sauce
adapted from The Gourmet Cookbook
3, 28oz cans whole no-salt added tomatos
1 1/2 tbsp. extra virgin olive oil
3 garlic cloves, chopped
1/2 tsp. sugar
1/2 tsp. salt (and more to taste as cooking)
1/4 cup fresh flat-leaf parsley
Roughly chop tomatoes, reserve juices and set aside.
Heat oil in large pot over moderately high heat until hot but not smoking. Add garlic and cook, stirring until just golden, about 1 minute. Add tomatoes, reserved juice, sugar, and salt, bring to a simmer and simmer, uncovering, stirring occasionally until thickened, 45 minutes to 1 hour.
Stir in parsley and salt to taste.
Other dishes so far that I have used with this was a healthy, delicious baked chicken parmesean and there's still enough sauce to use again! I'm in love!
10.29.2006
Rustic Chickpea Vegetable Soup
After a weekend of many sinfully wonderful indulgences all over Atlanta, GA (post to follow eventually), sampling desserts and famed greasy drive-in food; I felt the need for vegetables in heaping abundance.
I've been trying to incorporate some of my normal healthful habits into my cooking rather than just eating the stand-bys; The easily prepared grilled chicken and steamed vegetables. Although delicious, these are just not satisfying me; cooking is satisfying. I came up with this recipe because I did not have my computer on hand to look one up and no recipe fit exactly what I wanted. The measurements are approximate, hence the word "rustic" in the title, and it is absolutely delicious.
Rustic Chickpea Vegetable Soup
from yours truly.
1 tsp. olive oil
1 1/2 cups chopped yellow onion
2 garlic cloves, chopped
1 1/2 cups carrots, chopped
1 cup celery, chopped
1, 15oz can chick peas, drained and rinsed
4 cups organic vegetable stock
4 -5 cups water
1 1/2 cups mushrooms, sliced
1 1/2 cups zucchini, chopped
3/4 cup yellow squash, chooped
1 can diced no-salt added tomatos
1/4 cup fresh chopped parsley
1 tsp. salt
1/2 tsp. pepper
1/2 tsp. ground thyme, heaping
3/4 tsp. ground basil
1/4 tsp. ground sage
1/4 tsp. ground paprika
Brown rice, optional.
Heat olive oil in soup pot on medium-high heat. Add onions, garlic, carrots, and celery and sautee for about 2 minutes until fragrant; Add chick peas.
Pour the 4 cups of stock and 4-5 cups of water into pot, add rest of ingredients and bring soup to a boil. When it reaches a boil, reduce heat to a simmer and simmer for at least 30 minutes.
If you are going to prepare rice, begin this while the soup is simmering.
Sprinkle with a pinch of fresh chopped parsley, add spoonfuls of brown rice to soup if desired and serve!
Not a great photo but as you were eating it was visually delicious as well; the vegetables were chunky and tender but not mushy. I'm not in the mood to write too much more right now but I'll back for later as I have big plans for later to go along with that leftover soup!
I've been trying to incorporate some of my normal healthful habits into my cooking rather than just eating the stand-bys; The easily prepared grilled chicken and steamed vegetables. Although delicious, these are just not satisfying me; cooking is satisfying. I came up with this recipe because I did not have my computer on hand to look one up and no recipe fit exactly what I wanted. The measurements are approximate, hence the word "rustic" in the title, and it is absolutely delicious.
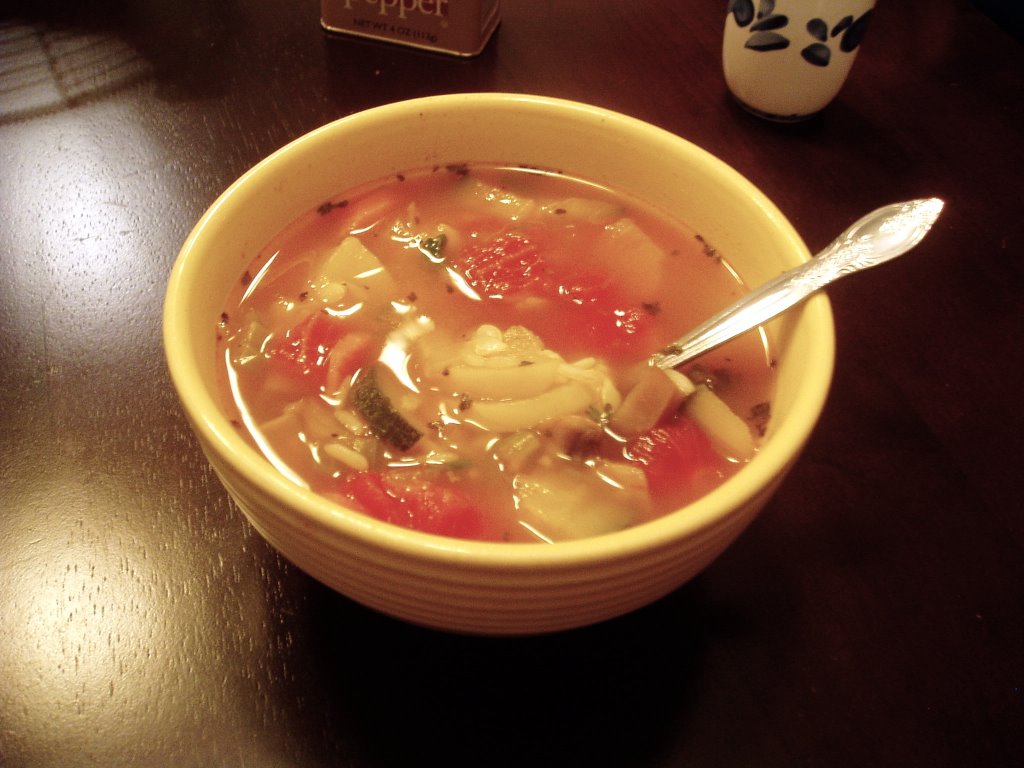
Rustic Chickpea Vegetable Soup
from yours truly.
1 tsp. olive oil
1 1/2 cups chopped yellow onion
2 garlic cloves, chopped
1 1/2 cups carrots, chopped
1 cup celery, chopped
1, 15oz can chick peas, drained and rinsed
4 cups organic vegetable stock
4 -5 cups water
1 1/2 cups mushrooms, sliced
1 1/2 cups zucchini, chopped
3/4 cup yellow squash, chooped
1 can diced no-salt added tomatos
1/4 cup fresh chopped parsley
1 tsp. salt
1/2 tsp. pepper
1/2 tsp. ground thyme, heaping
3/4 tsp. ground basil
1/4 tsp. ground sage
1/4 tsp. ground paprika
Brown rice, optional.
Heat olive oil in soup pot on medium-high heat. Add onions, garlic, carrots, and celery and sautee for about 2 minutes until fragrant; Add chick peas.
Pour the 4 cups of stock and 4-5 cups of water into pot, add rest of ingredients and bring soup to a boil. When it reaches a boil, reduce heat to a simmer and simmer for at least 30 minutes.
If you are going to prepare rice, begin this while the soup is simmering.
Sprinkle with a pinch of fresh chopped parsley, add spoonfuls of brown rice to soup if desired and serve!
Not a great photo but as you were eating it was visually delicious as well; the vegetables were chunky and tender but not mushy. I'm not in the mood to write too much more right now but I'll back for later as I have big plans for later to go along with that leftover soup!
Subscribe to:
Posts (Atom)