12.30.2006

Walnut Cupcakes with Brown Sugar Buttercream


The first creation from my new mixer! As fatigued and unpleasant as I felt on Friday night, cupcakes prevailed. Hungry folks needed these (although they didn't know they did) and I knew baking would help raise my mood as well.

Cupcakes stuck in my mind to share as the first baking creation from my new Kitchen Aid mixer. Cupcakes just shout "celebration!" and this mixer is worth the celebration.

Not only did I want the first mixer creation to be a cupcake, I wanted it to be special, or perhaps - different, in some way. Everyone has seen vanilla and chocolate; not to down play these flavors, of course... they are wonderful in there own ways. Just not what I wanted.

Martha came through with this wonderful recipe as she did during my cookie baking this Holiday. However, throughout holiday baking I did come across some problems with her; but, I'll save that for another post.

This Walnut Cupcake is fun yet sophisticated but most of all absolutely, down-right delicious. I decided to accompany this cupcake would be Brown Sugar Buttercream, also from Martha. The buttercream is an Italian-meringue style with the sugar and egg-whites being heated together before whipping. The buttercream was very temperamental and I didn't know what to expect but even after I thought I ruined it by over beating; I was able to bring it back (thank god!).

The cupcake was moist, nutty and sweet which was a perfect compliment to the pure buttercream frosting. Neither were overwhelmed by the other or overwhelming in flavor or sweetness. Overall - great experience with my mixer, the cupcakes and just plain ol' baking joy.

Note to self (and any others looking for advice on this recipe): I baked 9 regular cupcakes and 4 mini cupcakes. I halved the recipe and used 2 eggs. Mini-cupcakes took about 7 minutes; regular about 25.

12.27.2006

Christmas Cookies & A Wonderful Gift.. (A bit late, I know)


Hope everyones Holiday's have been filled with wonderful feelings and food. I know mine has; the cookies don't seem to ever disappear.

The picture above and aside is my beloved new Kitchen Aid Professional 600 mixer that my father so surprisingly bought me for Christmas. I wasn't ever expecting to get this although I had pined over it at William Sonoma and internet websites many nights... This gift accompanies many other wonderful baking supplies from other family members and my boyfriend including cake decorating stand, cake stand, mini tart pans, biscuit cutter set, a slip-pat mat and many others. I was definitely spoiled this Christmas. They'll receive wonderful goodies in return in addition to there Christmas cookie bags.

Holiday baking this year was like no other so far. I baked off my own set of holiday delectables for gift giving in addition to mother's traditional Christmas cookies. I wanted a diverse and colorful plate and I think I ended up with just that. I also learned a lot in the process. I love the trials and tribulations of new baking adventures. I feel much more seasoned as a baker after this experience. I learned do not heat your jam for your rugelach too much or else the dough will melt to your work surface (yet still bake up into a yummy little mess of goo), I learned making caramel requires attention and will set your burners a flame if it escapes from your pot, and last but not least: baking alone to your favorite music is more soothing and fun than a warm bath with candles.


Here is the complete set. Starting with the dark chocolatey ones from the left, we have Double Chocolate Brownie Cookies with M&M's adapted from Martha, Caramel Nut Bars from Martha with three types of nuts: Salted Peanuts, Cashews, and Pecans, Trail Mix Cookies adapted from the Gourmet Cookbook - hearty oatmeal cookies chock full of salted peanuts, raisins and chocolate chips, Holiday Butter Spritz from Cooks Illustrated - dipped in semisweet chocolate and white chocolate adorned with holidays sprinkles, pistachios, and almonds. Next is Rugelach from Martha with 5 different fillings: apricot, walnut and brown sugar, spiced apple + brown sugar, spiced apple + brown sugar w/ walnuts, chocolate chip and pistachio and honey almond and last but not least Cranberry Pistachio Biscotti from Martha as well.

Whew. Well I'm going to scour my new cookbooks for a cupcake recipe to christen my new mixer with. One last photo... these rugelach are too good.

12.20.2006

Apricot Almond Danish Braid


This pastry creation from Baking With Julia was so enjoyable to create. Each part of this wonderful danish from the dough to the filling are made with scratch and so much (on the risk of being corny) love. Each fold and roll of the danish dough was so suspenseful, in a nervous, giddy delight; I pondered hopefully for flaky layers but somehow I knew it would not fail. After all the cookbooks and magazines I've read on pastry I felt I knew the dough even before attempting it.

This was the dough the day before the bake-off which was refrigerated till the next morning before it baked off and brought to my younger cousin's Birthday Brunch.

A blurry, close up. My eyes were deceiving me that day.


I can't even express how perfect and delicious it was. The danish's pastry was flaky, buttery, and light and the encased apricot and almond fillings melded harmoniously between the danish crosses. I plan on doing this again if the occasion calls (or not!); the possibilities for filling are endless. A great experience.

I know this entry lacks creativity but this weeks holiday baking has been quite exhausting. I didn't take any pictures yet but the repertoire includes Rugelach (with a variety of fillings), Caramel Nut Bars, Double Chocolate Fudge Cookies w/ M&M's, Butter Spritz Cookies (dipped in white and semi-chocolates and sprinkled with various nuts, sprinkles), Cranberry Pistachio Biscotti, and Oatmeal-Trail Mix Cookies. Blogging will follow eventually once I catch up on my beauty sleep. Happy Holidays to all!

12.13.2006

Chocolate Angel Food Cake

I know I've been a bad blogger; I do apologize for those who might actually enjoy reading of my kitchen adventures. The holidays are stressing me out and I haven't even starting baking! Spending so much money on ingredients for loving home-baked gifts is wonderful but it's dwindling my small budget. Well, enough complaining, In attempts to enjoy dessert every night, I sought to create a longtime light favorite.
When I first starting a life-long (most of the time) healthy eating, active lifestyle, I enjoyed this cake for one of my birthdays layered with cocoa laced fat free cool whip (quite the culinary sin... I know) and topped with fresh fruit. With the addition of my fat free coolwhip, this dessert might be looked down upon; however, it is truly delicious, light, satisfying, guilt free dessert. Sense my guilt?

This wonderful dessert is angel food cake! Before I became slightly baking savvy, we cooked our angel food in a regular cake pan (yikes!). Everyone in the know knows the cake needs the tube pan so it may ever so angelically crawl up the sides to create its wonderful volume.

I decided to chose a simple recipe from Recipezaar after searching since it required minimal ingredients.

I really did follow the recipe exactly, as I usually do the first time around. I figured most of the "playing" with the recipe would be given to the infinite options for fillings, glazes, and frosting. I highly recommend this recipe - it is incredibly moist although the light brown color doesn't scream "chocolate!", is has a prominent chocolate flavor which doesn't overwhelm the cakes lightness.

Calling all faithful dieters (or at least trying)! this recipe might save you.

Chocolate Angel Food Cake
adapted from Recipezaar

2/3 cup sifted cake flour
1/3 cup unsweetened cocoa powder
1 1/2 cup granulated sugar, divided
12 large egg whites, at room temp.
1 1/2 tsp. vanilla
1 1/2 tsp. cream of tartar
1/2 tsp. salt

Pre-heat oven to 375 degrees.

In a large bowl, sift flour, cocoa, sugar together 3 times and set aside.

In a separate large bowl, beat the egg whites at low speed until foamy, about 5 minutes. Add vanilla, cream of tartar, and salt. Gradually increase speed to medium while beating in remaining 3/4 cup of sugar - 1 tbsp at a time for 5 minutes. When sugar is incorporated continue to beat until stiff peaks form about 2 minutes.

Sift 1/3 of dry ingredients over egg whites; gently fold in with rubber spatula. Repeat this process 2 more times until all dry ingredients are incorporated.

Pour batter into ungreased 10 inch tube pan. Cut through batter to remove air pockets. Bake 40-45 minutes, until top springs back when lightly pressed.

Invert and hang pan on neck of object to cool. To unmold run knife around edge of pan; invert pan. Turn cake upright and serve how you please!

The basic nutritionals are as follows for 12 servings - 150 calories, 0.5g fat, 0.9g fiber, 25.3g sugar, 4.7g protein.

I promise I have been reading everyones blogs faithfully but haven't had the time to comment. There is some good stuff going on in the kitchen. I have to start baking my holiday cookies today; let the games begin!

Here is a preview of what I'll be blogging about on my next entry - this was obviously pre-bake . I promise I'll be sooner than later. Happy Baking!

12.01.2006

Thanksgivings Ruminations: Mile High Biscuits and Mom's Apple Crumb Pie

Better late than never as we creep into the morning of the 1st of December. I still haven't a gift for anyone or finalized what I'd like to bake for the approaching holiday festivities but regardless, I'll give the gift of blog this morning!

Thanksgiving was wonderful, full of food and family. I was happy that my mom decided to join us down in South Carolina even though we are returning to CT this weekend (yikes). And what comes with Mom is my favorite dessert. Yes, I am bold enough to say that this dessert is my absolute favorite. I have no mercy when it's comes to mile high crumbs over crisp flavorful orchid apples and perfectly flaky crust. I had it for breakfast for 2 mornings after Thanksgiving (another, yikes); I can't forsake the pie if it's there. The apple crumb pie brought to you by my mother and now myself is a compilation of different recipes from my family. The pie portion comes from the Betty Crocker Cookbook, the crumbs are a recipe from my great grandmother's coffee cake recipe, and the crusts have changed a few times but for this pie I rolled out a wonderful crust from Baking With Julia.

This second attempt at pie crust with Baking With Julia was perfect. Since my Pate Brisee flop, I had read up a great portion on pie crust and was ready to tackle again head on. I decided for the time being to use a recipe that contained butter and shortening. I never grew up with shortening in my house and this was a very scary, foreign object that always perplexed me. For baking sake, I used shortening for the first time. What we had in the house (my boyfriends mother's stash) was Crisco shortening in the iconic blue tub. I would definitely not use regular Crisco shortening in the future given the existing trans-fat in the product but I know there are alternatives. Anyway - Julia's recipe was the perfect blend of butter and shortening to create a flavorful and flaky crust. I detest all shortening crusts; They just taste like air. However, I do love all butter crusts but I do have to better my technique with them.
My next Thanksgiving baking adventure was biscuits. I've been yearning to make delicious buttermilk biscuits from scratch since I moved down to the south. I had my fare share since I've come down here but homemade in your own kitchen is always superior. I had planned to make buttermilk rolls but the timing would have been too tricky. It was the perfect opportunity to make biscuits for the bread quota of the Thanksgiving table. Making them was fun and suspenseful, to see if they were everything they were cracked up to be. I used the recipe from a little cookbook I picked up in the Charleston from The Hominy Grill entitled Mile High Biscuits. I don't feel I should post the recipe from there but it included all of your basic biscuit ingredients: soft wheat flour, salt, baking powder, buttermilk, butter, shortening and lard. Instead of soft wheat flour, I used AP because I had it on hand and is perfectly acceptable and no lard because I never have that on hand but I would interesting in trying it in the biscuits. Lard repulses and intrigues me at the same time.These were the biscuits prior to baking. I stored them in the fridge until we were just about ready to eat; they only needed 10-12 minutes in the oven. I've said it before but these really were everything I hoped they would be. Warm, buttery and flaky, the layers just peeled away and melted in your mouth; I would know, I ate about 5 of the 15.

Well, glad I finally got this written; Can't wait to do it again next year.

11.25.2006

Sicilian Cassata Cake

The cannoli. One of the many pastry concoctions my family holds near and dear to their Italian hearts. Since I was born, Cannoli's would appear on our dessert table from esteemed New York City Italian pastry shops to be quickly devoured by each member except myself. Anything that was not chocolate did not pass these lips for a very long time - too long, but I think I've redeemed myself. Each aspect of a cannoli is perfection in it's own right, beginning with the shell. A cylindrical, fried to perfection, crisp and sturdy bassinet to cradle the delicately dense ricotta cream filling. The ricotta cream is perfectly blended with sugar to create a subtle sweetness to it's rich flavor and texture and a hint of cinnamon to complete the delight.

It's only fitting that the Cassata Cake was a starring guest, although infrequently, at our birthday tables. My mother would be the only one to tackle this complicated cake besides an Italian bakery. She made it for my Grandpa on his birthday and now I would make it for her on her birthday.

I really wanted to make this perfect so I sought out to find exactly what the components of a Cassata Cake were and go from there. The cake layers were Italian sponge cake which is purely leavened from all the eggs in the recipe and filled with cannoli cream although they added other things to cream that I didn't usually find in standard cannoli cream. Their were different ways for topping the cake such as chocolate glaze but my mother is a vanilla-o-holic, so vanilla glaze won.

I chose a recipe from Nick Malgieri for Pan Di Spanga cake layers and my cannoli cream recipe from epicurious.com to compile my Cassata Cake.

Pan Di Spanga
adapted slightly, curteousy of dianasdesserts.com

2/3 cup all purpose flour
1/3 cup cornstarch
5 large eggs, separated
1 cup sugar, divided
2 tsp. vanilla extract
Pinch of salt

Preheat oven to 350 degrees. Butter a 9 or 10 inch spring form pan (the original suggested lining with buttered parchment but I did not have any).

In a small bowl stir together flour and cornstarch.

In bowl with an electric mixer with the whisk attachment, whip egg yolks and half the sugar and the vanilla on medium speed for 2 minutes, until they are light and fluffy.

In another bowl, with whisk attachment for electric mixer, whip the egg whites and salt on medium speed until white and opaque. Add remaining sugar 1 tbsp. at a time, and continue whipping until whites hold firm peak when whisk is lifted.

Using a large rubber spatula, fold yolk mixture into whites. Sift 1/3 of flour mixture over eggs and fold in; repeat 2-3 times until all the flour has been incorporated. Scrape batter into prepared pan and smooth the top. Bake until well risen and well colored. About 30-40 minutes (30 was too little for me and when I took it out and thought it was done the top-middle portion was too wet; I'd give it closer to 40).

Remove cake from oven and run knife around edges to loosen; remove sides. Slide cake onto wire racks to cool. Cool completely before slicing to be used for other cakes; Refrigerate or freeze for 1 day for more even cut layers. It can be refrigerated for several days before use.


Cannoli Filling
adapted from Epicurious.com - Silician Cannoli Recipe

1 lb ricotta (2 cups) + 2 oz
1/2 cup confectioners sugar, scant
1/4 tsp. cinnamon
1/4 cup mini semi-sweet chocolate chips

Beat together ricotta, confectioners sugar, and cinnamon with an electric mixer on medium speed until smooth. Fold in chocolate and chill.

From this experience, I would highly suggest making this 1 or 2 days ahead so as the filling sits you can drain the water a few times during the day for a denser, less wet filling. Or I suppose you could strain the ricotta prior to mixing.

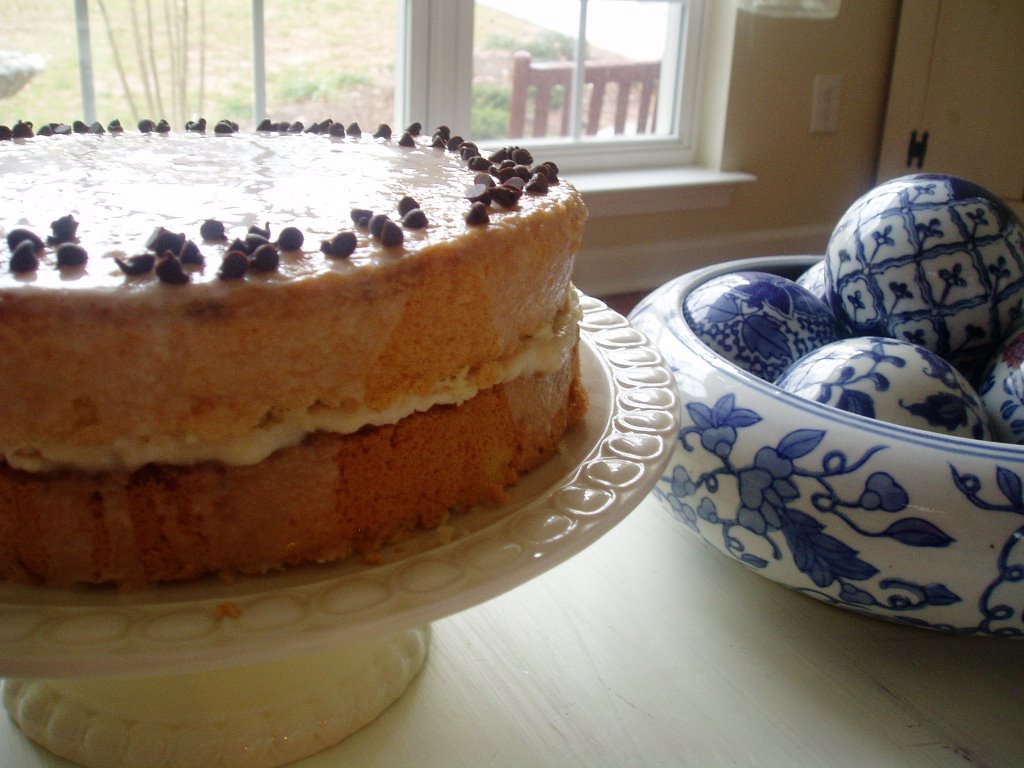
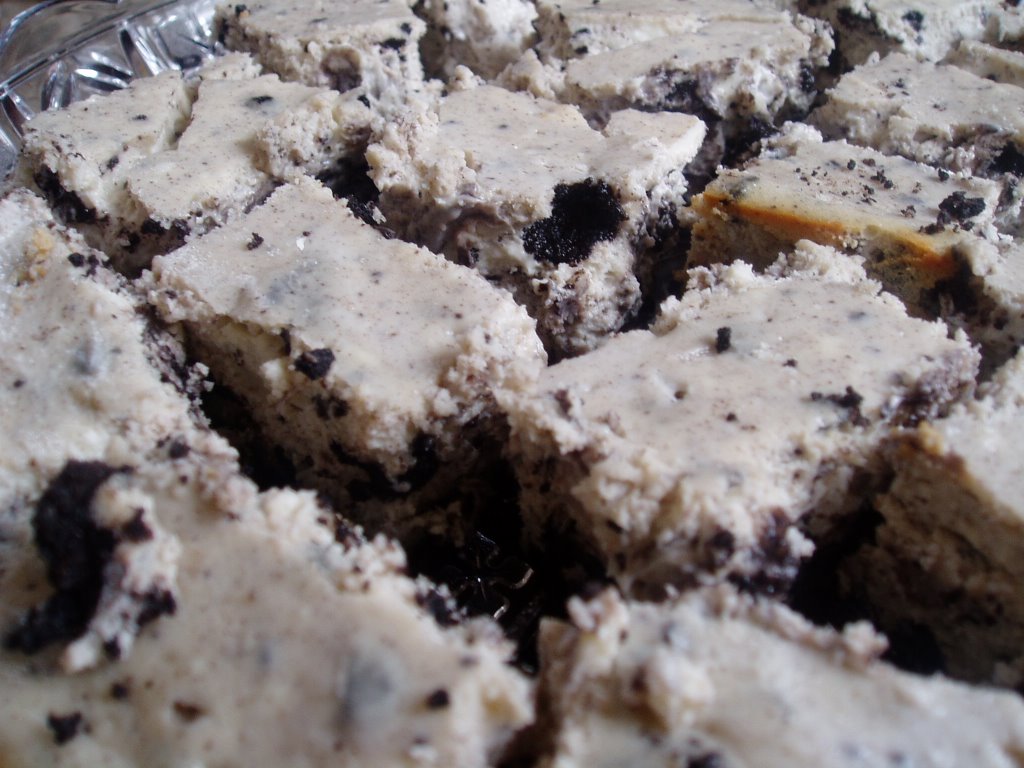
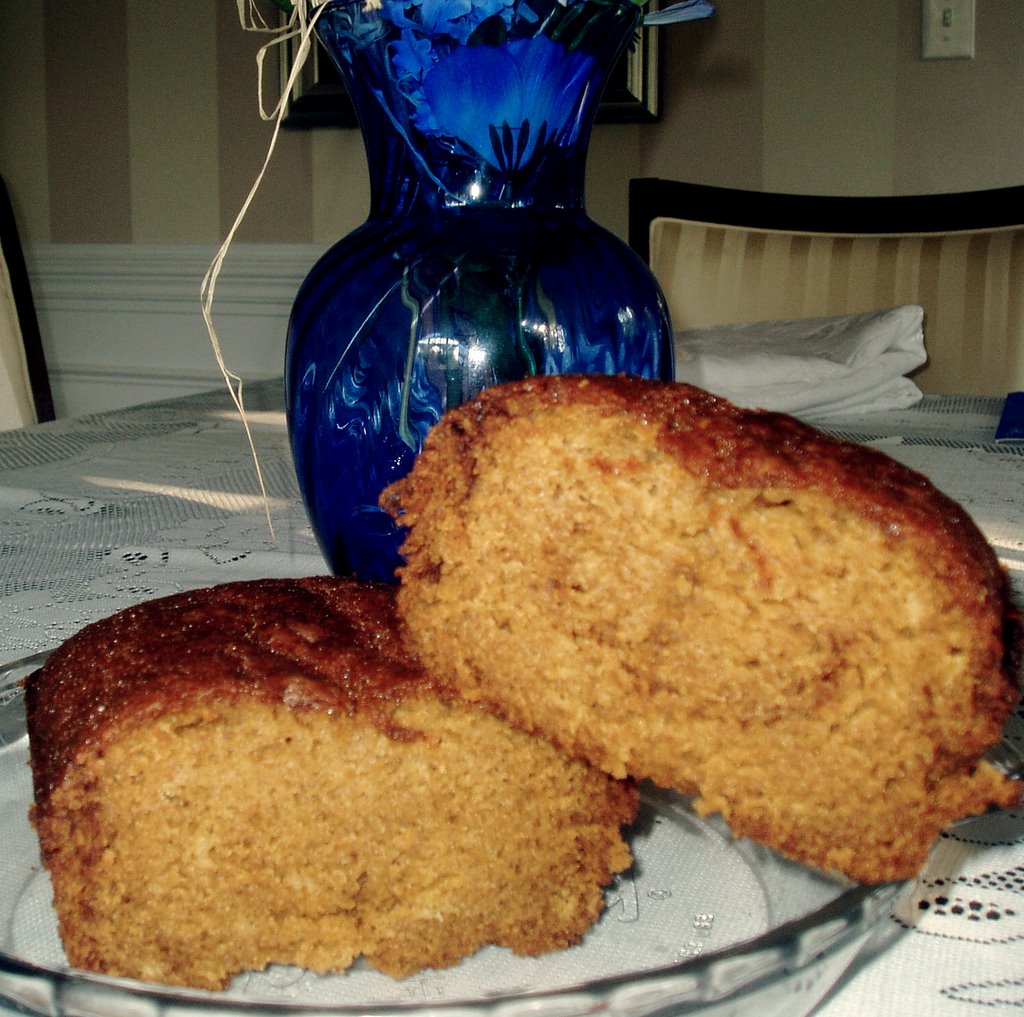
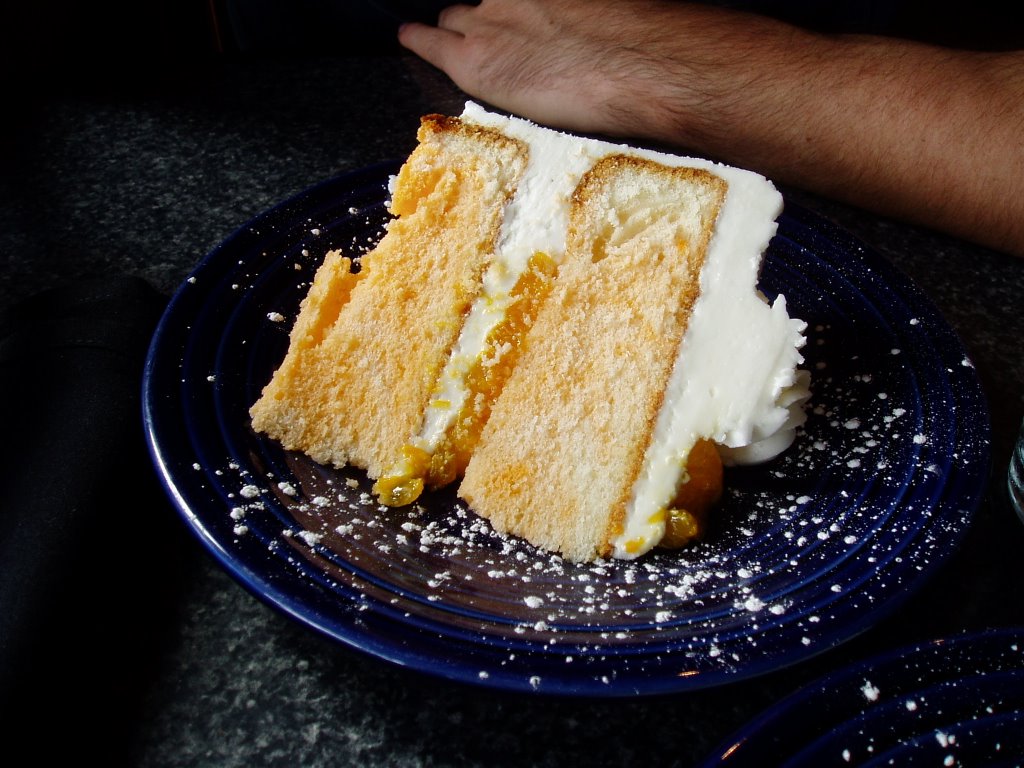
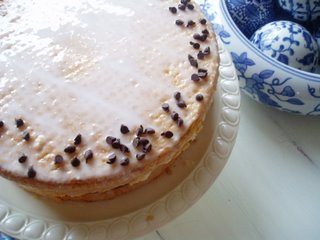
Assemblage was cutting the cake into two layers and spreading the cannoli filling between the layers and pouring a vanilla glaze over the cake and decorating with more mini chocolate chips.

For the record, the cake was outstanding; there was a tiny piece left which was devoured quickly the next night for dessert. I really enjoyed making this cake especially for such a special birthday for a truly special person- my mom.

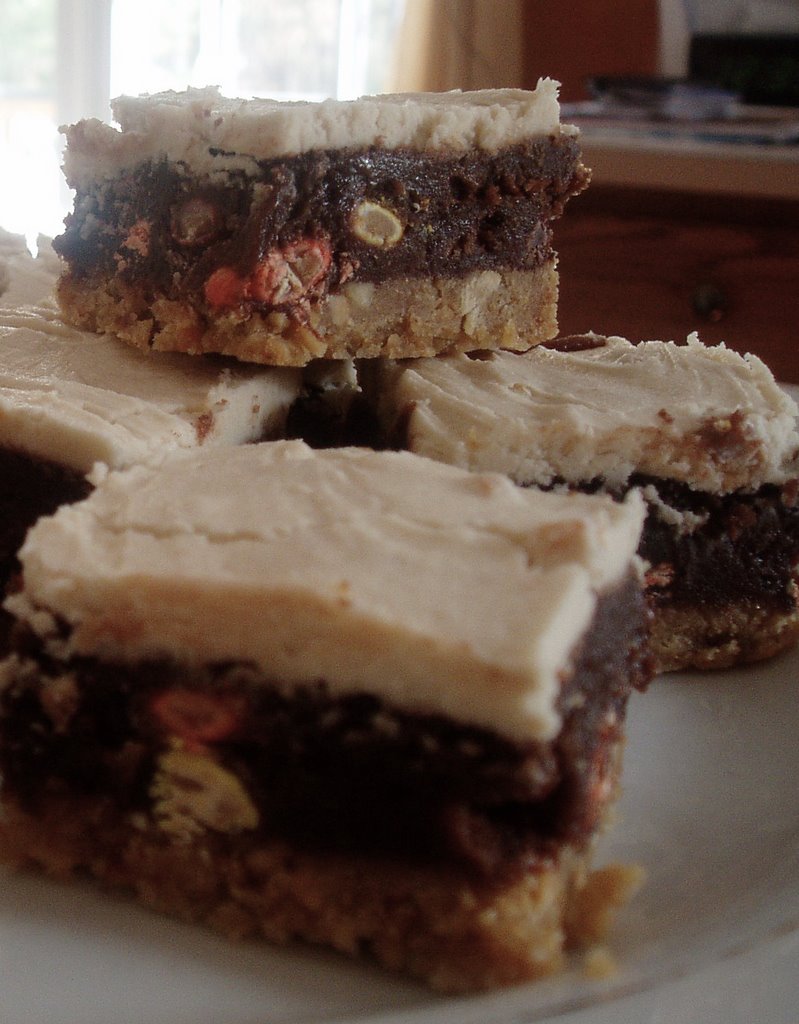
The sponge cake was light and sweet and perfectly complimented the mild ricotta filling; the vanilla glaze gave a super sweet contrasting bite which was very enjoyable. I would definitely make this cake again, perhaps experimenting with some different toppings/glazes.
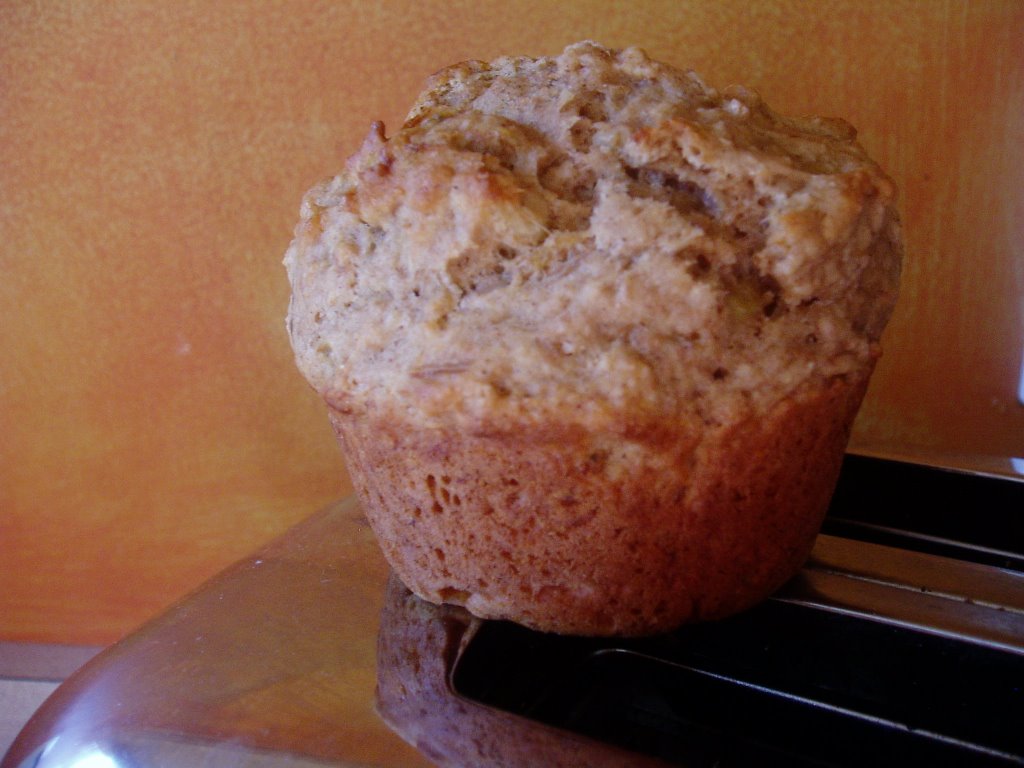
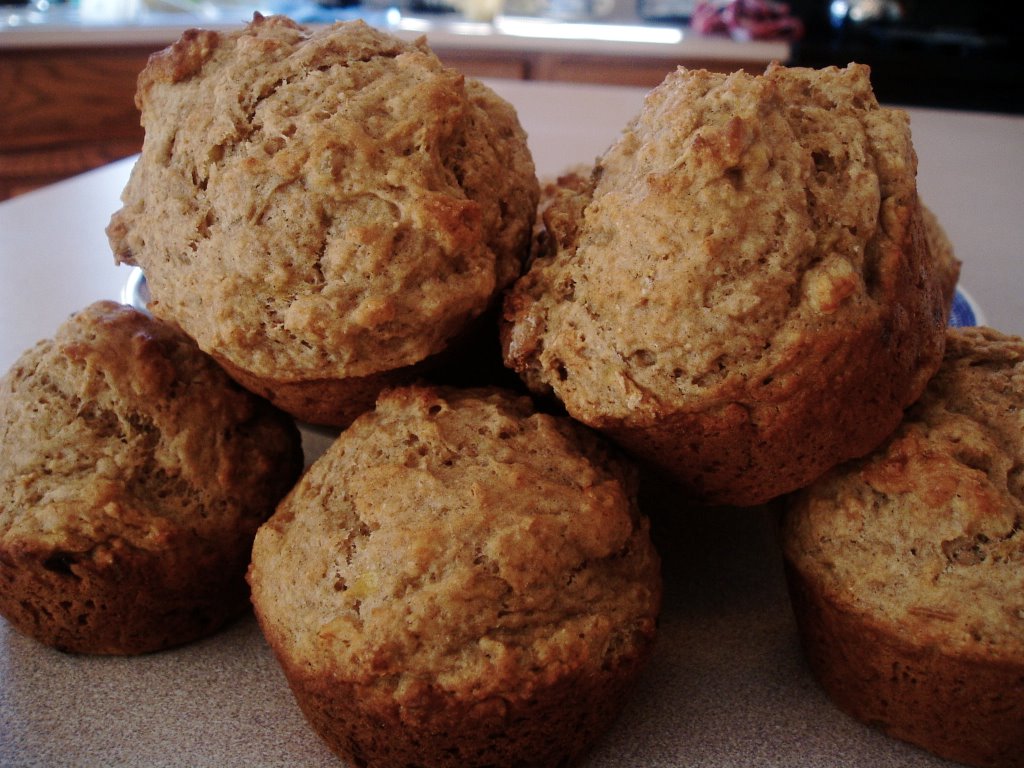
11.21.2006

Oreo Cheesecake & Strawberry Oatmeal Jam Bars... and CIA!

I can't save this news for last; I got accepted to the Culinary Institute of America for Winter 2007 in the AOS program for Baking and Pastry! The woman called me yesterday on the phone to congratulate me; My dream come true is really happening.

Anyway, let me report on some backed up culinary adventures since there are gonna be another good handful with the upcoming days including my mother's birthday which is today. I am in the process of making a slightly altered version of an authentic Silician Cassata Cake or Cannoli Cake. Everyone is greatly anticipating this tonight for dessert... as am I.

Last weekend during my families time of mourning we all gathered everyday for about 4 days and what would any family event be without an over abundence of food. I wanted to keep morale up and tried to do so one of the best ways I know how - providing delicious comforting desserts. I received an interesting magazine from a co-worked who knew my love for baking and desserts after showing up at work with goodies to share; It was a Kraft Food and Family magazine she received in the mail. I browsed through and everything was mostly easy and quick recipes for food and desserts. Like, use these Kraft's products here, use this brownie mix for these... kinda thing; You get the picture. On the back cover however was a very inticing picture for Oreo Cheesecake Bars; Oreo's being a Kraft division product of course. The recipe is prepared with ease and minimal ingredients and looked so delicious; who doesn't love Oreos? This was my first venture in cheesecake and putting together the ingredients was simple however judging bake time and cutting these bars were not.
Oreo Cheesecake Bars
adapted from Kraft Food & Family Magazine (Backcover)

1 pkg. Oreo cookies, divided
1/4 cup butter, melted
4 pkg. (8 oz each) Cream Cheese, softened
1 cup sugar
1 tsp. vanilla
1 cup sour cream
4 eggs

Preheat oven to 325 degrees and prepare a greased 13X9 baking dish (the original called for foil but I've never used that method).

Place 30 of the cookies into a food processor and process until finely ground. Add butter and mix well. Press firmly to bottom of prepared pan.

Beat cream cheese, sugar and vanilla in large bowl with electric mixer on medium speed until well blended. Add sour cream; mix well. Add eggs, one at a time, beating just until blended after each addition. Chop the remaining cookies and fold into cheesecake mixture (You can reserve some to sprinkle on top but I forgot).

Bake 45 minutes or until center is set. Cool and refrigerate for at least 4 hours or overnight. Cut into bars and serve! I cut mine much more bite size than the original serving suggestion of 16; these are dense and filling.


I also made my favorite loved Oatmeal Jam Bars which I filled with Strawberry Preserves. I first blogged about them - here where you'll find the recipe as well. This time I actually had enough ingredients so I could double the crust and still put a generous amount of crumbles on top. Delicious as usual... I think raspberry preserves are still my favorite for these. These bars always get raved about and they are so adaptable to different fillings; Next time I would really like to tried a spiced pear butter. They work better in my opinion with a mild sweetness to the filling as opposed to very sweet.

I'm off to continue birthday baking and blog reading for the morning.

11.17.2006

Back with Hearty Whole Wheat Banana Muffins


Thanks so much for the kind words - I really appreciate it. I've missed blogging and baking but I got to do a bit over the past week that I haven't shared yet.

Last Thursday - I actually had made these Banana Muffins in the morning but that's when all the madness began. At work the previous night they were going to throw away some barely browned banana's and I volunteered to take them instead of wasting them. Muffins seemed like the best option for something healthy for the morning; unless it's a special day, my morning meal is a usually a combination of fruit and whole grain.

I adapted this recipe out of my Better Homes and Gardens New Cookbook binder from the Oat Bran Muffin recipe.

Hearty Whole Wheat Banana Muffins

1 1/4 cups organic whole wheat flour
1 cup unbleached all-purpose flour
1/4 cup brown sugar
2 tsp. baking powder
1/4 tsp. baking soda
1/4 tsp. salt
1 beaten egg
3/4 cup mashed banana, heaping
3/4 cup fat-free buttermilk
1 tbsp. unsalted butter, melted

1/4 cup chopped walnuts

Lightly coat 12 - 2 1/2" muffins cups and set aside. Pre-heat oven to 400 degrees.

In a medium bowl combine ww flour, AP flour, baking powder, brown sugar, baking soda and salt. Make a well in center of flour mixture and set aside. Mix in walnuts.

In a small bowl combine egg, banana, buttermilk, and butter. Add all at once to flour mixture. Stir just until moistened (batter should be lumpy).

Divide batter evenly among muffins cups. Bake in 400 degree oven for 16 to 18 minutes or until golden and object inserted in center comes out clean. Cool in muffin cups on a wire rack for 5 minutes. Remove from cups; serve warm.


My boyfriend and I ate the muffins warm from the oven and they
were tasty but could have used a bit more moisture. I would try a full cup of buttermilk next time since the original ingredients calls for 1/4 cup of honey contributing to the moist ingredients which I subbed from brown sugar. I could tell the batter was a bit thick but didn't want to risk drier muffins by more stirring. I will definitely make these again with a few tweaks. I only filled 10 out of the 12 muffins cups and I liked the size they came out; they rose nice and big.

I probably won't be able to blog about the Oreo Cheesecake or Strawberry Oatmeal Jam Bars until I get a replacement computer charger ... Long story.

I'll get that worked out today somehow but in good news, my application for the Culinary Institute of America is complete and in for review. I should find out in about a week about acceptance and dates and such. I'm off to go read all your blogs until my computer runs out of batteries!

11.10.2006

A Moment of Silence

My grandmother passed away yesterday morning to much despair of my family. May she rest in peace with my grandfather.

She used to make me salami sandwiches on toasted italian bread when she watched us after school. That unique combination never fails to remind me of her.

I'll be back in a few day with lots to share.

11.06.2006

Reeses Pieces Brownies with Peanut Butter Frosting

These brownies were last nights project. I had leftover Reeses Pieces from a movie that were just begging to be apart of a baking creation. I hope this information doesn't offend but I've never been a huge fan of peanut butter; being that I never ate it when I was growing up, not even the coveted kid sandwich, PB & J. As I get older, my palette is becoming more and more diverse; The more I try, the more I like! I think my like for nut butters began when I was vegan and I used to go to my favorite natural food store, Lifethyme, complete with an amazing vegan bakery. They had the dreamiest cakes, combinations I would have never thought of; my favorite was the blueberry lemon cake with the creamiest, not too sweet, cashew butter frosting. Those cakes are still some of the best I've ever had, vegan or not.

Back to the brownies. I was originally going to go for an uninspired butter cookie mixed with the Reese Pieces but my boyfriend expressed interest in the combination chocolate and peanut butter. I was re-browsing my holiday baking magazines and found a brownie article in Better Homes and Gardens: Holiday Baking featuring different brownie combinations. This one called for just plain PB chips in the brownie batter portion so I substituted my Reeses pieces.

The reviews concluded that they were overall too sweet for my household members taste; I have to agree. The brownie portion was like fudge and peanut butter frosting did them in. I liked them but I definitely agree there could have been a better balance. I'm not sure how others would feel about them; I probably won't make them again but it was an easy recipe to prepare and came out very nice.


Reese Pieces Brownies with Peanut Butter Frosting
adapted from Better Homes and Gardens: Holiday Baking Magazine

1 1/4 cups crushed graham crackers (approx. 8 full cracker sheets)
1 1/4 cups sugar
1/4 cup finely chopped lightly salted peanuts
1/2 cup butter, melted
1/2 cup butter
2 ounces unsweetened chocolate, cut up
2 eggs
1 tsp. vanilla
2/3 cup all-purpose flour
1/2 cup Reeses' Pieces

Peanut Butter Frosting
1/4 cup butter
2 tbsp peanut butter (smooth or crunchy)
1 cup powdered sugar
1 tbsp. milk
1/2 tsp. vanilla

Preheat oven to 350. For crust: combine graham crackers, 1/4 cup of the sugar and chopped peanuts. Stir in half cup melted butter. Press mixture evenly into an ungreased 9X6X 1 1/4- inch pan (I had to buy a weird sized foil pan because I didn't have the specified 11X7X1 1/2-inch pan so something around these measurements would be fine). Bake for 5 minutes; cool.

For filling: In heavy saucepan, combine the 1/2 cup butter and the chocolate; heat and stir over low heat until melted. Remove from heat. Add the remaining 1 cup sugar, eggs, and vanilla; stir just until combined. Stir in flour and Reeses' Pieces. Spread evenly over crust. Bake for 20 minutes.

Cool in pan on a wire rack - do not cut brownies will they are warm, moisture will escape as steam and they may be dry when cooled. Spread with PB Frosting. Cut into bars - Makes 20 brownies.

For frosting: In bowl combine butter and peanut butter and beat with an electric mixer on low speed for 30 seconds. Gradually add the powdered sugar, beating well. Beat in milk and the vanilla. As you beat in the powdered sugar if it's too thick add enough milk to make a frosting that spreads easily.

You can cover and chill these for up to two days. They cut more evenly after being chilled. If your preparing ahead do not cut the bars until serving.

I ordered 2 new cookbooks from amazon that are on the way: The Bread Bakers Apprentice and Macrina Bakery Cookbook... they shipped today, yay! I am hopefully going to make some soup today and bread to follow. We'll see how the day goes.

11.04.2006

Baked Sweet Potato Bread


I feel poorly for the lack of dessert/baked goods in my blog. I have to admit there is a problem with my obsession with pastry and sugary treats, well, a few problems. One of them is the sheer health of it all; although I do believe in "healthy" indulgences, having baked goods around the time is not conducive to my healthy lifestyle because believe me, if there are cakes, tarts, pies, and cookies around me; they will be eaten. Moderation is not my strong suit especially when it comes to dessert. Another reason is budget; which is very humble lately. I'd love to run out and buy each ingredient at the store for baking just to have on hand when inspiration sparks but I have to spend fairly frugally as of now. Third, I have no one to eat my baked goods, which makes me utterly sad. My boyfriends mother is allergic to nuts (among 100's of other things) and is fairly picky; so, she's out. My boyfriend's father is away 3 weeks out of each month for business, not at all picky and loves to eat but is not around. His sister, currently, is on a low-fat diet; enough said. As his sister, my boyfriend is routinely on a rigid "diet" as a part of his regular healthy lifestyle and will only eat my baked goods on Mondays (a.k.a "cheat day", to those in the know in the diet world). And then there was one, me, what's a girl to do?

With that said, I've been baking more bread; It is equally near and dear to my heart when it comes to baking. There are countless reasons of my love for bread that have evolved from the simple enjoyment of eating it to baking it. I could keep going on this subject but I'll save that for another time. I've always been known as the bread girl in my family and nothing has changed. Today's bread baking venture was an all day affair. I was looking forward to baking some breads with slow rises because slow rises are supposed to improve the taste and texture the bread. Being that it was a slightly chilly 30 degrees this morning - it was the perfect day. I also wanted something a bit unique but easy to work with as I ease my way back into baking.

The Baked Potato Bread, from the Fresh Loaf, looked enticing but there were no baked potatoes to be found but there were sweet potatoes. An idea was born. I loved the idea of being able to use sweet potatoes as a unique ingredient in my bread that I hadn't previously thought of as a possibility. I adapted the recipe as I desired, hoping for the best. I wanted it to be healthy, unique, but overall, just delicious.

and it was.

Baked Sweet Potato Bread
adapted from Potato Rosemary Bread from The Fresh Loaf

1 packet active dry yeast
1 cup water
1 cup mashed sweet potato, heaping (could be boiled or baked)
2 1/4 cups bread flour
1 1/4 cups whole wheat flour
2 tsp. salt
1 tsp. pepper
1 tsp. sage

Mix packet of yeast with 1/4 cup of warm water (110-115 degrees); let sit for 5 minutes.

In a large bowl mix the whole wheat flour, 2 cups of the bread flour, water, yeast mixtures, salt, pepper and sage; reserve 1/4 cup of flour. Mix until dough begins to form turn out dough on floured work surface and knead for 6-9 minutes, incorporating the remaining 1/4 cup of flour. Once dough feels "ready", place the dough in a greased bowl and cover the bowl with a moist towel until double in size, about 1 - 2 1/2 hrs (depending on temperature environment where bowl is).

Remove dough from the bowl; de-gas it and shape it. You may make a large loaf, 2 small loaves, 12 large rolls... whatever you like! Placed them on a greased baking sheet and set aside to rise again until doubled (about 1 - 1 1/2 hrs).

When ready, pre-heat oven to 500 degrees (this will give a good last rise to the bread from the heat) and put dough in oven. Bake at 500 for 5-8 minutes then drop temperature down to 375 for 15-22 minutes depending on loaf size (rolls will take less time). When rolls are done they look brown/dark brown and sound hollow when tapped. Remove rolls and allow to cool before serving (as usual, I did sample out of the oven and I would definitely recommend letting them cool before eating/serving). They keep well at room temperature for 1-2 days without any deterioration in in flavor or texture.

I created one small loaf and 5 medium sized rolls for the household. Although, the sweetness of the sweet potato did not stand out in the bread; I think it definitely enhanced the overall flavor of bread compared to a normal baked potato. The loaf had a slight peppery bite which was pleasing to all the family members, who really liked the bread. It had a wonderful dense but soft, chewy crumb. My boyfriend and I made little sandwiches with roasted chicken breast shreds and BBQ sauce... definitely perfect for sandwiches. I have to go get prepared for this evenings baking adventure!

11.02.2006

Baguettes


I have been thinking about starting my bread baking full time again. I'm tired of store bought loaves; The closest thing I've come to good bread is from the little La Brea Bakery kiosk in my local supermarket where they bake 2/3's baked loaves in a little convection oven to get them to you hot.

It baffles me to see 2-3 weeks old loaves of store bought bread sitting the bread pantry that look as they were just baked yesterday; what are they putting in these things?! In this turmoil, I headed to the closest health food supermarket to seek out an organic, no perservative loaf in case of emergencies. I found an oraganic millet and flax loaf that happens to be gluten free as well which was nice, made a nice breakfast toast. I used to regularly buy Ezekiel's Seasame Loaf but my boyfriend's mom is deathly allergic to seasame seeds - so that was a no go.

Getting back to me bread baking, my "skills", which were mediocre for a home baker, have slightly dwindled. I don't remember the process as well as I did. So, I started simple a recipe from Cooking Light for Baguettes. I know, probably not the best place for a baguette recipe but what I was looking for was simplicity, a small list of ingredients, not much prep, and hot bread before work.

Little did I know how many problems I would run into, including, shattering a glass baking dish in the oven. Good job. I won't go into detail about anything else.

In the end, the loaf was ready right as I was walking out the door. I sliced off a steaming end of my "baguette" and bit into bread bliss. It actually had a good flavor and crust was nice, crunchy and brown but the bottom was a bit under done on the bigger of the two. I would recommend this recipe for anyone wanting some fresh bread with menial effort and large margin for error. *I'll post the recipe later on today.
Today, I'm gonna search for a bread recipe to prepare for tomorrow so I can start a poolish this afternoon. Let the bread baking begin!

10.31.2006

Pizza Dough and Fresh Tomato Sauce


Last night, I cooked up a wonderful dinner courtesy of a new cookbook I purchased for $15 dollars at Borders a few weeks ago, The Gourmet Cookbook. I have no idea why it was on sale for so little, but this book is huge and full of unique, vamped up stand-by and satisfying recipes.

The recipe is like any pizza dough recipe but they provide tips for shaping and detailed instruction for execution. I followed their method and came out with a wonderful pizza dough. The whole process was so enjoyable as I always find working with dough. I just wish that I had a pizza stone to cook it on then it would have been perfection. I had also planned to go along with our fresh pizza dough, the accompaning recipe found a few pages beyond: Fresh Tomato Sauce.

Growing up, I never knew the exsistence of a jarred tomato sauce. Every Sunday morning before church, my mom would begin preparing her sauce for our pasta, which we had every Sunday as far back as I can remember. The sauce would sit on the stove simmering for hours until around early evening when the pasta would get boiling, the ricotta would be dished, black and green olives placed, and the occasional thick rounds of soppresta sliced. As a young adult, I still cannot fathom the use of a jarred sauce; sorry Mr. Newman... I appreciate it and all but there's nothing like homemade. The unlaborious, gratifying task of making tomato sauce is worthy of the 15 minutes preparation for Sunday evening pasta and the following dishes it will adorn over the week. The flavor and love behind it are too special to pass off to a store shelf.

Since we are usually fairly healthy, although more slippage has occured lately, I topped the pizza with large dollops fat free ricotta, turkey pepperoni and a sprinkle of dried basil and pepper. The crust came out very nice, no runny topping falling off the pizza, however, I think I should cook it a tad less next time because although good and crunchy; I prefer my crust a little softer to the bite. The tomato sauce was truely perfection. I definitely found my go-to recipe for tomato sauce. Even though I halved the recipe, I've already used it to make other dishes this week that were equally as tasty.

The pizza dough recipe is a bit long to type out; the book itself is a good resource - I would recommend it highly. Here the recipe adapted slightly for the sauce; I subbed whole no-salt added tomato just because they were cheaper, hence, a smaller dent in my already small budget.

Fresh Tomato Sauce
adapted from The Gourmet Cookbook

3, 28oz cans whole no-salt added tomatos
1 1/2 tbsp. extra virgin olive oil
3 garlic cloves, chopped
1/2 tsp. sugar
1/2 tsp. salt (and more to taste as cooking)
1/4 cup fresh flat-leaf parsley

Roughly chop tomatoes, reserve juices and set aside.

Heat oil in large pot over moderately high heat until hot but not smoking. Add garlic and cook, stirring until just golden, about 1 minute. Add tomatoes, reserved juice, sugar, and salt, bring to a simmer and simmer, uncovering, stirring occasionally until thickened, 45 minutes to 1 hour.

Stir in parsley and salt to taste.

Other dishes so far that I have used with this was a healthy, delicious baked chicken parmesean and there's still enough sauce to use again! I'm in love!

10.29.2006

Rustic Chickpea Vegetable Soup

After a weekend of many sinfully wonderful indulgences all over Atlanta, GA (post to follow eventually), sampling desserts and famed greasy drive-in food; I felt the need for vegetables in heaping abundance.

I've been trying to incorporate some of my normal healthful habits into my cooking rather than just eating the stand-bys; The easily prepared grilled chicken and steamed vegetables. Although delicious, these are just not satisfying me; cooking is satisfying. I came up with this recipe because I did not have my computer on hand to look one up and no recipe fit exactly what I wanted. The measurements are approximate, hence the word "rustic" in the title, and it is absolutely delicious.

Rustic Chickpea Vegetable Soup
from yours truly.

1 tsp. olive oil
1 1/2 cups chopped yellow onion
2 garlic cloves, chopped
1 1/2 cups carrots, chopped
1 cup celery, chopped
1, 15oz can chick peas, drained and rinsed
4 cups organic vegetable stock
4 -5 cups water
1 1/2 cups mushrooms, sliced
1 1/2 cups zucchini, chopped
3/4 cup yellow squash, chooped
1 can diced no-salt added tomatos
1/4 cup fresh chopped parsley
1 tsp. salt
1/2 tsp. pepper
1/2 tsp. ground thyme, heaping
3/4 tsp. ground basil
1/4 tsp. ground sage
1/4 tsp. ground paprika

Brown rice, optional.

Heat olive oil in soup pot on medium-high heat. Add onions, garlic, carrots, and celery and sautee for about 2 minutes until fragrant; Add chick peas.

Pour the 4 cups of stock and 4-5 cups of water into pot, add rest of ingredients and bring soup to a boil. When it reaches a boil, reduce heat to a simmer and simmer for at least 30 minutes.

If you are going to prepare rice, begin this while the soup is simmering.

Sprinkle with a pinch of fresh chopped parsley, add spoonfuls of brown rice to soup if desired and serve!

Not a great photo but as you were eating it was visually delicious as well; the vegetables were chunky and tender but not mushy. I'm not in the mood to write too much more right now but I'll back for later as I have big plans for later to go along with that leftover soup!

10.26.2006

Fat-Free Banana Bread


Don't let the title throw you off; I promise I haven't gone off the deep end.

On any average day about 4/5 persons in the household are on some sort of diet; I prefer to call it lifestyle actually. Despite my musings on this blog, I eat very healthy and exercise about 6 days a week. However, I believe in the everything in moderation philosophy and balancing yourself when it comes to diet. A "perfect" diet is bound for failure; when you deny youself certain things pyschologically and physically your body with crave them and the end result is usually not pretty. With that said, I decided to create a baked good that everyone would feel guilt free eating (including myself) and the results were completely tasty and satisfying, not just for a fat-free baked good.

I don't think "light" baked good should contain anything too unnatural - start with a naturally healthy, fat free, sweet thing and your off to a good start - fragrantly ripe bananas!

I adapted this recipe from a recipe on allrecipes.com

Fat-Free Banana Bread

1 1/2 cup unbleached all-purpose flour
1/2 cup light brown sugar
1/4 granulated sugar
1 1/4 tsp. baking powder
1/2 tsp. baking soda
1/4 tsp. salt
1 tsp. cinnamon
1 tsp. nutmeg
1 tsp. vanilla extract
2 egg whites
2 large bananas, mashed
1/3 apple butter, heaping

For glaze (very approx. measures):
1/2 cup confectioners sugar
2-4 tbsp fat-free half and half

Preheat oven to 350, grease 9X5 loaf pan.

In a large bowl stir together flour, brown sugar, sugar, baking powder, baking soda, salt, cinnamon and nutmeg. In another bowl mash bananas, add vanilla, egg whites, and apple butter. Add to dry mixture and stir until just combined. Pour into pan.

Bake for about 45-47 minutes or until object inserted in center comes out clean. Turn out onto wire rack and let cool before slicing (I didn't exactly follow this part).

For glaze, while loaf if still warm, put confectioners sugar in bowl and stir in fat free half and half with wire wisk until desired consistency. Use wire whisk to drizzle over loaf.

Yield - one 9X5 loaf.

Overall - the tasty was delicious and the loaf was moist. The banana flavor was prominent but next time I would even add another banana. I would also use white whole wheat flour or other whole-grain flour in place of the all purpose to make this a more healthful treat. I didn't have these on hand. I didn't feel like I was eating a fat-free baked good and the loaf was gone the next day, so I guess I wasn't the only one!

10.23.2006

Coconut Cream Pie and Pâté Brisée

My boyfriend's favorite dessert is without a doubt coconut cream pie or anything creamy and coconuty. He spotted a coconut cream pie at the local grocery store one afternoon and exclaimed that he would purchase it on Monday to eat. I told him that would be ridiculous - of course I would make one! Any opportunity to work on baking is more than welcomed into my daily activities, especially something I don't have much (or any) experience in, pies and pie crust.

I knew my woman, Martha, would have a perfect recipe for me in her Baking Handbook where her decadant, classic recipes enchant my baking soul with elegant photos and wonderfully written pre-recipe descriptions and stories. The first task was crust. I was bit intimidating having never solely made a scratch crust; pie crusts have a notorious stigma attached them of being difficult to work with. I chose (as suggested by Martha) Pâté Brisée, a classic french pastry crust for pies, simply contain unsalted butter, salt and ice water.


Simple, right? I followed the directions trying to use not too much water because I didn't want the crust to be tough but in the end more would have been better.

When I went to roll out the crust the next day; it crumbled on the counter top. Although alarmed, I kept my composure and just added more water and continued to roll it out, hoping for the best. Of course after adding the water it was a bit too sticky so, I added a bit more flour as I rolled. Nothing close to perfect, I folded the pie dough into my pan; some of the ends on the round were thicker than others causing a shotty looking design as a I pinched the edges.

I remained persistant and turned out the coconut custard with ease and it was quite fun. I whipped my cream which I thought was kind of bland and a bit soft. I wanted it to be thick, tasty and bountiful but it just was kind of, cream, that was whipped.

Well, all and all, I know Martha's the queen of baking so it was my lack of expierience that rendered this pie to our eyes and taste buds as good and not earth shattering-orgasmically-amazing. I followed the recipe exactly (minus brushing the bottom with metled chocolate) and it is quite long ,so I won't post it. You can easily find this recipe in Martha Stewart's Baking Handbook or on her website. Next time, I think I'll try a more traditional diner style cream pie recipe (although I'm not sure of the differences) because I think that is style I'm looking for in this pie. I'll also be practicing my Pâté Brisée technique in the meantime.

10.19.2006

Pumpkin Oatmeal Raisin Cookies


Look at them in all their glory!

A leftover pumpkin project turned wonderful. I would hate to waste such a precious ingredient as pumpkin so, it needed a purpose in people's tummies which turned out to be the Pumpkin Oatmeal Raisin Cookie. I looked through many recipes before settling on this one. I was thinking something sort of pumpkin-cheesecakey-bar- but there was not enough cream cheese for that venture (however, I did find an awesome looking recipe on Epicurious for a later time). I wanted something that would appeal to the masses, something simple yet with a special twist. I turned to the Libby's Pumpkin website recipe section and these cookies stuck out; the ingredients were items I had on hand and simple enough to turn out before I had to leave for work. The general consensus is overwhelming success; I was requested to bring more cookies into work tomorrow because they finished all the ones I brought tonight. The cookies are soft but not overly so, as they tend to be in cookies that contain pumpkin. They are not overly sweet and have the perfect spicy cinnamon bite. The pecans and raisins are hinted throughout adding to the textural appeal of the cookie. Next time, I would use thicker cut oats (my quick oats were smaller than normal) for an even heartier texture and add more pecans (or walnuts as the original recipe stated) since I only had about a half cup.

Pumpkin Oatmeal Raisin Cookies
adapted from verybestbaking.com

2 cups all-purpose flour
1 1/2 cups quick or old fashioned oats
1 tsp. baking soda
1 tsp. ground cinnamon
1/2 tsp. salt
1 cup (2 sticks) butter, softened
1 cup packed brown sugar
1 cup granulated sugar
1 cup canned pumpkin
1 large egg
1 tsp. vanilla extract
3/4 cup (or more) chopped pecans (or any nut of choice)
3/4 cup raisins

Pre-heat oven to 350 degrees. Grease baking sheets.

Combine flour, oats, baking soda, cinnamon and salt in medium bowl. Beat butter, brown sugar and granulated sugar in large mixer bowl until light and fluffy. Add pumpkin, egg and vanilla extract; mix well. Add flour mixture; mix well. Stir in nuts and raisins. Drop in large rounded tablespoons onto baking sheet.

Bake 14 minutes or until cookies are lightly brown and centers are set. Cool 2 minutes of baking sheet and then move to wire cooling rack to cool completely.

Yield - about 24-30 large cookies (48 cookie according to original).

This week, I also recieved my Baker's Catalogue from King Arthur Flour.


There are way too many thing I want; What an amazing catalogue. They just make every image so visually appealing and the addition of recipes inside is nice as well. I must go write a detailed Christmas list!

10.17.2006

Hush Puppies and Diner Desserts

Monday is the day that my boyfriend and I actually get to spend the whole day together and we spend it doing the activity we enjoy most, eating.

We recently moved to a town in South Carolina about 15 minutes from Charlotte, North Carolina's outer limits, so we do most of our dining in the Charlotte area. Our town isn't exactly notorious for anything foodwise or other, unless you count Siler Chapman. He was a part of the US Pizza Team in 2004 and was recently on the Food Network (the only channel I watch) for the Food Network Pizza Challange.

Anyway, our breakfast meal began late at a place not even worth mentioning but, I will, to warn you, called Good Ol' Days in Charlotte. Luckily, I had forgotton my camera. The only notable was the kitchy 50's decor which was sparse but at least the attempt was nice. Everything was sub-standard, We could have made a better omelettes and pancakes at home. The bacon omelette had little bacon bits on top of the folded over egg (?!?), the pancakes; not any better than bisquik, and the biscuits looked like they came from a Pilsbury can with microwaved rubbery texture. Let's just say, we won't be back.

I also could note our poor return visit to an area bakery but I'll spare you.

However, our late night dinner at the Penguin Drive-In near downtown Charlotte was great. A dark, bar-like scene with great drive-in style food. The menu selection was complete with appetizers like wings, soup and stews, a multitude of different burgers, dogs, sandwiches, and sides.

We ordered my new southern favorite, hush puppies! Hush puppies are basically a doughy mixture of flour, white cornmeal, buttermilk, eggs, etc... then deep fried. They come out dark golden brown in golf ball sized rounds fresh from the deep fryer and stay warm until your finished devouring them because of their wonderful density. I like to call them my Southern zeppoles.

After finishing my stew and his burger, we were on the dessert prowl. We had passed the Landmark Diner on our frustrating man-hunt to find the Penguin Drive-In and I had heard tales of their wonderful desserts. We back tracked in high hopes of mountainess cream pies and thick, rich cakes and Landmark did not dissappoint. The bakery case was easy to spot right to your left at you enter the door and it was just at I pictured it, filled with all sorts of typical diner delights: carrot cake, banana cream pie, strawberry cheesecake, key lime pie, strawberry shortcake, coconut pineapple cake, chocolate cake, boston cream pie, I could go on.

Indecision was inevitable. We gazed at the case for a while and chatted with a very large, pleasant Southern woman sitting close by who educated us on the bakery case ropes; "the chocolate cake is so good and rich, you almost won't like chocolate when your done" she drawled.

When we returned home with our chocolate cake, banana cream pie and stawberry cheesecake, the excitement took over and the desserts went from the large boxes into are large bellies and pictures were forgotton! I know we'll head back their soon, maybe we'll dine in with our new Southern neighbors.

dive-in drive-in:
Penguin Drive-In
1921 Commonwealth Ave.
Charlotte, NC 28205

www.penguindrivein.com

diner's finest:
Landmark DIner
4429 Central Ave.
Charlotte, NC 28205

Today's mission: buy lots of flour and find a way to use leftover pumkin.

10.14.2006

Oatmeal Blackberry Jam Bars and Irresistable Holiday Mags

Company is always an excuse to bake, even when it's not your own company. I love to feed others with my baking creations, try out and perfect recipes while they enjoy. Yesterday's recipe was a one I had done a couple weeks ago - raspberry jam bars but I mixed it up with some blackberry perserves instead.


Originally, I planned to double the crust to make them even more irresistable but I had only enough brown sugar for one recipes worth. The idea didn't occur to put it in a smaller pan to make the crust thicker until after it was well into baking.

When I got home from work, the pan was already half gone; success! I had my little share of bars as well when I got home. The buttery crust and crumble top were sandwiched between the not-too-sweet deep violet blackberry perserve creating the most wonderful slighty savory/sweet treat. Anything with crumbles has a special place in my heart; I hear an apple pie calling my name in the near future with homemade buttery crust, piled sky-high orchird apples, and mountain top crumbs.

Oatmeal Blackberry Jam Bars
adapted from Real Simple Magazine

1 3/4 cups all-purpose flour
1 cup light brown sugar, firmly packed
1 tsp. salt
1/2 tsp. baking soda
3/4 cup unsalted butter, cut into small pieces
1 1/2 cups quick-cooking oats
1 1/2 cups blackberry preserves (or your choice jam/preserves)

Heat oven to 350 degrees. Place flour, sugar, salt, and baking soda and butter into a large bowl and combine with hands until a crumbly dough forms. Toss in oats lightly.

Press 2/3 of dough firmly into 9X13 greased baking pan. Spread jam evenly over crust. Sprinkle remaining dough over jam, gently pressing down. Bake until golden brown, let cool 2 hours. Cut into 24 bars (yea right!). Store in airtight container.

Original Yield - 2 dozen bars (or however many you'd like).

In other news, everytime I go to a supermarket, convenience store, ok- pretty much any store, I see holiday baking magazines calling my name from the rack. Praline and cream cake calls from the cover just begging to be bought; their wishes are answered and I, in turn, become more broke. I can't go to any of these places without leaving with one of these oh-so-special-limited-edition food porn magazines. For the $8.00 dollars I paid, Paula Dean should come to my house and show me how to make the recipes.


Alas, Family beware - get in your extra treadmill miles and stair stepping classes now; your probably doomed.

10.12.2006

Pumpkin Bread

Although it doesn't seem much like autumn here in South Carolina; I felt autumn upon me. This means pumpkin, apples, sweet potatos and other warm, fuzzy comfort fruits and vegetables.

This sparkled my urge for pumpkin bread. I decided to start out simple and just find an ultimate pumpkin bread recipe to start off my fall-inspired baking. None of my cookbooks had quite what I was looking for, a recipe with butter instead of oil for the fat; however, I settled for a well-reviewed oil based recipe for my pumpkin bread. My searches to me to a recipe at allrecipes.com

I know my pictures are nothing to right home about but hopefully they'll get better as I take more. The end product turned out a bit more brown on the outside than I would have liked but the color on the inside was a warm orange - no complaints there. I made slight changes due to the pan size and spices that were in my cabinet. I'd love to make some sort of pumpkin spice cream cheese frosting for these loaves but I was just baking for pleasure so it stayed plain for now.

Downeast Maine Pumpkin Bread
adapted from allrecipes.com

15oz pumpkin puree (1 can)
4 eggs
1 cup vegetable oil
2/3 cup water
3 cups white sugar
3 1/2 cups all-purpose flour
2 tsp. baking soda
1 1/2 tsp. salt
1 tsp. ground cinnamon
1 tsp. ground nutmeg
1/2 tsp. all-spice
1/4 tsp chopped crystalized ginger

Preheat oven to 350 degrees. Grease 2 9X5 loaf pans (this is just what I had - use other pans if you desire)

In large bowl mix pumpkin puree, eggs, oil, water and sugar until well blended. In seperate bowl whisk flour, baking soda, salt, and spices. Stir dry ingredients into wet just until blended. Pour mixture into prepared pans.

Baked 50-57 minutes in preheated oven. Loaves are down when toothpick inserted in middle comes out clean.

Yield: 2 - 9x5 loaves

Next time I would even up the spices, substitute some white sugar for brown, and bake for a little less (I baked for 60 minutes) so the tops aren't as brown. Although brown on the outside the flavor on the inside was delicious; moist pumpkin, soft, midly spicy, it's hard to stop eating! It's slowly disappearing to the kitchen to my delight.

10.11.2006

the end of Charleston.. day two.

We woke up fairly early for vacation to check out of the hotel and begin our daily stuffing. Our first stop for a late breakfast would the Bookstore Cafe which is sort-of renamed Charleston's Cafe after switching locations and owners. I was worried that it's acclaim would be damaged after such changes but they more than proved themselves to be breakfast gods in my eyes.

The staff was so friendly and inviting. My boyfriend and I gazed at the bright orange menus for quite awhile before deciding. The menu included country breakfast stapes such as eggs, omelettes, grits, biscuits, corned beef hash, a multitude of pancake choices and a Bookstore Cafe specialty the Island Potato Casseroles. These unique casseroles as a base have fried thin sliced potato called "chippers", onions, peppers, mushrooms topped with eggs (your choice of style); Then there is your particular choice island toppings to adorn this base. I chose the "Kiawah" which is sausage gravy and cheddar cheese; other choices but not limited to, include "Dewees" which is turkey, bacon, cheddar and tomato cream sauce and a bit lighter, the "Wadmalaw" with zucchini, broccoli, tomato, yellow squash and cheddar. This is making me quite hungry... and I have pumpkin bread in the oven, but anyway!

My final selection for a well-rounded breakfast included the "Kiawah" Island Potato Casserole accompanied by a buttermilk biscuit and a short stack of Raspberry Pancakes which as stated in the menu the raspberries are cooked IN the pancakes (phew...). A personal peeve of mine with pancakes that we'll save for another blog entry.
The pancakes were absolute heaven; fluffy, cake-like and chock full of huge, vibrant raspberries. I hadn't encountered a pancake like that in a while and boy, I was delighted.

I usually don't vary when it comes to choosing eat-out breakfast because I know what satisfies me but I wanted to be more bold in my breakfast choices and I'm glad I let the Kiawah Island Potato Casserole in my life. The combination of flavors were bursting each bite was unique; little bites of sausage, "chippers", scrambled egg, just falling in love at each bite. Alas, there was the biscuit! Faintly buttery with a soft moist inside and slight crisp on the outside; no butter required. It was perfect.

My boyfriend shared the pancakes with me and finished off my casserole in addition to his four-cheese omelette with grits and sweet potato biscuit which was delicious. Hints of cinnamon and big sweet potato flavor but same great biscuit texture.

We basked in fullness and then eventually waddled out and headed to the beach until the next meal which would really turn out to be dessert at Cupcake on King St. We (thankfully) accidently ran into Cupcake driving aimlessly looking for an ATM. I had heard one review on the internet and was instantly interested; I didn't expect to find it on our short visit. A good cupcake is always welcome in my tummy.

An aroma of fresh baked goods filled my nostrils entering the tiny bake-shop; Complete with pink and brown decor and minimal design but it seemed appropriate. The cupcakes were displayed behind a window, unrefridgerated (yes!) including a dozen or so flavors of the day including coffee, pumpkin, chocolate butterscotch, traditional vanilla and chocolate, strawberry, and more. I chose the Rocky Road cupcake; a chocolate cupcake with chocolate buttercream frosting folded with marshmellow fluff and chopped walnuts. My other half chose the Strawberry; a strawberry cupcake with Strawberry Creamcheese frosting.

The flavors hit me immediately; the cupcake was perfectly moist and chocolatey. The walnuts and fluff stood out in the frosting and added the perfect texture. I wanted to do it again but I was pretty full already. Luckily, my boyfriend hadn't finished his strawberry and wanted me to have the last bite and I did. The cupcake, again, was perfect; real stawberry taste no fake crap! The paired strawberry cream cheese frosting was the perfect compliment. All and all, the next time I'm in Charleston I will be seeking out a Cupcake cupcake.

In the way later hours after trudging around full bellied and sampling the heath cake from Kaminsky's (yum!); we would complete our Charleston eats at the Hominy Grill. Hominy Grill is a home style low country cooking menu but slightly modernized still retaining integrity. I had heard only great things about this place and really wanted to bite my teeth into some great fried chicken which I still had not had since moving to the Carolina's from New England. When we arrived the only seats the had were outside which turned out to be a nice romantic table in the back corner lit with a real burning latern and wooden benches.

I'm getting tired so I'll get to the point. We ordered the jalepeno hush puppies; we were eager to try hush puppies because of there Southern-ness and we hadn't expierenced them yet. I have a feeling we got spoiled though; they were amazing. They came just cooled enough to eat right from the deep fryer served with a sweet green tomato ketchup. The texture was chewy and moist but a crisp outside and these had hints of heat from jalepenos and a great constrat from the green tomato ketchup. Unfortunately the cookbook I purchased from there does not include this recipe but I maybe tackle finding a good recipe to duplicate these in the future.

For entrees, we both ordered the Southern Fried Chicken compete with ham gravy, collards and mashed potatos. Wondeful, moist and flavorful. There are many items we had to leave behind on the menu to head home but there's always next time and there will be a next time at the Hominy Grill for us.

good eats! ....

Bookstore Cafe
1039 Johnnie Dodds Blvd.
Mount Pleasant, SC

Cupcake
433 King St.
Charleston, SC
(843)-853-8181

Hominy Grill
207 Rutledge Ave.
Charleston, SC
(843)-937-0930, www.hominygrill.com

Those were our two days in Charleston - well fed!

10.10.2006

butter my biscuit... Charleston, SC

This past weekend my lovely boyfriend and I headed to the low country down in Charleston, South Carolina. I carefully researched as always to find some orgasmic culinary adventures for us. There were many options - soul food, desserts, and home stylin' cooking was a must.

The city itself is chock full of history; there are no mini-malls just new business' housed in the old buildings. Oh - and don't forget the plethora of palm trees.

Upon our arrival on Sunday afternoon, after a rainy drive, the sun greeted us in downtown Charleston at Kaminsky's Most Excellent Cafe. That is actually what it's called.

Kaminsky's is a bar/coffee house/dessert palace. The menu includes various hot, cold coffee/espresso concotions, teas and other specialty alcoholic drinks. But we weren't really interested in that portion of the menu. This was the only menu we needed...

I wish you could get the close up of those... Not as many options as I thought there would be but obviously plenty enough choice to be stumped as of what to devour.

After careful consideration I chose the top left creation the Italian Cream Cake described as a spice cake with coconut and pecans. My boyfriend chose the Madarin Orange Cake which he would have the virgin slice.


The mecca was probably 7 inches tall, 3 thick layers of spice cake filled with coconuty buttercream with coconut flakes of the outside frosting. The taste of the cake itself was just OK - I was looking foward to spicy moist cake but what I bit into was a bit bland and crumbly lacking moisture (and coconut). However, there was only a small portion of the cake left when I get the slice; I have a feeling it was older and the refrigerator sucked out the moisutre. Had it been a fresh cake - it would have had more potential to blow my mind.


My boyfriend's on the other hand was moist, dense but light orangey vanilla cake. The little madarin oranges in with the vanilla buttercream layer in the middle gave it a fresh bite.

I wish they were at room temperature however; the buttercream would have been nice and soft instead of the refrigerator taste and thick butter block consistency.

Overall, we left fairly satisfied and we left behind many enticing choices such as pumpkin spice, chocolate chip buttercream, key lime pie, pecan pie, heath cake, red velvet cake... and waaaay too many more.

After that there was a quick stop to Market Street Sweets where the open door and inviting samples lured us in; It's the little red awning in the picture to the right.The smell of praline was intoxitcated and there were more free samples galore. I didn't realize the Southern roots of praline until this trip; a mixture of pecans, heavy cream, butter and sugar (um .. what's not to love?). Unfortunately the sampling was enough and reluctantly walked out with nothing but a sugar high and a new love for praline.

here's some info:
Kaminsky's Most Excellent Cafe
78 N. Market St.
Charleston, SC 29401

Market Street Sweets
100 N. Market St.
Charleston, SC 29401
(843)-722-1397, www.riverstreetsweets.com

Time to go read the cookbooks I took out from the library and spend time with my love. I'm gonna try to finish up the 2nd day in Charleston tomorrow which includes round 2 of Kaminsky's, Bookstore Cafe, and the Hominy Grill.. mmmm.