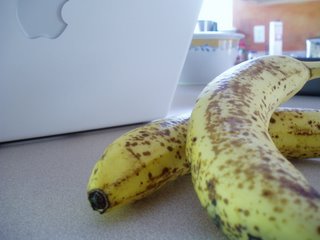
The plague of rotten bananas. Everyone party in our house currently buys their own groceries; hence, we usually end up with surplus bananas which is good for the baker in the house and usually for everyone else.
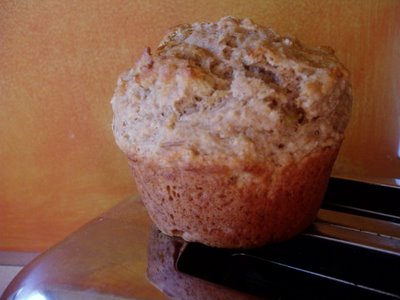
However, these bananas would were meant to reside in a different house- my oldest and dearest friend's new apartment. I know that if were moving (and I will be soon), I'd need some homey baked goods to relieve the stress and lighten the overwhelming load of move-in chaos. When I walked into to her new, large apartment still in shambles from move-in day, I knew the muffins would definitely provide relief, even if just for those few minutes while savoring one of these golden,moist muffins.
Exhausted, I made a trip to her late Tuesday to deliver the muffins; this was after waking up at 2:45am to work at the Bakery; did I mention I'm working for free?
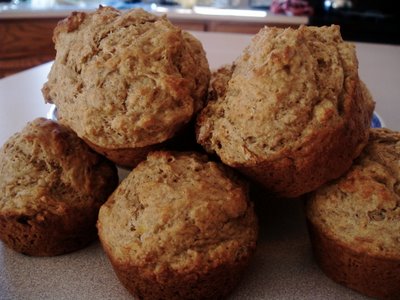
The muffins were nice; very moist, golden and chock full of banana however I realized afterwards there were no added spices to these banana muffins which I do prefer but a lot of banana muffin recipes do not have any. So, I'll leave that up to your discretion. The walnuts are also a great addition; I did half with and half without - I like to try to accomodate everyone's tastes. These muffins are incredibly moist; I could imagine a nice pinch of nutmeg to skyrocket there delicious factor then it would be the ideal banana muffin, in my humble opinion.
Banana Nut Muffins
Yield - 12 regular muffins
adapted from Simply Recipes
3 ripe bananas
1/3 cup melted butter
3/4 cup sugar
1 egg, beaten
1 tsp vanilla
1 tsp baking soda
Pinch of salt
1 1/2 cups flour
1/2 - 1 cup chopped walnuts
Pre-heat oven 350 degrees. In a large bowl mash bananas and add melted better and mix well.
Mix in sugar, eggs, and vanilla. Add baking soda and salt and mix in.
Add flour and mix until just incorporated. Fold in walnuts if desired.
Pour mixture in to prepared muffin tin. Bake 25-30 minutes. When toothpick inserted in muffin center comes out clean, muffins are done! Cool on wire rack.
I also forgot to mention that these muffins are so easy to prepare. In a pinch for a gift or you simply want fresh banana muffins in the morning, these muffins would be a great go-to for impromptu events calling for muffins.
Showing posts with label fruit. Show all posts
1.11.2007
1.03.2007
Apple Crumb Pie Tartlettes
New Years has lost it's debauchery factor as I continue to grow up. New Years was the night to see and be seen and, of course, the night not remember the next day. Waking up at three o'clock in the afternoon still groggy and parched to boot was not the way to start the New Year. These libations were left the others and I rang in the New Year in an nontraditional, certainly cozy way.
My boyfriend and I, once he arrived home from work, cozied up in our bumming gear. We ate, drank (in a mild manner), and were merry in bed all night and watched the SVU marathon and tuned in with the rest of America five minutes to midnight to watch the ball drop.
Food, as with any holiday or any excuse, is a large portion (no pun intended) of any festivity and New Years Eve would be no different. After all, this was the last "hurrah" before we resumed back to strict healthy eating. Cavatelli with Broccoli was the main meal for myself that evening, as the boyfriend was still hard at work; This pasta and I go way back, very fond memories. Cavatelli and broccoli was a quick evening meal my mother made growing up and it always a favorite. Chewy ricotta caves dabbled with garlic, parmesan and olive oil with large sprinkles of my favorite vegetable, broccoli; a wonderful childhood comfort of Italian American cooking.
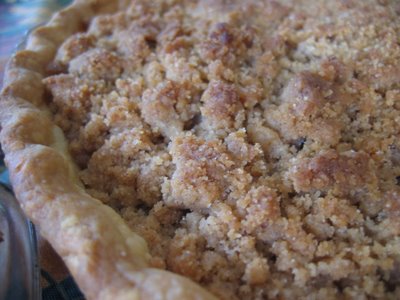
I suppose I should get the dessert portion of this post. As I've blogged about previously, the apple crumb pie made my mother since I can remember is without a doubt my favorite dessert. I dream about this pie, literally. I couldn't think of a better candidate to ring in the New Year than a variation on my families traditional apple crumb pie with Apple Crumb Pie Tartlettes. I made them into little tartlettes because I received tartlette pans for Christmas and was eager to try them out. Also, these tartlettes allowed for no fighting over crumbs or large slices since you had an individual pie all to yourself to pine over and indulge as slow or as fast as you pleased. A perfect way to start the New Year, hope you all had a great one!
12.20.2006
Apricot Almond Danish Braid
This pastry creation from Baking With Julia was so enjoyable to create. Each part of this wonderful danish from the dough to the filling are made with scratch and so much (on the risk of being corny) love. Each fold and roll of the danish dough was so suspenseful, in a nervous, giddy delight; I pondered hopefully for flaky layers but somehow I knew it would not fail. After all the cookbooks and magazines I've read on pastry I felt I knew the dough even before attempting it.
This was the dough the day before the bake-off which was refrigerated till the next morning before it baked off and brought to my younger cousin's Birthday Brunch.
A blurry, close up. My eyes were deceiving me that day.
I can't even express how perfect and delicious it was. The danish's pastry was flaky, buttery, and light and the encased apricot and almond fillings melded harmoniously between the danish crosses. I plan on doing this again if the occasion calls (or not!); the possibilities for filling are endless. A great experience.
I know this entry lacks creativity but this weeks holiday baking has been quite exhausting. I didn't take any pictures yet but the repertoire includes Rugelach (with a variety of fillings), Caramel Nut Bars, Double Chocolate Fudge Cookies w/ M&M's, Butter Spritz Cookies (dipped in white and semi-chocolates and sprinkled with various nuts, sprinkles), Cranberry Pistachio Biscotti, and Oatmeal-Trail Mix Cookies. Blogging will follow eventually once I catch up on my beauty sleep. Happy Holidays to all!
12.01.2006
Thanksgivings Ruminations: Mile High Biscuits and Mom's Apple Crumb Pie
Better late than never as we creep into the morning of the 1st of December. I still haven't a gift for anyone or finalized what I'd like to bake for the approaching holiday festivities but regardless, I'll give the gift of blog this morning!
Thanksgiving was wonderful, full of food and family. I was happy that my mom decided to join us down in South Carolina even though we are returning to CT this weekend (yikes). And what comes with Mom is my favorite dessert. Yes, I am bold enough to say that this dessert is my absolute favorite. I have no mercy when it's comes to mile high crumbs over crisp flavorful orchid apples and perfectly flaky crust. I had it for breakfast for 2 mornings after Thanksgiving (another, yikes); I can't forsake the pie if it's there. The apple crumb pie brought to you by my mother and now myself is a compilation of different recipes from my family. The pie portion comes from the Betty Crocker Cookbook, the crumbs are a recipe from my great grandmother's coffee cake recipe, and the crusts have changed a few times but for this pie I rolled out a wonderful crust from Baking With Julia.
This second attempt at pie crust with Baking With Julia was perfect. Since my Pate Brisee flop, I had read up a great portion on pie crust and was ready to tackle again head on. I decided for the time being to use a recipe that contained butter and shortening. I never grew up with shortening in my house and this was a very scary, foreign object that always perplexed me. For baking sake, I used shortening for the first time. What we had in the house (my boyfriends mother's stash) was Crisco shortening in the iconic blue tub. I would definitely not use regular Crisco shortening in the future given the existing trans-fat in the product but I know there are alternatives. Anyway - Julia's recipe was the perfect blend of butter and shortening to create a flavorful and flaky crust. I detest all shortening crusts; They just taste like air. However, I do love all butter crusts but I do have to better my technique with them.
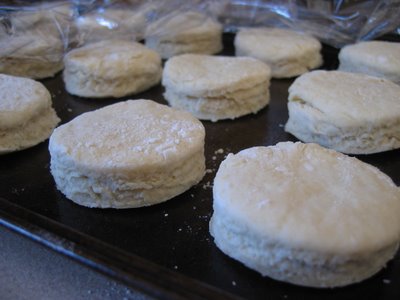
My next Thanksgiving baking adventure was biscuits. I've been yearning to make delicious buttermilk biscuits from scratch since I moved down to the south. I had my fare share since I've come down here but homemade in your own kitchen is always superior. I had planned to make buttermilk rolls but the timing would have been too tricky. It was the perfect opportunity to make biscuits for the bread quota of the Thanksgiving table. Making them was fun and suspenseful, to see if they were everything they were cracked up to be. I used the recipe from a little cookbook I picked up in the Charleston from The Hominy Grill entitled Mile High Biscuits. I don't feel I should post the recipe from there but it included all of your basic biscuit ingredients: soft wheat flour, salt, baking powder, buttermilk, butter, shortening and lard. Instead of soft wheat flour, I used AP because I had it on hand and is perfectly acceptable and no lard because I never have that on hand but I would interesting in trying it in the biscuits. Lard repulses and intrigues me at the same time.These were the biscuits prior to baking. I stored them in the fridge until we were just about ready to eat; they only needed 10-12 minutes in the oven. I've said it before but these really were everything I hoped they would be. Warm, buttery and flaky, the layers just peeled away and melted in your mouth; I would know, I ate about 5 of the 15.
Well, glad I finally got this written; Can't wait to do it again next year.
11.21.2006
Oreo Cheesecake & Strawberry Oatmeal Jam Bars... and CIA!
I can't save this news for last; I got accepted to the Culinary Institute of America for Winter 2007 in the AOS program for Baking and Pastry! The woman called me yesterday on the phone to congratulate me; My dream come true is really happening.
Anyway, let me report on some backed up culinary adventures since there are gonna be another good handful with the upcoming days including my mother's birthday which is today. I am in the process of making a slightly altered version of an authentic Silician Cassata Cake or Cannoli Cake. Everyone is greatly anticipating this tonight for dessert... as am I.
Last weekend during my families time of mourning we all gathered everyday for about 4 days and what would any family event be without an over abundence of food. I wanted to keep morale up and tried to do so one of the best ways I know how - providing delicious comforting desserts. I received an interesting magazine from a co-worked who knew my love for baking and desserts after showing up at work with goodies to share; It was a Kraft Food and Family magazine she received in the mail. I browsed through and everything was mostly easy and quick recipes for food and desserts. Like, use these Kraft's products here, use this brownie mix for these... kinda thing; You get the picture. On the back cover however was a very inticing picture for Oreo Cheesecake Bars; Oreo's being a Kraft division product of course. The recipe is prepared with ease and minimal ingredients and looked so delicious; who doesn't love Oreos? This was my first venture in cheesecake and putting together the ingredients was simple however judging bake time and cutting these bars were not.
Oreo Cheesecake Bars
adapted from Kraft Food & Family Magazine (Backcover)
1 pkg. Oreo cookies, divided
1/4 cup butter, melted
4 pkg. (8 oz each) Cream Cheese, softened
1 cup sugar
1 tsp. vanilla
1 cup sour cream
4 eggs
Preheat oven to 325 degrees and prepare a greased 13X9 baking dish (the original called for foil but I've never used that method).
Place 30 of the cookies into a food processor and process until finely ground. Add butter and mix well. Press firmly to bottom of prepared pan.
Beat cream cheese, sugar and vanilla in large bowl with electric mixer on medium speed until well blended. Add sour cream; mix well. Add eggs, one at a time, beating just until blended after each addition. Chop the remaining cookies and fold into cheesecake mixture (You can reserve some to sprinkle on top but I forgot).
Bake 45 minutes or until center is set. Cool and refrigerate for at least 4 hours or overnight. Cut into bars and serve! I cut mine much more bite size than the original serving suggestion of 16; these are dense and filling.
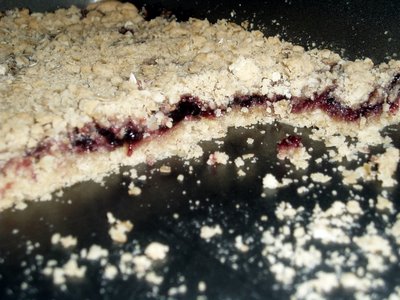
I also made my favorite loved Oatmeal Jam Bars which I filled with Strawberry Preserves. I first blogged about them - here where you'll find the recipe as well. This time I actually had enough ingredients so I could double the crust and still put a generous amount of crumbles on top. Delicious as usual... I think raspberry preserves are still my favorite for these. These bars always get raved about and they are so adaptable to different fillings; Next time I would really like to tried a spiced pear butter. They work better in my opinion with a mild sweetness to the filling as opposed to very sweet.
I'm off to continue birthday baking and blog reading for the morning.
11.17.2006
Back with Hearty Whole Wheat Banana Muffins
Thanks so much for the kind words - I really appreciate it. I've missed blogging and baking but I got to do a bit over the past week that I haven't shared yet.
Last Thursday - I actually had made these Banana Muffins in the morning but that's when all the madness began. At work the previous night they were going to throw away some barely browned banana's and I volunteered to take them instead of wasting them. Muffins seemed like the best option for something healthy for the morning; unless it's a special day, my morning meal is a usually a combination of fruit and whole grain.
I adapted this recipe out of my Better Homes and Gardens New Cookbook binder from the Oat Bran Muffin recipe.
Hearty Whole Wheat Banana Muffins
1 1/4 cups organic whole wheat flour
1 cup unbleached all-purpose flour
1/4 cup brown sugar
2 tsp. baking powder
1/4 tsp. baking soda
1/4 tsp. salt
1 beaten egg
3/4 cup mashed banana, heaping
3/4 cup fat-free buttermilk
1 tbsp. unsalted butter, melted
1/4 cup chopped walnuts
Lightly coat 12 - 2 1/2" muffins cups and set aside. Pre-heat oven to 400 degrees.
In a medium bowl combine ww flour, AP flour, baking powder, brown sugar, baking soda and salt. Make a well in center of flour mixture and set aside. Mix in walnuts.
In a small bowl combine egg, banana, buttermilk, and butter. Add all at once to flour mixture. Stir just until moistened (batter should be lumpy).
Divide batter evenly among muffins cups. Bake in 400 degree oven for 16 to 18 minutes or until golden and object inserted in center comes out clean. Cool in muffin cups on a wire rack for 5 minutes. Remove from cups; serve warm.
My boyfriend and I ate the muffins warm from the oven and they were tasty but could have used a bit more moisture. I would try a full cup of buttermilk next time since the original ingredients calls for 1/4 cup of honey contributing to the moist ingredients which I subbed from brown sugar. I could tell the batter was a bit thick but didn't want to risk drier muffins by more stirring. I will definitely make these again with a few tweaks. I only filled 10 out of the 12 muffins cups and I liked the size they came out; they rose nice and big.
I probably won't be able to blog about the Oreo Cheesecake or Strawberry Oatmeal Jam Bars until I get a replacement computer charger ... Long story.
I'll get that worked out today somehow but in good news, my application for the Culinary Institute of America is complete and in for review. I should find out in about a week about acceptance and dates and such. I'm off to go read all your blogs until my computer runs out of batteries!
10.26.2006
Fat-Free Banana Bread
Don't let the title throw you off; I promise I haven't gone off the deep end.
On any average day about 4/5 persons in the household are on some sort of diet; I prefer to call it lifestyle actually. Despite my musings on this blog, I eat very healthy and exercise about 6 days a week. However, I believe in the everything in moderation philosophy and balancing yourself when it comes to diet. A "perfect" diet is bound for failure; when you deny youself certain things pyschologically and physically your body with crave them and the end result is usually not pretty. With that said, I decided to create a baked good that everyone would feel guilt free eating (including myself) and the results were completely tasty and satisfying, not just for a fat-free baked good.
I don't think "light" baked good should contain anything too unnatural - start with a naturally healthy, fat free, sweet thing and your off to a good start - fragrantly ripe bananas!
I adapted this recipe from a recipe on allrecipes.com
Fat-Free Banana Bread
1 1/2 cup unbleached all-purpose flour
1/2 cup light brown sugar
1/4 granulated sugar
1 1/4 tsp. baking powder
1/2 tsp. baking soda
1/4 tsp. salt
1 tsp. cinnamon
1 tsp. nutmeg
1 tsp. vanilla extract
2 egg whites
2 large bananas, mashed
1/3 apple butter, heaping
For glaze (very approx. measures):
1/2 cup confectioners sugar
2-4 tbsp fat-free half and half
Preheat oven to 350, grease 9X5 loaf pan.
In a large bowl stir together flour, brown sugar, sugar, baking powder, baking soda, salt, cinnamon and nutmeg. In another bowl mash bananas, add vanilla, egg whites, and apple butter. Add to dry mixture and stir until just combined. Pour into pan.
Bake for about 45-47 minutes or until object inserted in center comes out clean. Turn out onto wire rack and let cool before slicing (I didn't exactly follow this part).
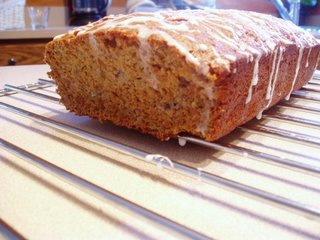
For glaze, while loaf if still warm, put confectioners sugar in bowl and stir in fat free half and half with wire wisk until desired consistency. Use wire whisk to drizzle over loaf.
Yield - one 9X5 loaf.
Overall - the tasty was delicious and the loaf was moist. The banana flavor was prominent but next time I would even add another banana. I would also use white whole wheat flour or other whole-grain flour in place of the all purpose to make this a more healthful treat. I didn't have these on hand. I didn't feel like I was eating a fat-free baked good and the loaf was gone the next day, so I guess I wasn't the only one!
10.23.2006
Coconut Cream Pie and Pâté Brisée
My boyfriend's favorite dessert is without a doubt coconut cream pie or anything creamy and coconuty. He spotted a coconut cream pie at the local grocery store one afternoon and exclaimed that he would purchase it on Monday to eat. I told him that would be ridiculous - of course I would make one! Any opportunity to work on baking is more than welcomed into my daily activities, especially something I don't have much (or any) experience in, pies and pie crust.
I knew my woman, Martha, would have a perfect recipe for me in her Baking Handbook where her decadant, classic recipes enchant my baking soul with elegant photos and wonderfully written pre-recipe descriptions and stories. The first task was crust. I was bit intimidating having never solely made a scratch crust; pie crusts have a notorious stigma attached them of being difficult to work with. I chose (as suggested by Martha) Pâté Brisée, a classic french pastry crust for pies, simply contain unsalted butter, salt and ice water.
Simple, right? I followed the directions trying to use not too much water because I didn't want the crust to be tough but in the end more would have been better.
When I went to roll out the crust the next day; it crumbled on the counter top. Although alarmed, I kept my composure and just added more water and continued to roll it out, hoping for the best. Of course after adding the water it was a bit too sticky so, I added a bit more flour as I rolled. Nothing close to perfect, I folded the pie dough into my pan; some of the ends on the round were thicker than others causing a shotty looking design as a I pinched the edges.
I remained persistant and turned out the coconut custard with ease and it was quite fun. I whipped my cream which I thought was kind of bland and a bit soft. I wanted it to be thick, tasty and bountiful but it just was kind of, cream, that was whipped.
Well, all and all, I know Martha's the queen of baking so it was my lack of expierience that rendered this pie to our eyes and taste buds as good and not earth shattering-orgasmically-amazing. I followed the recipe exactly (minus brushing the bottom with metled chocolate) and it is quite long ,so I won't post it. You can easily find this recipe in Martha Stewart's Baking Handbook or on her website. Next time, I think I'll try a more traditional diner style cream pie recipe (although I'm not sure of the differences) because I think that is style I'm looking for in this pie. I'll also be practicing my Pâté Brisée technique in the meantime.
10.14.2006
Oatmeal Blackberry Jam Bars and Irresistable Holiday Mags
Company is always an excuse to bake, even when it's not your own company. I love to feed others with my baking creations, try out and perfect recipes while they enjoy. Yesterday's recipe was a one I had done a couple weeks ago - raspberry jam bars but I mixed it up with some blackberry perserves instead.
Originally, I planned to double the crust to make them even more irresistable but I had only enough brown sugar for one recipes worth. The idea didn't occur to put it in a smaller pan to make the crust thicker until after it was well into baking.
When I got home from work, the pan was already half gone; success! I had my little share of bars as well when I got home. The buttery crust and crumble top were sandwiched between the not-too-sweet deep violet blackberry perserve creating the most wonderful slighty savory/sweet treat. Anything with crumbles has a special place in my heart; I hear an apple pie calling my name in the near future with homemade buttery crust, piled sky-high orchird apples, and mountain top crumbs.
Oatmeal Blackberry Jam Bars
adapted from Real Simple Magazine
1 3/4 cups all-purpose flour
1 cup light brown sugar, firmly packed
1 tsp. salt
1/2 tsp. baking soda
3/4 cup unsalted butter, cut into small pieces
1 1/2 cups quick-cooking oats
1 1/2 cups blackberry preserves (or your choice jam/preserves)
Heat oven to 350 degrees. Place flour, sugar, salt, and baking soda and butter into a large bowl and combine with hands until a crumbly dough forms. Toss in oats lightly.
Press 2/3 of dough firmly into 9X13 greased baking pan. Spread jam evenly over crust. Sprinkle remaining dough over jam, gently pressing down. Bake until golden brown, let cool 2 hours. Cut into 24 bars (yea right!). Store in airtight container.
Original Yield - 2 dozen bars (or however many you'd like).
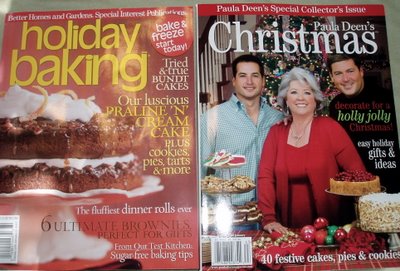
In other news, everytime I go to a supermarket, convenience store, ok- pretty much any store, I see holiday baking magazines calling my name from the rack. Praline and cream cake calls from the cover just begging to be bought; their wishes are answered and I, in turn, become more broke. I can't go to any of these places without leaving with one of these oh-so-special-limited-edition food porn magazines. For the $8.00 dollars I paid, Paula Dean should come to my house and show me how to make the recipes.
Alas, Family beware - get in your extra treadmill miles and stair stepping classes now; your probably doomed.
Subscribe to:
Posts (Atom)