11.25.2006

Sicilian Cassata Cake

The cannoli. One of the many pastry concoctions my family holds near and dear to their Italian hearts. Since I was born, Cannoli's would appear on our dessert table from esteemed New York City Italian pastry shops to be quickly devoured by each member except myself. Anything that was not chocolate did not pass these lips for a very long time - too long, but I think I've redeemed myself. Each aspect of a cannoli is perfection in it's own right, beginning with the shell. A cylindrical, fried to perfection, crisp and sturdy bassinet to cradle the delicately dense ricotta cream filling. The ricotta cream is perfectly blended with sugar to create a subtle sweetness to it's rich flavor and texture and a hint of cinnamon to complete the delight.

It's only fitting that the Cassata Cake was a starring guest, although infrequently, at our birthday tables. My mother would be the only one to tackle this complicated cake besides an Italian bakery. She made it for my Grandpa on his birthday and now I would make it for her on her birthday.

I really wanted to make this perfect so I sought out to find exactly what the components of a Cassata Cake were and go from there. The cake layers were Italian sponge cake which is purely leavened from all the eggs in the recipe and filled with cannoli cream although they added other things to cream that I didn't usually find in standard cannoli cream. Their were different ways for topping the cake such as chocolate glaze but my mother is a vanilla-o-holic, so vanilla glaze won.

I chose a recipe from Nick Malgieri for Pan Di Spanga cake layers and my cannoli cream recipe from epicurious.com to compile my Cassata Cake.

Pan Di Spanga
adapted slightly, curteousy of dianasdesserts.com

2/3 cup all purpose flour
1/3 cup cornstarch
5 large eggs, separated
1 cup sugar, divided
2 tsp. vanilla extract
Pinch of salt

Preheat oven to 350 degrees. Butter a 9 or 10 inch spring form pan (the original suggested lining with buttered parchment but I did not have any).

In a small bowl stir together flour and cornstarch.

In bowl with an electric mixer with the whisk attachment, whip egg yolks and half the sugar and the vanilla on medium speed for 2 minutes, until they are light and fluffy.

In another bowl, with whisk attachment for electric mixer, whip the egg whites and salt on medium speed until white and opaque. Add remaining sugar 1 tbsp. at a time, and continue whipping until whites hold firm peak when whisk is lifted.

Using a large rubber spatula, fold yolk mixture into whites. Sift 1/3 of flour mixture over eggs and fold in; repeat 2-3 times until all the flour has been incorporated. Scrape batter into prepared pan and smooth the top. Bake until well risen and well colored. About 30-40 minutes (30 was too little for me and when I took it out and thought it was done the top-middle portion was too wet; I'd give it closer to 40).

Remove cake from oven and run knife around edges to loosen; remove sides. Slide cake onto wire racks to cool. Cool completely before slicing to be used for other cakes; Refrigerate or freeze for 1 day for more even cut layers. It can be refrigerated for several days before use.


Cannoli Filling
adapted from Epicurious.com - Silician Cannoli Recipe

1 lb ricotta (2 cups) + 2 oz
1/2 cup confectioners sugar, scant
1/4 tsp. cinnamon
1/4 cup mini semi-sweet chocolate chips

Beat together ricotta, confectioners sugar, and cinnamon with an electric mixer on medium speed until smooth. Fold in chocolate and chill.

From this experience, I would highly suggest making this 1 or 2 days ahead so as the filling sits you can drain the water a few times during the day for a denser, less wet filling. Or I suppose you could strain the ricotta prior to mixing.

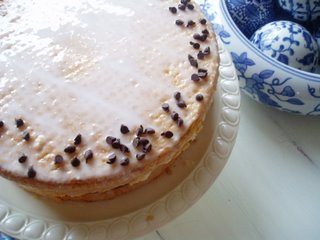
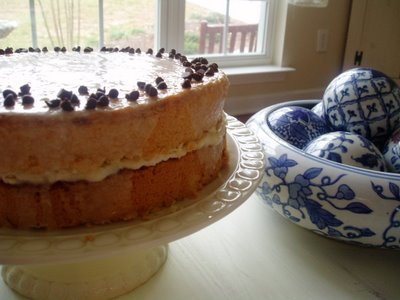
Assemblage was cutting the cake into two layers and spreading the cannoli filling between the layers and pouring a vanilla glaze over the cake and decorating with more mini chocolate chips.

For the record, the cake was outstanding; there was a tiny piece left which was devoured quickly the next night for dessert. I really enjoyed making this cake especially for such a special birthday for a truly special person- my mom.

The sponge cake was light and sweet and perfectly complimented the mild ricotta filling; the vanilla glaze gave a super sweet contrasting bite which was very enjoyable. I would definitely make this cake again, perhaps experimenting with some different toppings/glazes.

11.21.2006

Oreo Cheesecake & Strawberry Oatmeal Jam Bars... and CIA!

I can't save this news for last; I got accepted to the Culinary Institute of America for Winter 2007 in the AOS program for Baking and Pastry! The woman called me yesterday on the phone to congratulate me; My dream come true is really happening.

Anyway, let me report on some backed up culinary adventures since there are gonna be another good handful with the upcoming days including my mother's birthday which is today. I am in the process of making a slightly altered version of an authentic Silician Cassata Cake or Cannoli Cake. Everyone is greatly anticipating this tonight for dessert... as am I.

Last weekend during my families time of mourning we all gathered everyday for about 4 days and what would any family event be without an over abundence of food. I wanted to keep morale up and tried to do so one of the best ways I know how - providing delicious comforting desserts. I received an interesting magazine from a co-worked who knew my love for baking and desserts after showing up at work with goodies to share; It was a Kraft Food and Family magazine she received in the mail. I browsed through and everything was mostly easy and quick recipes for food and desserts. Like, use these Kraft's products here, use this brownie mix for these... kinda thing; You get the picture. On the back cover however was a very inticing picture for Oreo Cheesecake Bars; Oreo's being a Kraft division product of course. The recipe is prepared with ease and minimal ingredients and looked so delicious; who doesn't love Oreos? This was my first venture in cheesecake and putting together the ingredients was simple however judging bake time and cutting these bars were not.
Oreo Cheesecake Bars
adapted from Kraft Food & Family Magazine (Backcover)

1 pkg. Oreo cookies, divided
1/4 cup butter, melted
4 pkg. (8 oz each) Cream Cheese, softened
1 cup sugar
1 tsp. vanilla
1 cup sour cream
4 eggs

Preheat oven to 325 degrees and prepare a greased 13X9 baking dish (the original called for foil but I've never used that method).

Place 30 of the cookies into a food processor and process until finely ground. Add butter and mix well. Press firmly to bottom of prepared pan.

Beat cream cheese, sugar and vanilla in large bowl with electric mixer on medium speed until well blended. Add sour cream; mix well. Add eggs, one at a time, beating just until blended after each addition. Chop the remaining cookies and fold into cheesecake mixture (You can reserve some to sprinkle on top but I forgot).

Bake 45 minutes or until center is set. Cool and refrigerate for at least 4 hours or overnight. Cut into bars and serve! I cut mine much more bite size than the original serving suggestion of 16; these are dense and filling.


I also made my favorite loved Oatmeal Jam Bars which I filled with Strawberry Preserves. I first blogged about them - here where you'll find the recipe as well. This time I actually had enough ingredients so I could double the crust and still put a generous amount of crumbles on top. Delicious as usual... I think raspberry preserves are still my favorite for these. These bars always get raved about and they are so adaptable to different fillings; Next time I would really like to tried a spiced pear butter. They work better in my opinion with a mild sweetness to the filling as opposed to very sweet.

I'm off to continue birthday baking and blog reading for the morning.

11.17.2006

Back with Hearty Whole Wheat Banana Muffins


Thanks so much for the kind words - I really appreciate it. I've missed blogging and baking but I got to do a bit over the past week that I haven't shared yet.

Last Thursday - I actually had made these Banana Muffins in the morning but that's when all the madness began. At work the previous night they were going to throw away some barely browned banana's and I volunteered to take them instead of wasting them. Muffins seemed like the best option for something healthy for the morning; unless it's a special day, my morning meal is a usually a combination of fruit and whole grain.

I adapted this recipe out of my Better Homes and Gardens New Cookbook binder from the Oat Bran Muffin recipe.

Hearty Whole Wheat Banana Muffins

1 1/4 cups organic whole wheat flour
1 cup unbleached all-purpose flour
1/4 cup brown sugar
2 tsp. baking powder
1/4 tsp. baking soda
1/4 tsp. salt
1 beaten egg
3/4 cup mashed banana, heaping
3/4 cup fat-free buttermilk
1 tbsp. unsalted butter, melted

1/4 cup chopped walnuts

Lightly coat 12 - 2 1/2" muffins cups and set aside. Pre-heat oven to 400 degrees.

In a medium bowl combine ww flour, AP flour, baking powder, brown sugar, baking soda and salt. Make a well in center of flour mixture and set aside. Mix in walnuts.

In a small bowl combine egg, banana, buttermilk, and butter. Add all at once to flour mixture. Stir just until moistened (batter should be lumpy).

Divide batter evenly among muffins cups. Bake in 400 degree oven for 16 to 18 minutes or until golden and object inserted in center comes out clean. Cool in muffin cups on a wire rack for 5 minutes. Remove from cups; serve warm.


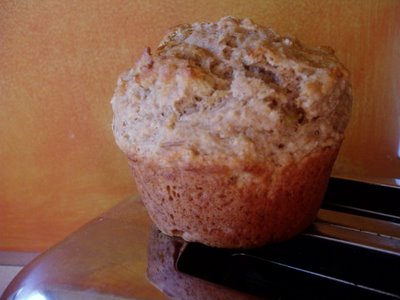
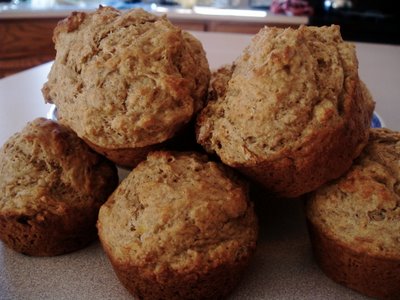
My boyfriend and I ate the muffins warm from the oven and they
were tasty but could have used a bit more moisture. I would try a full cup of buttermilk next time since the original ingredients calls for 1/4 cup of honey contributing to the moist ingredients which I subbed from brown sugar. I could tell the batter was a bit thick but didn't want to risk drier muffins by more stirring. I will definitely make these again with a few tweaks. I only filled 10 out of the 12 muffins cups and I liked the size they came out; they rose nice and big.

I probably won't be able to blog about the Oreo Cheesecake or Strawberry Oatmeal Jam Bars until I get a replacement computer charger ... Long story.

I'll get that worked out today somehow but in good news, my application for the Culinary Institute of America is complete and in for review. I should find out in about a week about acceptance and dates and such. I'm off to go read all your blogs until my computer runs out of batteries!

11.10.2006

A Moment of Silence

My grandmother passed away yesterday morning to much despair of my family. May she rest in peace with my grandfather.

She used to make me salami sandwiches on toasted italian bread when she watched us after school. That unique combination never fails to remind me of her.

I'll be back in a few day with lots to share.

11.06.2006

Reeses Pieces Brownies with Peanut Butter Frosting

These brownies were last nights project. I had leftover Reeses Pieces from a movie that were just begging to be apart of a baking creation. I hope this information doesn't offend but I've never been a huge fan of peanut butter; being that I never ate it when I was growing up, not even the coveted kid sandwich, PB & J. As I get older, my palette is becoming more and more diverse; The more I try, the more I like! I think my like for nut butters began when I was vegan and I used to go to my favorite natural food store, Lifethyme, complete with an amazing vegan bakery. They had the dreamiest cakes, combinations I would have never thought of; my favorite was the blueberry lemon cake with the creamiest, not too sweet, cashew butter frosting. Those cakes are still some of the best I've ever had, vegan or not.

Back to the brownies. I was originally going to go for an uninspired butter cookie mixed with the Reese Pieces but my boyfriend expressed interest in the combination chocolate and peanut butter. I was re-browsing my holiday baking magazines and found a brownie article in Better Homes and Gardens: Holiday Baking featuring different brownie combinations. This one called for just plain PB chips in the brownie batter portion so I substituted my Reeses pieces.

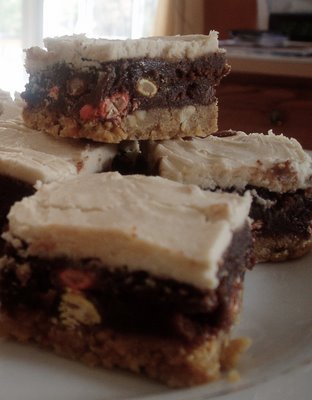
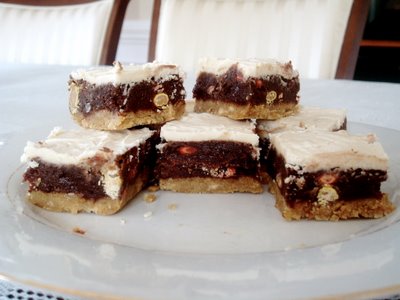
The reviews concluded that they were overall too sweet for my household members taste; I have to agree. The brownie portion was like fudge and peanut butter frosting did them in. I liked them but I definitely agree there could have been a better balance. I'm not sure how others would feel about them; I probably won't make them again but it was an easy recipe to prepare and came out very nice.


Reese Pieces Brownies with Peanut Butter Frosting
adapted from Better Homes and Gardens: Holiday Baking Magazine

1 1/4 cups crushed graham crackers (approx. 8 full cracker sheets)
1 1/4 cups sugar
1/4 cup finely chopped lightly salted peanuts
1/2 cup butter, melted
1/2 cup butter
2 ounces unsweetened chocolate, cut up
2 eggs
1 tsp. vanilla
2/3 cup all-purpose flour
1/2 cup Reeses' Pieces

Peanut Butter Frosting
1/4 cup butter
2 tbsp peanut butter (smooth or crunchy)
1 cup powdered sugar
1 tbsp. milk
1/2 tsp. vanilla

Preheat oven to 350. For crust: combine graham crackers, 1/4 cup of the sugar and chopped peanuts. Stir in half cup melted butter. Press mixture evenly into an ungreased 9X6X 1 1/4- inch pan (I had to buy a weird sized foil pan because I didn't have the specified 11X7X1 1/2-inch pan so something around these measurements would be fine). Bake for 5 minutes; cool.

For filling: In heavy saucepan, combine the 1/2 cup butter and the chocolate; heat and stir over low heat until melted. Remove from heat. Add the remaining 1 cup sugar, eggs, and vanilla; stir just until combined. Stir in flour and Reeses' Pieces. Spread evenly over crust. Bake for 20 minutes.

Cool in pan on a wire rack - do not cut brownies will they are warm, moisture will escape as steam and they may be dry when cooled. Spread with PB Frosting. Cut into bars - Makes 20 brownies.

For frosting: In bowl combine butter and peanut butter and beat with an electric mixer on low speed for 30 seconds. Gradually add the powdered sugar, beating well. Beat in milk and the vanilla. As you beat in the powdered sugar if it's too thick add enough milk to make a frosting that spreads easily.

You can cover and chill these for up to two days. They cut more evenly after being chilled. If your preparing ahead do not cut the bars until serving.

I ordered 2 new cookbooks from amazon that are on the way: The Bread Bakers Apprentice and Macrina Bakery Cookbook... they shipped today, yay! I am hopefully going to make some soup today and bread to follow. We'll see how the day goes.

11.04.2006

Baked Sweet Potato Bread


I feel poorly for the lack of dessert/baked goods in my blog. I have to admit there is a problem with my obsession with pastry and sugary treats, well, a few problems. One of them is the sheer health of it all; although I do believe in "healthy" indulgences, having baked goods around the time is not conducive to my healthy lifestyle because believe me, if there are cakes, tarts, pies, and cookies around me; they will be eaten. Moderation is not my strong suit especially when it comes to dessert. Another reason is budget; which is very humble lately. I'd love to run out and buy each ingredient at the store for baking just to have on hand when inspiration sparks but I have to spend fairly frugally as of now. Third, I have no one to eat my baked goods, which makes me utterly sad. My boyfriends mother is allergic to nuts (among 100's of other things) and is fairly picky; so, she's out. My boyfriend's father is away 3 weeks out of each month for business, not at all picky and loves to eat but is not around. His sister, currently, is on a low-fat diet; enough said. As his sister, my boyfriend is routinely on a rigid "diet" as a part of his regular healthy lifestyle and will only eat my baked goods on Mondays (a.k.a "cheat day", to those in the know in the diet world). And then there was one, me, what's a girl to do?

With that said, I've been baking more bread; It is equally near and dear to my heart when it comes to baking. There are countless reasons of my love for bread that have evolved from the simple enjoyment of eating it to baking it. I could keep going on this subject but I'll save that for another time. I've always been known as the bread girl in my family and nothing has changed. Today's bread baking venture was an all day affair. I was looking forward to baking some breads with slow rises because slow rises are supposed to improve the taste and texture the bread. Being that it was a slightly chilly 30 degrees this morning - it was the perfect day. I also wanted something a bit unique but easy to work with as I ease my way back into baking.

The Baked Potato Bread, from the Fresh Loaf, looked enticing but there were no baked potatoes to be found but there were sweet potatoes. An idea was born. I loved the idea of being able to use sweet potatoes as a unique ingredient in my bread that I hadn't previously thought of as a possibility. I adapted the recipe as I desired, hoping for the best. I wanted it to be healthy, unique, but overall, just delicious.

and it was.

Baked Sweet Potato Bread
adapted from Potato Rosemary Bread from The Fresh Loaf

1 packet active dry yeast
1 cup water
1 cup mashed sweet potato, heaping (could be boiled or baked)
2 1/4 cups bread flour
1 1/4 cups whole wheat flour
2 tsp. salt
1 tsp. pepper
1 tsp. sage

Mix packet of yeast with 1/4 cup of warm water (110-115 degrees); let sit for 5 minutes.

In a large bowl mix the whole wheat flour, 2 cups of the bread flour, water, yeast mixtures, salt, pepper and sage; reserve 1/4 cup of flour. Mix until dough begins to form turn out dough on floured work surface and knead for 6-9 minutes, incorporating the remaining 1/4 cup of flour. Once dough feels "ready", place the dough in a greased bowl and cover the bowl with a moist towel until double in size, about 1 - 2 1/2 hrs (depending on temperature environment where bowl is).

Remove dough from the bowl; de-gas it and shape it. You may make a large loaf, 2 small loaves, 12 large rolls... whatever you like! Placed them on a greased baking sheet and set aside to rise again until doubled (about 1 - 1 1/2 hrs).

When ready, pre-heat oven to 500 degrees (this will give a good last rise to the bread from the heat) and put dough in oven. Bake at 500 for 5-8 minutes then drop temperature down to 375 for 15-22 minutes depending on loaf size (rolls will take less time). When rolls are done they look brown/dark brown and sound hollow when tapped. Remove rolls and allow to cool before serving (as usual, I did sample out of the oven and I would definitely recommend letting them cool before eating/serving). They keep well at room temperature for 1-2 days without any deterioration in in flavor or texture.

I created one small loaf and 5 medium sized rolls for the household. Although, the sweetness of the sweet potato did not stand out in the bread; I think it definitely enhanced the overall flavor of bread compared to a normal baked potato. The loaf had a slight peppery bite which was pleasing to all the family members, who really liked the bread. It had a wonderful dense but soft, chewy crumb. My boyfriend and I made little sandwiches with roasted chicken breast shreds and BBQ sauce... definitely perfect for sandwiches. I have to go get prepared for this evenings baking adventure!

11.02.2006

Baguettes


I have been thinking about starting my bread baking full time again. I'm tired of store bought loaves; The closest thing I've come to good bread is from the little La Brea Bakery kiosk in my local supermarket where they bake 2/3's baked loaves in a little convection oven to get them to you hot.

It baffles me to see 2-3 weeks old loaves of store bought bread sitting the bread pantry that look as they were just baked yesterday; what are they putting in these things?! In this turmoil, I headed to the closest health food supermarket to seek out an organic, no perservative loaf in case of emergencies. I found an oraganic millet and flax loaf that happens to be gluten free as well which was nice, made a nice breakfast toast. I used to regularly buy Ezekiel's Seasame Loaf but my boyfriend's mom is deathly allergic to seasame seeds - so that was a no go.

Getting back to me bread baking, my "skills", which were mediocre for a home baker, have slightly dwindled. I don't remember the process as well as I did. So, I started simple a recipe from Cooking Light for Baguettes. I know, probably not the best place for a baguette recipe but what I was looking for was simplicity, a small list of ingredients, not much prep, and hot bread before work.

Little did I know how many problems I would run into, including, shattering a glass baking dish in the oven. Good job. I won't go into detail about anything else.

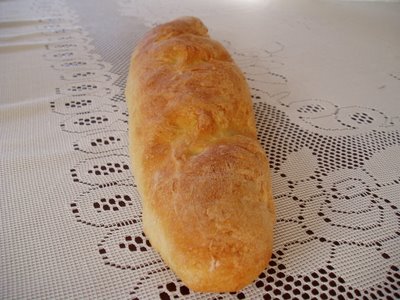
In the end, the loaf was ready right as I was walking out the door. I sliced off a steaming end of my "baguette" and bit into bread bliss. It actually had a good flavor and crust was nice, crunchy and brown but the bottom was a bit under done on the bigger of the two. I would recommend this recipe for anyone wanting some fresh bread with menial effort and large margin for error. *I'll post the recipe later on today.
Today, I'm gonna search for a bread recipe to prepare for tomorrow so I can start a poolish this afternoon. Let the bread baking begin!