12.30.2006

Walnut Cupcakes with Brown Sugar Buttercream


The first creation from my new mixer! As fatigued and unpleasant as I felt on Friday night, cupcakes prevailed. Hungry folks needed these (although they didn't know they did) and I knew baking would help raise my mood as well.

Cupcakes stuck in my mind to share as the first baking creation from my new Kitchen Aid mixer. Cupcakes just shout "celebration!" and this mixer is worth the celebration.

Not only did I want the first mixer creation to be a cupcake, I wanted it to be special, or perhaps - different, in some way. Everyone has seen vanilla and chocolate; not to down play these flavors, of course... they are wonderful in there own ways. Just not what I wanted.

Martha came through with this wonderful recipe as she did during my cookie baking this Holiday. However, throughout holiday baking I did come across some problems with her; but, I'll save that for another post.

This Walnut Cupcake is fun yet sophisticated but most of all absolutely, down-right delicious. I decided to accompany this cupcake would be Brown Sugar Buttercream, also from Martha. The buttercream is an Italian-meringue style with the sugar and egg-whites being heated together before whipping. The buttercream was very temperamental and I didn't know what to expect but even after I thought I ruined it by over beating; I was able to bring it back (thank god!).

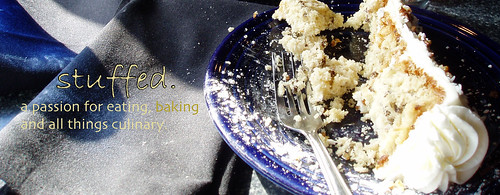
The cupcake was moist, nutty and sweet which was a perfect compliment to the pure buttercream frosting. Neither were overwhelmed by the other or overwhelming in flavor or sweetness. Overall - great experience with my mixer, the cupcakes and just plain ol' baking joy.

Note to self (and any others looking for advice on this recipe): I baked 9 regular cupcakes and 4 mini cupcakes. I halved the recipe and used 2 eggs. Mini-cupcakes took about 7 minutes; regular about 25.
12.27.2006

Christmas Cookies & A Wonderful Gift.. (A bit late, I know)


Hope everyones Holiday's have been filled with wonderful feelings and food. I know mine has; the cookies don't seem to ever disappear.

The picture above and aside is my beloved new Kitchen Aid Professional 600 mixer that my father so surprisingly bought me for Christmas. I wasn't ever expecting to get this although I had pined over it at William Sonoma and internet websites many nights... This gift accompanies many other wonderful baking supplies from other family members and my boyfriend including cake decorating stand, cake stand, mini tart pans, biscuit cutter set, a slip-pat mat and many others. I was definitely spoiled this Christmas. They'll receive wonderful goodies in return in addition to there Christmas cookie bags.

Holiday baking this year was like no other so far. I baked off my own set of holiday delectables for gift giving in addition to mother's traditional Christmas cookies. I wanted a diverse and colorful plate and I think I ended up with just that. I also learned a lot in the process. I love the trials and tribulations of new baking adventures. I feel much more seasoned as a baker after this experience. I learned do not heat your jam for your rugelach too much or else the dough will melt to your work surface (yet still bake up into a yummy little mess of goo), I learned making caramel requires attention and will set your burners a flame if it escapes from your pot, and last but not least: baking alone to your favorite music is more soothing and fun than a warm bath with candles.


Here is the complete set. Starting with the dark chocolatey ones from the left, we have Double Chocolate Brownie Cookies with M&M's adapted from Martha, Caramel Nut Bars from Martha with three types of nuts: Salted Peanuts, Cashews, and Pecans, Trail Mix Cookies adapted from the Gourmet Cookbook - hearty oatmeal cookies chock full of salted peanuts, raisins and chocolate chips, Holiday Butter Spritz from Cooks Illustrated - dipped in semisweet chocolate and white chocolate adorned with holidays sprinkles, pistachios, and almonds. Next is Rugelach from Martha with 5 different fillings: apricot, walnut and brown sugar, spiced apple + brown sugar, spiced apple + brown sugar w/ walnuts, chocolate chip and pistachio and honey almond and last but not least Cranberry Pistachio Biscotti from Martha as well.

Whew. Well I'm going to scour my new cookbooks for a cupcake recipe to christen my new mixer with. One last photo... these rugelach are too good.

12.20.2006

Apricot Almond Danish Braid


This pastry creation from Baking With Julia was so enjoyable to create. Each part of this wonderful danish from the dough to the filling are made with scratch and so much (on the risk of being corny) love. Each fold and roll of the danish dough was so suspenseful, in a nervous, giddy delight; I pondered hopefully for flaky layers but somehow I knew it would not fail. After all the cookbooks and magazines I've read on pastry I felt I knew the dough even before attempting it.

This was the dough the day before the bake-off which was refrigerated till the next morning before it baked off and brought to my younger cousin's Birthday Brunch.

A blurry, close up. My eyes were deceiving me that day.


I can't even express how perfect and delicious it was. The danish's pastry was flaky, buttery, and light and the encased apricot and almond fillings melded harmoniously between the danish crosses. I plan on doing this again if the occasion calls (or not!); the possibilities for filling are endless. A great experience.

I know this entry lacks creativity but this weeks holiday baking has been quite exhausting. I didn't take any pictures yet but the repertoire includes Rugelach (with a variety of fillings), Caramel Nut Bars, Double Chocolate Fudge Cookies w/ M&M's, Butter Spritz Cookies (dipped in white and semi-chocolates and sprinkled with various nuts, sprinkles), Cranberry Pistachio Biscotti, and Oatmeal-Trail Mix Cookies. Blogging will follow eventually once I catch up on my beauty sleep. Happy Holidays to all!

12.13.2006

Chocolate Angel Food Cake

I know I've been a bad blogger; I do apologize for those who might actually enjoy reading of my kitchen adventures. The holidays are stressing me out and I haven't even starting baking! Spending so much money on ingredients for loving home-baked gifts is wonderful but it's dwindling my small budget. Well, enough complaining, In attempts to enjoy dessert every night, I sought to create a longtime light favorite.
When I first starting a life-long (most of the time) healthy eating, active lifestyle, I enjoyed this cake for one of my birthdays layered with cocoa laced fat free cool whip (quite the culinary sin... I know) and topped with fresh fruit. With the addition of my fat free coolwhip, this dessert might be looked down upon; however, it is truly delicious, light, satisfying, guilt free dessert. Sense my guilt?

This wonderful dessert is angel food cake! Before I became slightly baking savvy, we cooked our angel food in a regular cake pan (yikes!). Everyone in the know knows the cake needs the tube pan so it may ever so angelically crawl up the sides to create its wonderful volume.

I decided to chose a simple recipe from Recipezaar after searching since it required minimal ingredients.

I really did follow the recipe exactly, as I usually do the first time around. I figured most of the "playing" with the recipe would be given to the infinite options for fillings, glazes, and frosting. I highly recommend this recipe - it is incredibly moist although the light brown color doesn't scream "chocolate!", is has a prominent chocolate flavor which doesn't overwhelm the cakes lightness.

Calling all faithful dieters (or at least trying)! this recipe might save you.

Chocolate Angel Food Cake
adapted from Recipezaar

2/3 cup sifted cake flour
1/3 cup unsweetened cocoa powder
1 1/2 cup granulated sugar, divided
12 large egg whites, at room temp.
1 1/2 tsp. vanilla
1 1/2 tsp. cream of tartar
1/2 tsp. salt

Pre-heat oven to 375 degrees.

In a large bowl, sift flour, cocoa, sugar together 3 times and set aside.

In a separate large bowl, beat the egg whites at low speed until foamy, about 5 minutes. Add vanilla, cream of tartar, and salt. Gradually increase speed to medium while beating in remaining 3/4 cup of sugar - 1 tbsp at a time for 5 minutes. When sugar is incorporated continue to beat until stiff peaks form about 2 minutes.

Sift 1/3 of dry ingredients over egg whites; gently fold in with rubber spatula. Repeat this process 2 more times until all dry ingredients are incorporated.

Pour batter into ungreased 10 inch tube pan. Cut through batter to remove air pockets. Bake 40-45 minutes, until top springs back when lightly pressed.

Invert and hang pan on neck of object to cool. To unmold run knife around edge of pan; invert pan. Turn cake upright and serve how you please!

The basic nutritionals are as follows for 12 servings - 150 calories, 0.5g fat, 0.9g fiber, 25.3g sugar, 4.7g protein.

I promise I have been reading everyones blogs faithfully but haven't had the time to comment. There is some good stuff going on in the kitchen. I have to start baking my holiday cookies today; let the games begin!

Here is a preview of what I'll be blogging about on my next entry - this was obviously pre-bake . I promise I'll be sooner than later. Happy Baking!

12.01.2006

Thanksgivings Ruminations: Mile High Biscuits and Mom's Apple Crumb Pie

Better late than never as we creep into the morning of the 1st of December. I still haven't a gift for anyone or finalized what I'd like to bake for the approaching holiday festivities but regardless, I'll give the gift of blog this morning!

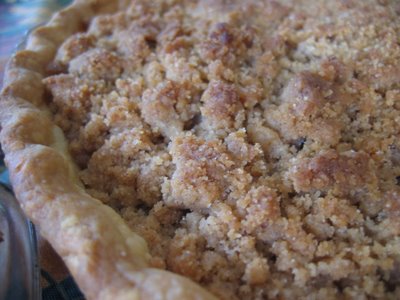
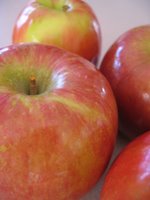
Thanksgiving was wonderful, full of food and family. I was happy that my mom decided to join us down in South Carolina even though we are returning to CT this weekend (yikes). And what comes with Mom is my favorite dessert. Yes, I am bold enough to say that this dessert is my absolute favorite. I have no mercy when it's comes to mile high crumbs over crisp flavorful orchid apples and perfectly flaky crust. I had it for breakfast for 2 mornings after Thanksgiving (another, yikes); I can't forsake the pie if it's there. The apple crumb pie brought to you by my mother and now myself is a compilation of different recipes from my family. The pie portion comes from the Betty Crocker Cookbook, the crumbs are a recipe from my great grandmother's coffee cake recipe, and the crusts have changed a few times but for this pie I rolled out a wonderful crust from Baking With Julia.

This second attempt at pie crust with Baking With Julia was perfect. Since my Pate Brisee flop, I had read up a great portion on pie crust and was ready to tackle again head on. I decided for the time being to use a recipe that contained butter and shortening. I never grew up with shortening in my house and this was a very scary, foreign object that always perplexed me. For baking sake, I used shortening for the first time. What we had in the house (my boyfriends mother's stash) was Crisco shortening in the iconic blue tub. I would definitely not use regular Crisco shortening in the future given the existing trans-fat in the product but I know there are alternatives. Anyway - Julia's recipe was the perfect blend of butter and shortening to create a flavorful and flaky crust. I detest all shortening crusts; They just taste like air. However, I do love all butter crusts but I do have to better my technique with them.
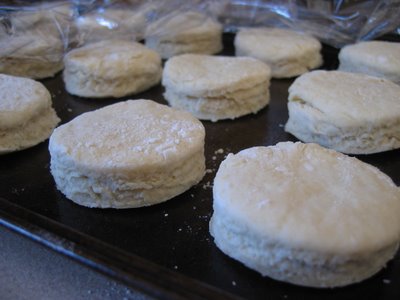
My next Thanksgiving baking adventure was biscuits. I've been yearning to make delicious buttermilk biscuits from scratch since I moved down to the south. I had my fare share since I've come down here but homemade in your own kitchen is always superior. I had planned to make buttermilk rolls but the timing would have been too tricky. It was the perfect opportunity to make biscuits for the bread quota of the Thanksgiving table. Making them was fun and suspenseful, to see if they were everything they were cracked up to be. I used the recipe from a little cookbook I picked up in the Charleston from The Hominy Grill entitled Mile High Biscuits. I don't feel I should post the recipe from there but it included all of your basic biscuit ingredients: soft wheat flour, salt, baking powder, buttermilk, butter, shortening and lard. Instead of soft wheat flour, I used AP because I had it on hand and is perfectly acceptable and no lard because I never have that on hand but I would interesting in trying it in the biscuits. Lard repulses and intrigues me at the same time.These were the biscuits prior to baking. I stored them in the fridge until we were just about ready to eat; they only needed 10-12 minutes in the oven. I've said it before but these really were everything I hoped they would be. Warm, buttery and flaky, the layers just peeled away and melted in your mouth; I would know, I ate about 5 of the 15.

Well, glad I finally got this written; Can't wait to do it again next year.